8.10.00 J-TRACE ARM Segger Microcontroller Systems, 8.10.00 J-TRACE ARM Datasheet - Page 94
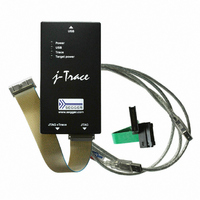
8.10.00 J-TRACE ARM
Manufacturer Part Number
8.10.00 J-TRACE ARM
Description
JTAG EMULATOR ARM7/ARM9 ETM
Manufacturer
Segger Microcontroller Systems
Type
Emulatorr
Specifications of 8.10.00 J-TRACE ARM
Contents
Emulation Module
For Use With/related Products
ARM7, ARM9
Lead Free Status / RoHS Status
Lead free / RoHS Compliant
Other names
899-1006


94
5.1
5.1.1
5.1.2
5.1.3
J-Link / J-Trace (UM08001)
In general, J-Link / J-Trace should be powered on before connecting it with the target
device. That means you should first connect J-Link / J-Trace with the host system via
USB and then connect J-Link / J-Trace with the target device via JTAG. Power-on the
device after you connected J-Link / J-Trace to it.
If the USB driver is working properly and your J-Link / J-Trace is connected with the
host system, you may connect J-Link / J-Trace to your target hardware. Then start
JLink.exe which should now display the normal J-Link / J-Trace related information
and in addition to that it should report that it found a JTAG target and the target’s
core ID. The screenshot below shows the output of JLink.exe. As can be seen, it
reports a J-Link with one JTAG device connected.
If you experience problems with any of the steps described above, read the chapter
Support and FAQs on page 205 for troubleshooting tips. If you still do not find appro-
priate help there and your J-Link / J-Trace is an original SEGGER product, you can
contact SEGGER support via e-mail. Provide the necessary information about your
target processor, board etc. and we will try to solve your problem. A checklist of the
required information together with the contact information can be found in chapter
Support and FAQs on page 205 as well.
Connecting the target system
Power-on sequence
Verifying target device connection
Problems
CHAPTER 5
© 2004-2011 SEGGER Microcontroller GmbH & Co. KG
Working with J-Link and J-Trace
Related parts for 8.10.00 J-TRACE ARM
Image
Part Number
Description
Manufacturer
Datasheet
Request
R

Part Number:
Description:
CONNECTOR JTAG-ARM ISOLATION
Manufacturer:
Segger Microcontroller Systems
Datasheet:

Part Number:
Description:
ADAPTER ARM TARGET 14PIN RIBBON
Manufacturer:
Segger Microcontroller Systems
Datasheet:

Part Number:
Description:
JTAG EMULATOR FOR ARM CORES
Manufacturer:
Segger Microcontroller Systems
Datasheet:

Part Number:
Description:
JTAG EMULATOR FOR ARM CORES
Manufacturer:
Segger Microcontroller Systems
Datasheet:

Part Number:
Description:
PROGRAMMING TOOL FOR MCU
Manufacturer:
Segger Microcontroller Systems
Datasheet:

Part Number:
Description:
PROGRAMMING TOOL FOR ST7 MCU
Manufacturer:
Segger Microcontroller Systems
Datasheet:

Part Number:
Description:
PROGRAMMING TOOL FOR STM8
Manufacturer:
Segger Microcontroller Systems
Datasheet:

Part Number:
Description:
PROGRAMMER JTAG FOR ARM CORES
Manufacturer:
Segger Microcontroller Systems
Datasheet:

Part Number:
Description:
JTAG EMULATOR USB ETHERNET ARM
Manufacturer:
Segger Microcontroller Systems
Datasheet:

Part Number:
Description:
EMULATOR JTAG/SWD CORTEX M3
Manufacturer:
Segger Microcontroller Systems
Datasheet: