8.10.00 J-TRACE ARM Segger Microcontroller Systems, 8.10.00 J-TRACE ARM Datasheet - Page 148
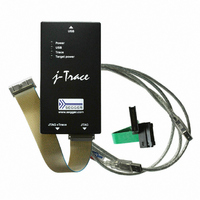
8.10.00 J-TRACE ARM
Manufacturer Part Number
8.10.00 J-TRACE ARM
Description
JTAG EMULATOR ARM7/ARM9 ETM
Manufacturer
Segger Microcontroller Systems
Type
Emulatorr
Specifications of 8.10.00 J-TRACE ARM
Contents
Emulation Module
For Use With/related Products
ARM7, ARM9
Lead Free Status / RoHS Status
Lead free / RoHS Compliant
Other names
899-1006


148
J-Link / J-Trace (UM08001)
Then J-Link / J-Trace has to be selected as debugger. To select J-Link / J-Trace as
debugger simply choose J-Link / J-Trace from the list box which can be found at
Project->Options for Target->Debug.
To use J-Link ARM FlashDL the J-Link flashloader has to be selected (the FlashBP
feature can also be used when J-Link flashloader is disabled). To enable the J-Link
flashloader J-Link / J-Trace at Project->Options for Target->Utilities has to be
selected.
If you use the MDK project for the first time, the J-Link ARM FlashDL and FlashBPs
settings are configured to Auto, which is the default value. For more information
about different configurations for J-Link ARM FlashDL and FlashBPs please refer to
chapter Settings on page 113. Now you can start the debug session. If you run this
project for the first time a settings file is created in which the configuration of J-Link
ARM FlashDL and FlashBPs is saved. This settings file is created for every project
configuration (e.g. Debug_RAM, Debug_FLASH), so you can save different J-Link
ARM FlashDL and FlashBP configurations for different project configurations. When
the debug session starts, you should see the selected target in the General tab of
CHAPTER 6
© 2004-2011 SEGGER Microcontroller GmbH & Co. KG
Flash download and flash breakpoints
Related parts for 8.10.00 J-TRACE ARM
Image
Part Number
Description
Manufacturer
Datasheet
Request
R

Part Number:
Description:
CONNECTOR JTAG-ARM ISOLATION
Manufacturer:
Segger Microcontroller Systems
Datasheet:

Part Number:
Description:
ADAPTER ARM TARGET 14PIN RIBBON
Manufacturer:
Segger Microcontroller Systems
Datasheet:

Part Number:
Description:
JTAG EMULATOR FOR ARM CORES
Manufacturer:
Segger Microcontroller Systems
Datasheet:

Part Number:
Description:
JTAG EMULATOR FOR ARM CORES
Manufacturer:
Segger Microcontroller Systems
Datasheet:

Part Number:
Description:
PROGRAMMING TOOL FOR MCU
Manufacturer:
Segger Microcontroller Systems
Datasheet:

Part Number:
Description:
PROGRAMMING TOOL FOR ST7 MCU
Manufacturer:
Segger Microcontroller Systems
Datasheet:

Part Number:
Description:
PROGRAMMING TOOL FOR STM8
Manufacturer:
Segger Microcontroller Systems
Datasheet:

Part Number:
Description:
PROGRAMMER JTAG FOR ARM CORES
Manufacturer:
Segger Microcontroller Systems
Datasheet:

Part Number:
Description:
JTAG EMULATOR USB ETHERNET ARM
Manufacturer:
Segger Microcontroller Systems
Datasheet:

Part Number:
Description:
EMULATOR JTAG/SWD CORTEX M3
Manufacturer:
Segger Microcontroller Systems
Datasheet: