8.10.00 J-TRACE ARM Segger Microcontroller Systems, 8.10.00 J-TRACE ARM Datasheet - Page 65
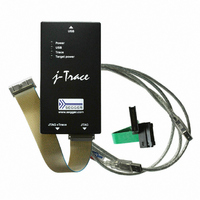
8.10.00 J-TRACE ARM
Manufacturer Part Number
8.10.00 J-TRACE ARM
Description
JTAG EMULATOR ARM7/ARM9 ETM
Manufacturer
Segger Microcontroller Systems
Type
Emulatorr
Specifications of 8.10.00 J-TRACE ARM
Contents
Emulation Module
For Use With/related Products
ARM7, ARM9
Lead Free Status / RoHS Status
Lead free / RoHS Compliant
Other names
899-1006


3.2
3.2.1
J-Link / J-Trace (UM08001)
After installing the J-Link ARM software and documentation package it should not be
necessary to perform any additional setup sequences in order to configure the USB
interface of J-Link.
To verify the correct installation of the driver, disconnect and reconnect J-Link / J-
Trace to the USB port. During the enumeration process which takes about 2 seconds,
the LED on J-Link / J-Trace is flashing. After successful enumeration, the LED stays
on permanently.
Start the provided sample application JLink.exe, which should display the compila-
tion time of the J-Link firmware, the serial number, a target voltage of 0.000V, a
complementary error message, which says that the supply voltage is too low if no
target is connected to J-Link / J-Trace, and the speed selection. The screenshot below
shows an example.
In addition you can verify the driver installation by consulting the Windows device
manager. If the driver is installed and your J-Link / J-Trace is connected to your com-
puter, the device manager should list the J-Link USB driver as a node below "Univer-
sal Serial Bus controllers" as shown in the following screenshot:
Setting up the USB interface
Verifying correct driver installation
© 2004-2011 SEGGER Microcontroller GmbH & Co. KG
65
Related parts for 8.10.00 J-TRACE ARM
Image
Part Number
Description
Manufacturer
Datasheet
Request
R

Part Number:
Description:
CONNECTOR JTAG-ARM ISOLATION
Manufacturer:
Segger Microcontroller Systems
Datasheet:

Part Number:
Description:
ADAPTER ARM TARGET 14PIN RIBBON
Manufacturer:
Segger Microcontroller Systems
Datasheet:

Part Number:
Description:
JTAG EMULATOR FOR ARM CORES
Manufacturer:
Segger Microcontroller Systems
Datasheet:

Part Number:
Description:
JTAG EMULATOR FOR ARM CORES
Manufacturer:
Segger Microcontroller Systems
Datasheet:

Part Number:
Description:
PROGRAMMING TOOL FOR MCU
Manufacturer:
Segger Microcontroller Systems
Datasheet:

Part Number:
Description:
PROGRAMMING TOOL FOR ST7 MCU
Manufacturer:
Segger Microcontroller Systems
Datasheet:

Part Number:
Description:
PROGRAMMING TOOL FOR STM8
Manufacturer:
Segger Microcontroller Systems
Datasheet:

Part Number:
Description:
PROGRAMMER JTAG FOR ARM CORES
Manufacturer:
Segger Microcontroller Systems
Datasheet:

Part Number:
Description:
JTAG EMULATOR USB ETHERNET ARM
Manufacturer:
Segger Microcontroller Systems
Datasheet:

Part Number:
Description:
EMULATOR JTAG/SWD CORTEX M3
Manufacturer:
Segger Microcontroller Systems
Datasheet: