ATMEGA16-16PU Atmel, ATMEGA16-16PU Datasheet - Page 238
ATMEGA16-16PU
Manufacturer Part Number
ATMEGA16-16PU
Description
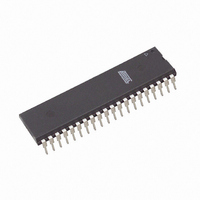
IC AVR MCU 16K 16MHZ 5V 40DIP
Manufacturer
Atmel
Series
AVR® ATmegar
Datasheets
1.ATMEGA16L-8MI.pdf
(26 pages)
2.ATMEGA16L-8MI.pdf
(357 pages)
3.ATMEGA16-16PU.pdf
(358 pages)
4.ATMEGA16-16PU.pdf
(351 pages)
Specifications of ATMEGA16-16PU
Core Processor
AVR
Core Size
8-Bit
Speed
16MHz
Connectivity
I²C, SPI, UART/USART
Peripherals
Brown-out Detect/Reset, POR, PWM, WDT
Number Of I /o
32
Program Memory Size
16KB (8K x 16)
Program Memory Type
FLASH
Eeprom Size
512 x 8
Ram Size
1K x 8
Voltage - Supply (vcc/vdd)
4.5 V ~ 5.5 V
Data Converters
A/D 8x10b
Oscillator Type
Internal
Operating Temperature
-40°C ~ 85°C
Package / Case
40-DIP (0.600", 15.24mm)
Package
40PDIP
Device Core
AVR
Family Name
ATmega
Maximum Speed
16 MHz
Operating Supply Voltage
5 V
Data Bus Width
8 Bit
Number Of Programmable I/os
32
Interface Type
TWI/SPI/USART
On-chip Adc
8-chx10-bit
Number Of Timers
3
Processor Series
ATMEGA16x
Core
AVR8
Data Ram Size
1 KB
Maximum Clock Frequency
16 MHz
Maximum Operating Temperature
+ 85 C
Mounting Style
Through Hole
3rd Party Development Tools
EWAVR, EWAVR-BL
Development Tools By Supplier
ATAVRDRAGON, ATSTK500, ATSTK600, ATAVRISP2, ATAVRONEKIT
Minimum Operating Temperature
- 40 C
A/d Inputs
8-Channel, 10-Bit
Cpu Speed
16 MIPS
Eeprom Memory
512 Bytes
Input Output
32
Interface
JTAG/SPI/UART
Memory Type
Flash
Number Of Bits
8
Package Type
44-pin PDIP
Programmable Memory
16K Bytes
Timers
2-8-bit, 1-16-bit
Voltage, Range
4.5-5.5 V
Controller Family/series
AVR MEGA
No. Of I/o's
32
Eeprom Memory Size
512Byte
Ram Memory Size
1KB
Rohs Compliant
Yes
For Use With
ATSTK600-TQFP44 - STK600 SOCKET/ADAPTER 44-TQFPATSTK600-DIP40 - STK600 SOCKET/ADAPTER 40-PDIP770-1007 - ISP 4PORT ATMEL AVR MCU SPI/JTAGATAVRISP2 - PROGRAMMER AVR IN SYSTEMATJTAGICE2 - AVR ON-CHIP D-BUG SYSTEMATSTK500 - PROGRAMMER AVR STARTER KIT
Lead Free Status / RoHS Status
Lead free / RoHS Compliant
Available stocks
Company
Part Number
Manufacturer
Quantity
Price
Company:

Part Number:
ATMEGA16-16PU
Manufacturer:
Atmel
Quantity:
140


Table 92. Boundary-scan Signals for the ADC (Continued)
Note:
238
Signal
Name
MUXEN_2
MUXEN_1
MUXEN_0
NEGSEL_2
NEGSEL_1
NEGSEL_0
PASSEN
PRECH
SCTEST
ST
VCCREN
Incorrect setting of the switches in Figure 123 will make signal contention and may damage the part. There are several input
choices to the S&H circuitry on the negative input of the output comparator in Figure 123. Make sure only one path is selected
from either one ADC pin, Bandgap reference source, or Ground.
ATmega16(L)
Direction as Seen
from the ADC
Input
Input
Input
Input
Input
Input
Input
Input
Input
Input
Input
Description
Input Mux bit 2
Input Mux bit 1
Input Mux bit 0
Input Mux for negative input for
differential signal, bit 2
Input Mux for negative input for
differential signal, bit 1
Input Mux for negative input for
differential signal, bit 0
Enable pass-gate of gain stages.
Precharge output latch of
comparator. (Active low)
Switch-cap TEST enable. Output
from x10 gain stage send out to
Port Pin having ADC_4
Output of gain stages will settle
faster if this signal is high first two
ACLK periods after AMPEN goes
high.
Selects Vcc as the ACC reference
voltage.
If the ADC is not to be used during scan, the recommended input values from Table 92
should be used. The user is recommended not to use the Differential Gain stages dur-
ing scan. Switch-cap based gain stages require fast operation and accurate timing
which is difficult to obtain when used in a scan chain. Details concerning operations of
the differential gain stage is therefore not provided.
The AVR ADC is based on the analog circuitry shown in Figure 123 with a successive
approximation algorithm implemented in the digital logic. When used in Boundary-scan,
the problem is usually to ensure that an applied analog voltage is measured within some
limits. This can easily be done without running a successive approximation algorithm:
apply the lower limit on the digital DAC[9:0] lines, make sure the output from the com-
parator is low, then apply the upper limit on the digital DAC[9:0] lines, and verify the
output from the comparator to be high.
The ADC need not be used for pure connectivity testing, since all analog inputs are
shared with a digital port pin as well.
When using the ADC, remember the following:
•
The Port Pin for the ADC channel in use must be configured to be an input with pull-
up disabled to avoid signal contention.
Recommended
Input when Not
in Use
0
0
1
0
0
0
1
1
0
0
0
Output Values when Recommended
Inputs are used, and CPU is not
Using the ADC
0
0
1
0
0
0
1
1
0
0
0
2466J–AVR–10/04
Related parts for ATMEGA16-16PU
Image
Part Number
Description
Manufacturer
Datasheet
Request
R

Part Number:
Description:
Manufacturer:
Atmel Corporation
Datasheet:

Part Number:
Description:
IC AVR MCU 16K 16MHZ 5V 44TQFP
Manufacturer:
Atmel
Datasheet:

Part Number:
Description:
IC AVR MCU 16K 16MHZ 5V 44-QFN
Manufacturer:
Atmel
Datasheet:
Part Number:
Description:
MCU AVR 16K FLASH 16MHZ 44-QFN
Manufacturer:
Atmel
Datasheet:

Part Number:
Description:
IC AVR MCU 16K 16MHZ COM 40-DIP
Manufacturer:
Atmel
Datasheet:
Part Number:
Description:
IC AVR MCU 16K 16MHZ COM 44-QFN
Manufacturer:
Atmel
Datasheet:
Part Number:
Description:
IC AVR MCU 16K 16MHZ IND 40-DIP
Manufacturer:
Atmel
Datasheet:
Part Number:
Description:
IC AVR MCU 16K 16MHZ IND 44-QFN
Manufacturer:
Atmel
Datasheet:
Part Number:
Description:
IC AVR MCU 16K 16MHZ IND 44-TQFP
Manufacturer:
Atmel
Datasheet:
Part Number:
Description:
IC MCU 8BIT 16KB FLASH 44TQFP
Manufacturer:
Atmel
Datasheet:
Part Number:
Description:
MCU AVR 16K FLASH 16MHZ 44-TQFP
Manufacturer:
Atmel
Datasheet:
Part Number:
Description:
IC AVR MCU 16K 16MHZ COM 44-TQFP
Manufacturer:
Atmel
Datasheet:
Part Number:
Description:
IC MCU AVR 16K 5V 16MHZ 44-TQFP
Manufacturer:
Atmel
Datasheet: