Chameleon-AVR Nurve Networks, Chameleon-AVR Datasheet - Page 94
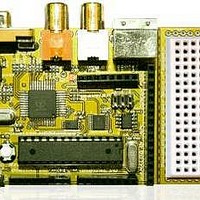
Chameleon-AVR
Manufacturer Part Number
Chameleon-AVR
Description
MCU, MPU & DSP Development Tools AVR8 & PROPELLER DEV SYSTEM (SBC)
Manufacturer
Nurve Networks
Datasheet
1.CHAMELEON-AVR.pdf
(268 pages)
Specifications of Chameleon-AVR
Processor To Be Evaluated
AVR 328P
Data Bus Width
8 bit
Interface Type
USB, VGA, PS/2, I2C, ISP, SPI
Operating Supply Voltage
3.3 V, 5 V
Lead Free Status / RoHS Status
Lead free / RoHS Compliant


© 2009 NURVE NETWORKS LLC “Exploring the Chameleon AVR 8-Bit”
Referring to Figure 15.26, the Custom Options tab controls the compiler/linker settings for all files, or specific files. In our
case, we need to make a change to make sure the programs compile correctly. On the left pane, select [All Files], on the
right you should see a list of options/flags that are applied to all source files by the compiler. You may recognize them
from the “General” tab. In any event, this is where you can add/delete very specific flags. Right now, we need to delete
something; notice the flag named:
-std=gnu99
This flag indicates certain compiler standards that we do not want to apply, thus we need to delete the flag. Simply
highlight it and then click <Remove> in the upper right hand side of the dialog. Finally, make sure in the “External Tools”
section at the bottom of the dialog the “Use WinAVR” checkbox is selected, if you wanted to you could actually change
the path to the compiler and make tools here to other versions, but that’s for advanced users only.
This completes the Project Options dialog settings, click <Ok> and let’s move on.
15.1.4.2 Adding Files to the Project
Now, we are ready to actually add files to our project, but first we need some files to add! Before, we get into that, let’s
briefly recap what we have been doing since at this point you might have forgotten what all these steps where for. So, we
created a new GCC project, but before getting started we had to configure a number of components in the tool chain
before we could do anything. At this point, AVR Studio is ready to go, and we can actually add the source files we want to
compile and hopefully the compiler and linker will build our application perfectly.
The first step is to copy the source files from the DVD-ROM to the installation directory on your hard drive. To do this, you
need to locate the \Source directory inside your AVR installation, it should look something like the listing shown in Figure
15.27.
Figure 15.27 – The “Source” directory in the AVR Studio installation or where you want your projects.
If you navigate into the “\Source” directory, this is where the project we created should reside in a directory called
“\cham_avr_work_01”. Yours should looks something like the listing shown in Figure 15.28 if you navigate into the
project directory.
94
Related parts for Chameleon-AVR
Image
Part Number
Description
Manufacturer
Datasheet
Request
R

Part Number:
Description:
MCU, MPU & DSP Development Tools PIC24 & PROPELLER DEV SYSTEM (SBC)
Manufacturer:
Nurve Networks
Datasheet:

Part Number:
Description:
MCU, MPU & DSP Development Tools AVR8 VIDEO GAME DEV SYSTEM (SBC)
Manufacturer:
Nurve Networks

Part Number:
Description:
MCU, MPU & DSP Development Tools PIC24 VIDEO GAME DEV SYSTEM (SBC)
Manufacturer:
Nurve Networks