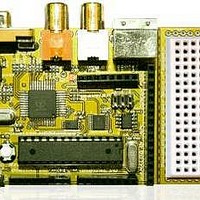
Chameleon-AVR Nurve Networks, Chameleon-AVR Datasheet - Page 115

Chameleon-AVR
Manufacturer Part Number
Chameleon-AVR
Description
MCU, MPU & DSP Development Tools AVR8 & PROPELLER DEV SYSTEM (SBC)
Manufacturer
Nurve Networks
Datasheet
1.CHAMELEON-AVR.pdf
(268 pages)
Specifications of Chameleon-AVR
Processor To Be Evaluated
AVR 328P
Data Bus Width
8 bit
Interface Type
USB, VGA, PS/2, I2C, ISP, SPI
Operating Supply Voltage
3.3 V, 5 V
Lead Free Status / RoHS Status
Lead free / RoHS Compliant
- Current page: 115 of 268
- Download datasheet (17Mb)
Please read the Arduino documentation to learn all the features of the tool, but its fairly straightforward. It has a simple
menu and a set of icons/buttons. Simply hover over each button see what they do. From left to right they are:
Ok, so the first thing we need to do is make sure that the Arduino tool can find our sketchbook since it likes to place
sketches in a different place. If you recall, we copied our sketchbook from the DVD-ROM to the installation directory of the
Arduino files, refer to Figure 15.43. So, first we need to tell the Arduino tool where to look. To do this, from the main menu
select <File → Preferences> which should bring up the dialog shown in Figure 15.54 below.
Verify – Compiles only to show errors.
Stop – Stops the serial monitor.
New Sketch – Creates a new sketch.
Open Sketch – Opens a sketch.
Save Sketch – Saves the current sketch.
Upload Sketch – Compiles and uploads the sketch to the Chameleon (Arduino).
Serial Monitor – Launches a serial monitor terminal program.
Tab Controls – Standard tab controls to add more views.
Figure 15.53 – the Arduino application at last!
© 2009 NURVE NETWORKS LLC “Exploring the Chameleon AVR 8-Bit”
115
Related parts for Chameleon-AVR
Image
Part Number
Description
Manufacturer
Datasheet
Request
R

Part Number:
Description:
MCU, MPU & DSP Development Tools PIC24 & PROPELLER DEV SYSTEM (SBC)
Manufacturer:
Nurve Networks
Datasheet:

Part Number:
Description:
MCU, MPU & DSP Development Tools AVR8 VIDEO GAME DEV SYSTEM (SBC)
Manufacturer:
Nurve Networks

Part Number:
Description:
MCU, MPU & DSP Development Tools PIC24 VIDEO GAME DEV SYSTEM (SBC)
Manufacturer:
Nurve Networks


