Chameleon-AVR Nurve Networks, Chameleon-AVR Datasheet - Page 101
Chameleon-AVR
Manufacturer Part Number
Chameleon-AVR
Description
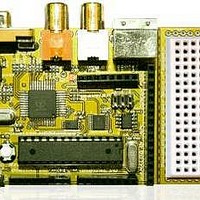
MCU, MPU & DSP Development Tools AVR8 & PROPELLER DEV SYSTEM (SBC)
Manufacturer
Nurve Networks
Datasheet
1.CHAMELEON-AVR.pdf
(268 pages)
Specifications of Chameleon-AVR
Processor To Be Evaluated
AVR 328P
Data Bus Width
8 bit
Interface Type
USB, VGA, PS/2, I2C, ISP, SPI
Operating Supply Voltage
3.3 V, 5 V
Lead Free Status / RoHS Status
Lead free / RoHS Compliant


tasks. Additionally, this tool can actually damage the AVR chip if you don’t set it up correctly. For example, you can force
the wrong part, fuse bit settings, etc. and then download garbage to the chip locking it up, therefore, this tool must be set
up correctly and care taken when using it.
Let’s begin with the “Main” tab as shown in the figure. This tab allows you to select the type of device you want to
program, read the device signature (a unique id that indicates what the device is) as well as set the type of programming
mode (ISP or JTAG) along with the frequency of programming. Let’s talk about each selection in brief.
Device and Signature Bytes – These two controls select and indicate the device and respective “signature” read
Programming Mode and Target Settings – Depending on what programmer you have plugged in, it will have a number
When you have completed setting the “Main” tab up properly, select the “Program” tab next. You should see the
controls shown in Figure 15.37 below.
This tab is where you command the tool to program the chip’s FLASH or EEPROM memories. In our case, we are only
going to program the FLASH memory with the .HEX files generated by AVR Studio and AVR-GCC. Reviewing the
“Program” tab at the top under “Device”, make sure both check boxes are checked, we definitely want to erase the
device each programming cycle and verify it after programming to make the download was error free. Additionally, you
can click <Erase Device> if you wish to simply erase the AVR chip and do nothing more.
Figure 15.37 – The AVR ISP MKII control panel’s “Program” tab.
manually. In our case, we want to select the “ATmega328P” as shown in the figure,
additionally, you can click the <Read Signature> button and the tool will read the device
signature out of the Chameleon AVR and check it against the device you have selected
in the above list box. For example, the AVR Mega329P should have the signature: “0x1E
0x95 0x0F”.
of communication modes; ISP mode, JTAG mode, etc. In our case, simply select ISP
mode since the AVR ISP programmer uses the ISP interface on the AVR chip.
Additionally, there is a speed setting that controls the download baud rate to the
programmer. Set it for 125 KHz as a nominal value, you can get away with higher
speeds, but then risk some bit errors which can lead to locked up chips. Thus, 125 KHz
should be fast enough and the default setting. Simply press the <Settings> buttons to
adjust the programmer baud rate.
© 2009 NURVE NETWORKS LLC “Exploring the Chameleon AVR 8-Bit”
101
Related parts for Chameleon-AVR
Image
Part Number
Description
Manufacturer
Datasheet
Request
R

Part Number:
Description:
MCU, MPU & DSP Development Tools PIC24 & PROPELLER DEV SYSTEM (SBC)
Manufacturer:
Nurve Networks
Datasheet:

Part Number:
Description:
MCU, MPU & DSP Development Tools AVR8 VIDEO GAME DEV SYSTEM (SBC)
Manufacturer:
Nurve Networks

Part Number:
Description:
MCU, MPU & DSP Development Tools PIC24 VIDEO GAME DEV SYSTEM (SBC)
Manufacturer:
Nurve Networks