Chameleon-AVR Nurve Networks, Chameleon-AVR Datasheet - Page 81
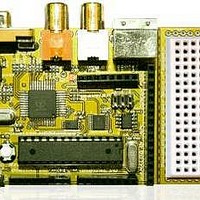
Chameleon-AVR
Manufacturer Part Number
Chameleon-AVR
Description
MCU, MPU & DSP Development Tools AVR8 & PROPELLER DEV SYSTEM (SBC)
Manufacturer
Nurve Networks
Datasheet
1.CHAMELEON-AVR.pdf
(268 pages)
Specifications of Chameleon-AVR
Processor To Be Evaluated
AVR 328P
Data Bus Width
8 bit
Interface Type
USB, VGA, PS/2, I2C, ISP, SPI
Operating Supply Voltage
3.3 V, 5 V
Lead Free Status / RoHS Status
Lead free / RoHS Compliant


15.1.2 Installing the AVR ISP MKII Hardware (Optional)
Now that AVR Studio is installed, we could install WinAVR next, but I find that installation the programming hardware is a
better idea, so the drivers can load and it can register itself, so that WinAVR will find it during its installation. This way we
don’t get into a “chicken and the egg” problem and have to install something two times.
Installing the AVR ISP MKII programmer consists of nothing more than plugging it into your PC with a USB cable. Go
ahead and do this now as. Once you plug it in, the PC should detect it and begin the installation process as shown in
Figure 15.8 below.
Select the radio button to install the software automatically and then click <Next>. Unless something went wrong with the
AVR Studio installation you should see the hardware being installed as shown in Figure 15.9 below.
TIP
Of course, if you do not have a AVR ISP MKII then you can skip this section since you
are probably planning on using the pre-flashed bootloader in Arduino mode over the
USB serial connection.
Figure 15.9 – Windows installation AVR ISP hardware and drivers.
Figure 15.8 – Window’s detecting the Atmel AVR ISP MKII.
© 2009 NURVE NETWORKS LLC “Exploring the Chameleon AVR 8-Bit”
81
Related parts for Chameleon-AVR
Image
Part Number
Description
Manufacturer
Datasheet
Request
R

Part Number:
Description:
MCU, MPU & DSP Development Tools PIC24 & PROPELLER DEV SYSTEM (SBC)
Manufacturer:
Nurve Networks
Datasheet:

Part Number:
Description:
MCU, MPU & DSP Development Tools AVR8 VIDEO GAME DEV SYSTEM (SBC)
Manufacturer:
Nurve Networks

Part Number:
Description:
MCU, MPU & DSP Development Tools PIC24 VIDEO GAME DEV SYSTEM (SBC)
Manufacturer:
Nurve Networks