Chameleon-AVR Nurve Networks, Chameleon-AVR Datasheet - Page 114
Chameleon-AVR
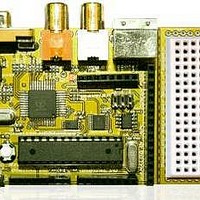
Manufacturer Part Number
Chameleon-AVR
Description
MCU, MPU & DSP Development Tools AVR8 & PROPELLER DEV SYSTEM (SBC)
Manufacturer
Nurve Networks
Datasheet
1.CHAMELEON-AVR.pdf
(268 pages)
Specifications of Chameleon-AVR
Processor To Be Evaluated
AVR 328P
Data Bus Width
8 bit
Interface Type
USB, VGA, PS/2, I2C, ISP, SPI
Operating Supply Voltage
3.3 V, 5 V
Lead Free Status / RoHS Status
Lead free / RoHS Compliant


© 2009 NURVE NETWORKS LLC “Exploring the Chameleon AVR 8-Bit”
To launch the terminal program, you would press <Open> which opens a new terminal window. This is where you would
type on the PC keyboard to communicate with the Chameleon AVR and run the demos or do serial terminal experiments.
15.2.3.1 Running the Arduino Tool
We are all ready to go, let’s do a final checklist before we launch the tool:
1. You have the USB cable plugged into the PC and you have installed the FTDI serial drivers if needed.
2. You have a 9V DC power supply plugged into the Chameleon (optional).
3. You have moved the serial select switch into the DOWN position, so the USB serial port is connected to the AVR chip
(not the Propeller).
4. You have the VGA and NTSC cables connected to the Chameleon as well as a mouse (optional).
Finally, we are ready to launch the Arduino tool itself. If you take a look back in the installation directory where you
decompressed the Arduino ZIP file (Figure 15.44) you will see an icon ARDUINO.EXE, go ahead and double click it. You
should see the splash screen load shown in Figure 15.52.
Figure 15.52 – Arduino splash screen.
Then finally, the application will load and will look something like that shown in Figure 15.53.
114
Related parts for Chameleon-AVR
Image
Part Number
Description
Manufacturer
Datasheet
Request
R

Part Number:
Description:
MCU, MPU & DSP Development Tools PIC24 & PROPELLER DEV SYSTEM (SBC)
Manufacturer:
Nurve Networks
Datasheet:

Part Number:
Description:
MCU, MPU & DSP Development Tools AVR8 VIDEO GAME DEV SYSTEM (SBC)
Manufacturer:
Nurve Networks

Part Number:
Description:
MCU, MPU & DSP Development Tools PIC24 VIDEO GAME DEV SYSTEM (SBC)
Manufacturer:
Nurve Networks