AT91SAM9G45-CU-999 Atmel, AT91SAM9G45-CU-999 Datasheet - Page 996
AT91SAM9G45-CU-999
Manufacturer Part Number
AT91SAM9G45-CU-999
Description
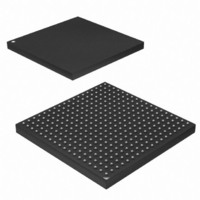
IC MCU ARM9 APMC 324TFBGA
Manufacturer
Atmel
Series
AT91SAMr
Datasheet
1.AT91SAM9G45-EKES.pdf
(1218 pages)
Specifications of AT91SAM9G45-CU-999
Core Processor
ARM9
Core Size
16/32-Bit
Speed
400MHz
Connectivity
EBI/EMI, Ethernet, I²C, IrDA, MMC, SPI, SSC, UART/USART, USB
Peripherals
AC'97, DMA, I²S, LCD, POR, PWM, WDT
Number Of I /o
160
Program Memory Size
64KB (64K x 8)
Program Memory Type
ROM
Ram Size
128K x 8
Voltage - Supply (vcc/vdd)
0.9 V ~ 1.1 V
Data Converters
A/D 8x10b
Oscillator Type
Internal
Operating Temperature
-40°C ~ 85°C
Package / Case
324-TFBGA
Lead Free Status / RoHS Status
Lead free / RoHS Compliant
Eeprom Size
-
Lead Free Status / Rohs Status
Supplier Unconfirmed
Available stocks
Company
Part Number
Manufacturer
Quantity
Price


6438F–ATARM–21-Jun-10
4. After the DMAC channel has been programmed, enable the channel by writing a ‘1’ to
5. Source and destination request single and chunk DMAC transactions to transfer the
6. When the buffer transfer has completed, the DMAC reloads the DMAC_SADDRx regis-
7. The DMAC transfer proceeds as follows:
– ii. Set up the transfer characteristics, such as:
e. If source picture-in-picture is enabled (DMAC_CTRLBx.SPIP is enabled), program
f.
g. Write the channel configuration information into the DMAC_CFGx register for chan-
– i. Designate the handshaking interface type (hardware or software) for the source
– ii. If the hardware handshaking interface is activated for the source or destination
the DMAC_CHER.ENABLE[n] bit where n is the channel number. Make sure that bit 0
of the DMAC_EN.ENABLE register is enabled.
buffer of data (assuming non-memory peripherals). The DMAC acknowledges at the
completion of every transaction (chunk and single) in the buffer and carries out the buf-
fer transfer.
ter. The DMAC_DADDRx register remains unchanged. Hardware sets the buffer
complete interrupt. The DMAC then samples the row number as shown in
on page
ware sets the transfer complete interrupt and disables the channel. So you can either
respond to the Buffer Complete or Transfer Complete interrupts, or poll for ENABLE
field in the Channel Status Register (DMAC_CHSR.ENABLE[n] bit) until it is cleared by
hardware, to detect when the transfer is complete. If the DMAC is not in Row 1, the next
step is performed.
a. If the buffer complete interrupt is un-masked (DMAC_EBCIMR.BTC[x] = ‘1’, where
and destination peripherals. This is not required for memory. This step requires
programming the SRC_H2SEL/DST_H2SEL bits, respectively. Writing a ‘1’ activates
the hardware handshaking interface to handle source/destination requests for the
specific channel. Writing a ‘0’ activates the software handshaking interface to handle
source/destination requests.
peripheral, assign handshaking interface to the source and destination peripheral.
This requires programming the SRC_PER and DST_PER bits, respectively.
– Transfer width for the source in the SRC_WIDTH field.
– Transfer width for the destination in the DST_WIDTH field.
– Source AHB master interface layer in the SIF field where source resides.
– Destination AHB master interface master layer in the DIF field where destination
resides.
– Incrementing/decrementing or fixed address for source in SRC_INCR field.
– Incrementing/decrementing or fixed address for destination in DST_INCR field.
the DMAC_SPIPx register for channel x.
If destination picture-in-picture is enabled (DMAC_CTRLBx.DPIP), program the
DMAC_DPIPx register for channel x.
nel x.
x is the channel number) hardware sets the buffer complete interrupt when the buf-
fer transfer has completed. It then stalls until STALLED[n] bit of DMAC_CHSR is
cleared by writing in the KEEPON[n] field of DMAC_CHER register where n is the
channel number. If the next buffer is to be the last buffer in the DMAC transfer, then
the buffer complete ISR (interrupt service routine) should clear the automatic mode
bit, DMAC_CTRLBx.AUTO. This puts the DMAC into Row 1 as shown in
2 on page
982. If the DMAC is in Row 1, then the DMAC transfer has completed. Hard-
982. If the next buffer is not the last buffer in the DMAC transfer then the
AT91SAM9G45
Table 41-2
Table 41-
996
Related parts for AT91SAM9G45-CU-999
Image
Part Number
Description
Manufacturer
Datasheet
Request
R

Part Number:
Description:
KIT EVAL FOR AT91SAM9G45
Manufacturer:
Atmel
Datasheet:

Part Number:
Description:
MCU ARM9 324-TFBGA
Manufacturer:
Atmel
Datasheet:

Part Number:
Description:
At91 Arm Thumb-based Microcontrollers
Manufacturer:
ATMEL Corporation
Datasheet:

Part Number:
Description:
MCU, MPU & DSP Development Tools KICKSTART KIT FOR AT91SAM9 PLUS
Manufacturer:
IAR Systems

Part Number:
Description:
DEV KIT FOR AVR/AVR32
Manufacturer:
Atmel
Datasheet:
Part Number:
Description:
INTERVAL AND WIPE/WASH WIPER CONTROL IC WITH DELAY
Manufacturer:
ATMEL Corporation
Datasheet:
Part Number:
Description:
Low-Voltage Voice-Switched IC for Hands-Free Operation
Manufacturer:
ATMEL Corporation
Datasheet:
Part Number:
Description:
MONOLITHIC INTEGRATED FEATUREPHONE CIRCUIT
Manufacturer:
ATMEL Corporation
Datasheet:
Part Number:
Description:
AM-FM Receiver IC U4255BM-M
Manufacturer:
ATMEL Corporation
Datasheet:
Part Number:
Description:
Monolithic Integrated Feature Phone Circuit
Manufacturer:
ATMEL Corporation
Datasheet:
Part Number:
Description:
Multistandard Video-IF and Quasi Parallel Sound Processing
Manufacturer:
ATMEL Corporation
Datasheet:
Part Number:
Description:
High-performance EE PLD
Manufacturer:
ATMEL Corporation
Datasheet: