PIC16F785-E/SS Microchip Technology, PIC16F785-E/SS Datasheet - Page 101
PIC16F785-E/SS
Manufacturer Part Number
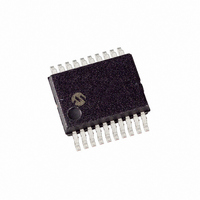
PIC16F785-E/SS
Description
20 PIN, 3.5 KB STD FLASH, 128 RAM, 18 I/O PB FREE,
Manufacturer
Microchip Technology
Series
PIC® 16Fr
Datasheets
1.PIC16F616T-ISL.pdf
(8 pages)
2.PIC16F785-ISS.pdf
(206 pages)
3.PIC16F785-ISS.pdf
(10 pages)
4.PIC16F785-ISS.pdf
(28 pages)
Specifications of PIC16F785-E/SS
Rohs Compliant
YES
Core Processor
PIC
Core Size
8-Bit
Speed
20MHz
Peripherals
Brown-out Detect/Reset, POR, PWM, WDT
Number Of I /o
17
Program Memory Size
3.5KB (2K x 14)
Program Memory Type
FLASH
Eeprom Size
256 x 8
Ram Size
128 x 8
Voltage - Supply (vcc/vdd)
2 V ~ 5.5 V
Data Converters
A/D 14x10b
Oscillator Type
Internal
Operating Temperature
-40°C ~ 125°C
Package / Case
20-SSOP
Lead Free Status / RoHS Status
Lead free / RoHS Compliant
For Use With
XLT20SS1-1 - SOCKET TRANSITION 20DIP 20SSOPAC162060 - HEADER INTRFC MPLAB ICD2 20PIN
Connectivity
-
Lead Free Status / RoHS Status
Lead free / RoHS Compliant


13.8
When configuring the Two-Phase PWM, care must be
taken to avoid active output levels from the PH1 and
PH2 pins before the PWM is fully configured. The
following sequence is suggested before the TRISC
register or any of the Two-Phase PWM control registers
are first configured:
• Output inactive (OFF) levels to the PORTC RC1/
• Clear TRISC bits 1 and 4 to configure the PH1
• Configure the PWMCLK, PWMPH1, PWMPH2,
• Configure the PWMCON0 register.
EXAMPLE 13-1:
© 2008 Microchip Technology Inc.
;Example to configure PH1 as a free running PWM output using the SYNC output as the duty cycle
;termination feedback.
;This requires an external connection between the SYNC output and the comparator input.
;SYNC out = RB7 on pin 10
;C1 inverting input = RC2/AN6 on pin 14
;Configure PH1, PH2 and SYNC pins as outputs
;First, ensure output latches are low
;Configure the I/Os as outputs
;PH1 shares its function with AN5
;Configure AN5 as digital I/O
;Configure the PWM but don't enable PH1 or PH2 yet
;PWM control setup
;PWM clock setup
;PH1 setup
;PH2 setup
;Configure Comparator 1
;Configure comparator voltage reference
;Everything is setup at this point so now it is time to enable PH1
;Module is running autonomously at this point
AN5/C12IN1-/PH1 and RC4/C2OUT/PH2 pins.
and PH2 pins as outputs.
and PWMCON1 registers.
BCF
BCF
BCF
BANKSEL TRISB
BCF
BCF
BCF
BCF
BANKSEL PWMCLK
MOVLW
MOVWF
MOVLW
MOVWF
MOVLW
MOVWF
MOVLW
MOVWF
MOVLW
MOVWF
BANKSEL VRCON
MOVLW
MOVWF
BANKSEL PWMCON0
BSF
PWM Configuration
PORTC,1
PORTC,4
PORTB,7
TRISC,1
TRISC,4
TRISB,7
ANSEL0,5
B'00001100'
PWMCON0
B'00111101'
PWMCLK
B'00101111'
PWMPH1
B'00110101'
PWMPH2
B'10011110'
CM1CON0
B'10101100'
VRCON
PWMCON0,PH1EN
PWM SETUP EXAMPLE
;PH1 low
;PH2 low
;SYNC low
;PH1 output
;PH2 output
;SYNC output
;AN5 is digital, all others default as analog
;auto shutdown off, no blanking, SYNC on, PH1 and PH2 off
;see data sheet page 93
;pwm_clk = Fosc, 30 clocks in PWM period
;see data sheet page 94
;non-inverted, terminate on C1, Start on clock 15
;see data sheet page 95
;non-inverted, terminate on C1, Start on clock 21
;see data sheet page 96
;C1 on, internal, inverted, normal speed, +:C1V
;see data sheet page 68
;C1V
;see data sheet page 72
;enable PH1
REN
on, low range, CV
REF
= V
DD
PIC16F785/HV785
/2
REF
, -:AN6
DS41249E-page 99
Related parts for PIC16F785-E/SS
Image
Part Number
Description
Manufacturer
Datasheet
Request
R

Part Number:
Description:
IC PIC MCU FLASH 2KX14 20SOIC
Manufacturer:
Microchip Technology
Datasheet:

Part Number:
Description:
IC PIC MCU FLASH 2KX14 20QFN
Manufacturer:
Microchip Technology
Datasheet:

Part Number:
Description:
IC PIC MCU FLASH 2KX14 20DIP
Manufacturer:
Microchip Technology
Datasheet:

Part Number:
Description:
IC PIC MCU FLASH 2KX14 20SSOP
Manufacturer:
Microchip Technology
Datasheet:
Part Number:
Description:
IC PIC MCU FLASH 2KX14 20SOIC
Manufacturer:
Microchip Technology
Datasheet:
Part Number:
Description:
IC PIC MCU FLASH 2KX14 20DIP
Manufacturer:
Microchip Technology
Datasheet:
Part Number:
Description:
3.5 KB Flash, 128 RAM, 18 I/O 20 QFN 4x4mm TUBE
Manufacturer:
Microchip Technology
Datasheet:

Part Number:
Description:
IC, 8BIT MCU, PIC16F, 32MHZ, SOIC-18
Manufacturer:
Microchip Technology
Datasheet:

Part Number:
Description:
IC, 8BIT MCU, PIC16F, 32MHZ, SSOP-20
Manufacturer:
Microchip Technology
Datasheet:

Part Number:
Description:
IC, 8BIT MCU, PIC16F, 32MHZ, DIP-18
Manufacturer:
Microchip Technology
Datasheet:

Part Number:
Description:
IC, 8BIT MCU, PIC16F, 32MHZ, QFN-28
Manufacturer:
Microchip Technology
Datasheet:

Part Number:
Description:
IC, 8BIT MCU, PIC16F, 32MHZ, QFN-28
Manufacturer:
Microchip Technology
Datasheet:
Part Number:
Description:
IC, 8BIT MCU, PIC16F, 32MHZ, QFN-28
Manufacturer:
Microchip Technology
Datasheet:
Part Number:
Description:
IC, 8BIT MCU, PIC16F, 32MHZ, SSOP-20
Manufacturer:
Microchip Technology
Datasheet:

Part Number:
Description:
IC, 8BIT MCU, PIC16F, 20MHZ, DIP-40
Manufacturer:
Microchip Technology
Datasheet: