Chameleon-PIC Nurve Networks, Chameleon-PIC Datasheet - Page 227
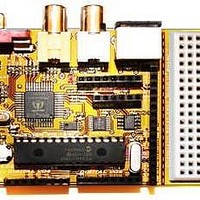
Chameleon-PIC
Manufacturer Part Number
Chameleon-PIC
Description
MCU, MPU & DSP Development Tools PIC24 & PROPELLER DEV SYSTEM (SBC)
Manufacturer
Nurve Networks
Datasheet
1.CHAMELEON-PIC.pdf
(263 pages)
Specifications of Chameleon-PIC
Processor To Be Evaluated
PIC24
Data Bus Width
16 bit
Interface Type
USB, VGA, PS/2, I2C, ISP, SPI
Operating Supply Voltage
3.3 V, 5 V
Lead Free Status / RoHS Status
Lead free / RoHS Compliant


} // end main
I have highlighted the port I/O commands. The program starts by setting the direction bits to all 1’s which mean output.
Then the program immediately enters into the main loop and starts toggling the I/O pins on a 500ms total cycle. The
output is mimicked to the NTSC screen, you can add VGA support yourself with a few lines of code. Just don’t forget to
add the library and header files to your program.
Now, one thing you might wonder is “how fast can I control these pins?”. This is a good question since you might want
to do something like talk to a SPI or I2C device. So, the real bottleneck is the SPI interface from the AVR/PIC chip to the
Propeller, we can only send commands and thus toggle the I/O pins as fast as this interface. Thus, if you want to do
something more complex, then I suggest that you add commands and messages to control the Propeller’s onboard
counters – then you can route them to the I/O pins and generate any signal you want via control from the master AVR/PIC
chip.
Summary
31.1.2 Serial RS-232 Communications Demo
This demo shows off the serial communications of the Chameleon. There are three components to this:
Considering these three elements; to get serial from the PC’s USB port to the Chameleon, first we need the FTDI USB to
serial UART which we have been using. Secondly, to communicate with the PIC, we need to use its internal UART (there
are two available for us). And finally, we need to write software to control the PIC’s UART and set it up. This is what the
CHAM_PIC_UART_DRV_V010 library module is for.
{
// print on NTSC terminal screen
NTSC_Term_Print("Port Data ON [+ - + - + - + -]");
NTSC_Term_Char( 0x0D );
// turn on the LED pin 7 = HIGH, pin 6 = LOW, repeat pattern down port.
PropPort_Write(0b10101010);
// slow things down a bit, so we can read the text!
DELAY_MS(250);
// print on NTSC terminal screen
NTSC_Term_Print("Port Data OFF[- + - + - + - +]");
NTSC_Term_Char( 0x0D );
// turn off the LED pin 7 = LOW, pin 6 = HIGH, repeat pattern down port.
PropPort_Write(0b01010101);
// slow things down a bit, so we can read the text!
DELAY_MS(250);
} // end while
The hardware UART in the PIC24HJ.
The FTDI USB to Serial UART converter.
The software driver running on the PIC.
TIP
Although, we have been using the USB to serial connection to the Chameleon, we don’t
have to use the USB port, the serial TX/RX pins from the PIC are exported to the
expansion headers where you can directly connect them to a TTL level serial device.
This demos shows off a really simple way to control some of the I/O pins of the Propeller chip.
Also, the code is so simple there is no processing core for it on the Propeller, it runs right on the
main message dispatcher loop and just does the pin I/O on demand. Something you should try
is hooking up a SPI, I2C, or other device to the port and see if you can remotely control it all the
way from the AVR/PIC chip!
© 2009 NURVE NETWORKS LLC “Exploring the Chameleon PIC 16-Bit”
227
Related parts for Chameleon-PIC
Image
Part Number
Description
Manufacturer
Datasheet
Request
R

Part Number:
Description:
MCU, MPU & DSP Development Tools AVR8 VIDEO GAME DEV SYSTEM (SBC)
Manufacturer:
Nurve Networks

Part Number:
Description:
MCU, MPU & DSP Development Tools PIC24 VIDEO GAME DEV SYSTEM (SBC)
Manufacturer:
Nurve Networks

Part Number:
Description:
MCU, MPU & DSP Development Tools AVR8 & PROPELLER DEV SYSTEM (SBC)
Manufacturer:
Nurve Networks
Datasheet: