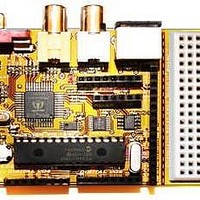
Chameleon-PIC Nurve Networks, Chameleon-PIC Datasheet - Page 107

Chameleon-PIC
Manufacturer Part Number
Chameleon-PIC
Description
MCU, MPU & DSP Development Tools PIC24 & PROPELLER DEV SYSTEM (SBC)
Manufacturer
Nurve Networks
Datasheet
1.CHAMELEON-PIC.pdf
(263 pages)
Specifications of Chameleon-PIC
Processor To Be Evaluated
PIC24
Data Bus Width
16 bit
Interface Type
USB, VGA, PS/2, I2C, ISP, SPI
Operating Supply Voltage
3.3 V, 5 V
Lead Free Status / RoHS Status
Lead free / RoHS Compliant
- Current page: 107 of 263
- Download datasheet (12Mb)
The final step is to release the Chameleon PIC from reset (which will also release the Propeller as well since the resets
are the same). You can do this by either unplugging the PICkit 2 programmer or more easily press the “Bring target
MCLR to VDD” (7) toolbar button. Now plug your Chameleon PIC into your NTSC television and VGA monitor and verify
your screen looks similar to Figure 15.46
If you are having difficulties getting your Chameleon PIC to program properly or video is not displaying, you may try the
suggestions below:
Finally, if you are still having problems, contact Nurve Networks support at support@nurve.net and also send a copy of
the email to nurve_help@yahoo.com just to decrease the chance spam firewalls filter your email. There is also a thriving
community of Chameleon users with a lot of experience who commonly use message forums at the following website.
http://www.chameleon-dev.com
http://www.xgamestation.com/phpbb/
15.1.4.2 Enabling Compiler Optimizations
Before we finish I wanted to mention how to enable/disable compiler optimizations. Remember, after 60 days of use with
the student edition of the MPLAB C compiler for PIC24s, optimization level 0 and 1 can only be enabled. Still level 1
compiles significantly faster and smaller code than level 0.
To change the optimization levels first start by opening the project options (ProjectBuild OptionsProject). Next click on
the MPLAB C30 tab as highlighted in the green box in Figure 15.47.
•
•
•
•
Is your PICkit 2 programmer plugged into the USB port and enumerated properly? The first indicator is whether or
not the green power LED is lit on the PICkit 2. Additional error messages may also be displayed in the output
window.
Is the Chameleon PIC powered from a 9-12V DC or USB cable power source and turned ON?
Is the Audio/Video cables plugged into your television and the Chameleon PIC properly. Make sure video is
connected to video and audio to audio.
If all else fails, first try to restart MPLAB, save your workspace and project first! If it still does not work try
rebooting your computer.
Figure 15.46 – “Hello World” Demo running on NTSC television.
© 2009 NURVE NETWORKS LLC “Exploring the Chameleon PIC 16-Bit”
107
Related parts for Chameleon-PIC
Image
Part Number
Description
Manufacturer
Datasheet
Request
R

Part Number:
Description:
MCU, MPU & DSP Development Tools AVR8 VIDEO GAME DEV SYSTEM (SBC)
Manufacturer:
Nurve Networks

Part Number:
Description:
MCU, MPU & DSP Development Tools PIC24 VIDEO GAME DEV SYSTEM (SBC)
Manufacturer:
Nurve Networks

Part Number:
Description:
MCU, MPU & DSP Development Tools AVR8 & PROPELLER DEV SYSTEM (SBC)
Manufacturer:
Nurve Networks
Datasheet:


