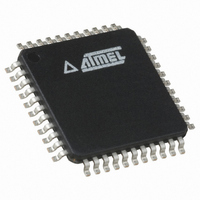
ATMEGA32-16AU Atmel, ATMEGA32-16AU Datasheet - Page 284

ATMEGA32-16AU
Manufacturer Part Number
ATMEGA32-16AU
Description
IC AVR MCU 32K 16MHZ 5V 44TQFP
Manufacturer
Atmel
Series
AVR® ATmegar
Specifications of ATMEGA32-16AU
Core Processor
AVR
Core Size
8-Bit
Speed
16MHz
Connectivity
I²C, SPI, UART/USART
Peripherals
Brown-out Detect/Reset, POR, PWM, WDT
Number Of I /o
32
Program Memory Size
32KB (16K x 16)
Program Memory Type
FLASH
Eeprom Size
1K x 8
Ram Size
2K x 8
Voltage - Supply (vcc/vdd)
4.5 V ~ 5.5 V
Data Converters
A/D 8x10b
Oscillator Type
Internal
Operating Temperature
-40°C ~ 85°C
Package / Case
44-TQFP, 44-VQFP
Processor Series
ATMEGA32x
Core
AVR8
Data Bus Width
8 bit
Data Ram Size
2 KB
Interface Type
2-Wire/SPI/USART
Maximum Clock Frequency
16 MHz
Number Of Programmable I/os
32
Number Of Timers
3
Operating Supply Voltage
4.5 V to 5.5 V
Maximum Operating Temperature
+ 85 C
Mounting Style
SMD/SMT
3rd Party Development Tools
EWAVR, EWAVR-BL
Development Tools By Supplier
ATAVRDRAGON, ATSTK500, ATSTK600, ATAVRISP2, ATAVRONEKIT
Minimum Operating Temperature
- 40 C
On-chip Adc
8-ch x 10-bit
Controller Family/series
AVR MEGA
No. Of I/o's
32
Eeprom Memory Size
1KB
Ram Memory Size
2KB
Cpu Speed
16MHz
No. Of Timers
3
Rohs Compliant
Yes
Cpu Family
ATmega
Device Core
AVR
Device Core Size
8b
Frequency (max)
16MHz
Total Internal Ram Size
2KB
# I/os (max)
32
Number Of Timers - General Purpose
3
Operating Supply Voltage (typ)
5V
Operating Supply Voltage (max)
5.5V
Operating Supply Voltage (min)
4.5V
Instruction Set Architecture
RISC
Operating Temp Range
-40C to 85C
Operating Temperature Classification
Industrial
Mounting
Surface Mount
Pin Count
44
Package Type
TQFP
For Use With
ATSTK524 - KIT STARTER ATMEGA32M1/MEGA32C1ATSTK600-TQFP32 - STK600 SOCKET/ADAPTER 32-TQFPATSTK600-TQFP44 - STK600 SOCKET/ADAPTER 44-TQFPATSTK600-DIP40 - STK600 SOCKET/ADAPTER 40-PDIP770-1007 - ISP 4PORT ATMEL AVR MCU SPI/JTAG770-1005 - ISP 4PORT FOR ATMEL AVR MCU JTAG770-1004 - ISP 4PORT FOR ATMEL AVR MCU SPIATAVRDRAGON - KIT DRAGON 32KB FLASH MEM AVRATAVRISP2 - PROGRAMMER AVR IN SYSTEMATJTAGICE2 - AVR ON-CHIP D-BUG SYSTEMATSTK500 - PROGRAMMER AVR STARTER KIT
Lead Free Status / RoHS Status
Lead free / RoHS Compliant
Available stocks
Company
Part Number
Manufacturer
Quantity
Price
Part Number:
ATMEGA32-16AU
Manufacturer:
ATMEL
Quantity:
20 000
Programming
Algorithm
Entering Programming
Mode
Leaving Programming
Mode
Performing Chip Erase 1. Enter JTAG instruction PROG_COMMANDS.
Programming the
Flash
2503Q–AVR–02/11
All references below of type “1a”, “1b”, and so on, refer to
1. Enter JTAG instruction AVR_RESET and shift 1 in the Reset Register.
2. Enter instruction PROG_ENABLE and shift 1010_0011_0111_0000 in the Programming
1. Enter JTAG instruction PROG_COMMANDS.
2. Disable all programming instructions by usning no operation instruction 11a.
3. Enter instruction PROG_ENABLE and shift 0000_0000_0000_0000 in the programming
4. Enter JTAG instruction AVR_RESET and shift 0 in the Reset Register.
2. Start chip erase using programming instruction 1a.
3. Poll for Chip Erase complete using programming instruction 1b, or wait for t
Before programming the Flash a Chip Erase must be performed. See
on page
1. Enter JTAG instruction PROG_COMMANDS.
2. Enable Flash write using programming instruction 2a.
3. Load address high byte using programming instruction 2b.
4. Load address low byte using programming instruction 2c.
5. Load data using programming instructions 2d, 2e and 2f.
6. Repeat steps 4 and 5 for all instruction words in the page.
7. Write the page using programming instruction 2g.
8. Poll for Flash write complete using programming instruction 2h, or wait for t
9. Repeat steps 3 to 7 until all data have been programmed.
A more efficient data transfer can be achieved using the PROG_PAGELOAD instruction:
1. Enter JTAG instruction PROG_COMMANDS.
2. Enable Flash write using programming instruction 2a.
3. Load the page address using programming instructions 2b and 2c. PCWORD (refer to
4. Enter JTAG instruction PROG_PAGELOAD.
5. Load the entire page by shifting in all instruction words in the page, starting with the LSB
6. Enter JTAG instruction PROG_COMMANDS.
7. Write the page using programming instruction 2g.
8. Poll for Flash write complete using programming instruction 2h, or wait for t
9. Repeat steps 3 to 8 until all data have been programmed.
Enable Register.
Enable Register.
to
Table 112 on page
Table 106 on page
of the first instruction in the page and ending with the MSB of the last instruction in the
page.
Table 112 on page
Table 112 on page
284.
269).
258) is used to address within one page and must be written as 0.
269).
269).
Table
116.
ATmega32(L)
“Performing Chip Erase”
WLRH_CE
WLRH
WLRH
(refer to
(refer to
(refer
284


