5.07.01 FLASHER ARM Segger Microcontroller Systems, 5.07.01 FLASHER ARM Datasheet - Page 14
5.07.01 FLASHER ARM
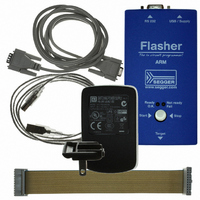
Manufacturer Part Number
5.07.01 FLASHER ARM
Description
PROGRAMMER JTAG FOR ARM CORES
Manufacturer
Segger Microcontroller Systems
Type
In-System Programmerr
Specifications of 5.07.01 FLASHER ARM
Contents
Programmer
For Use With/related Products
ARM7, ARM9, Cortex
Lead Free Status / RoHS Status
Lead free / RoHS Compliant
Other names
899-1002


14
2.1
2.1.1
2.1.1.1 Connecting the target system
2.1.1.2 Setting up Flasher ARM for stand-alone mode
Flasher ARM (UM08007)
Flasher ARM is able to boot in 3 different modes:
•
•
•
If Flasher ARM can enumerate on the USB port, Flasher ARM boots in "J-Link mode".
In this mode Flasher ARM can be used as a J-Link. When supply power is enabled and
Flasher ARM cannot enumerate, the "stand-alone mode" is started. In this mode
Flasher ARM can be used as a stand-alone flash programmer. When the Start/Stop
button is kept pressed when power supply is enabled, Flasher ARM boots in "MSD
mode". In this mode Flasher ARM boots as a mass storage device.
When you want to use Flasher ARM for the first time you need to install the J-Link
ARM related software and documentation pack. After installation, connect Flasher
ARM to the host PC via USB. For more information about how to install the J-Link
ARM related software and documentation pack please refer to the J-Link / J-Trace
User Guide, chapter Setup which can be downloaded from http://www.segger.com/
download_jlink.html.
Power-on sequence
In general, Flasher ARM should be powered on before connecting it with the target
device. That means you should first connect Flasher ARM with the host system via
USB / RS232 and then connect Flasher ARM with the target device via JTAG. Power-
on the device after you connected Flasher ARM to it. Flasher ARM will boot in "J-Link
mode".
Verifying target device connection with J-Link.exe
If the USB driver is working properly and your Flasher ARM is connected with the
host system, you may connect Flasher ARM to your target hardware. Then start the
J-Link command line tool JLink.exe, which should now display the normal Flasher
ARM related information and in addition to that it should report that it found a JTAG
target and the target’s core ID. The screenshot below shows the output of
JLink.exe.
In order to set up Flasher ARM for the "stand-alone mode" it has to be in "J-Link
mode". When the correct connection of Flasher ARM to the host PC is verified start
the J-Flash software. For more information about J-Flash, please refer to the J-Flash
Operating modes
J-Link mode
Stand-alone mode
MSD (Mass storage device) mode
J-Link mode
CHAPTER 2
© 2004-2009 SEGGER Microcontroller GmbH & Co. KG
Working with Flasher ARM
Related parts for 5.07.01 FLASHER ARM
Image
Part Number
Description
Manufacturer
Datasheet
Request
R

Part Number:
Description:
CONNECTOR JTAG-ARM ISOLATION
Manufacturer:
Segger Microcontroller Systems
Datasheet:

Part Number:
Description:
ADAPTER ARM TARGET 14PIN RIBBON
Manufacturer:
Segger Microcontroller Systems
Datasheet:

Part Number:
Description:
JTAG EMULATOR FOR ARM CORES
Manufacturer:
Segger Microcontroller Systems
Datasheet:

Part Number:
Description:
JTAG EMULATOR FOR ARM CORES
Manufacturer:
Segger Microcontroller Systems
Datasheet:

Part Number:
Description:
PROGRAMMING TOOL FOR MCU
Manufacturer:
Segger Microcontroller Systems
Datasheet:

Part Number:
Description:
PROGRAMMING TOOL FOR ST7 MCU
Manufacturer:
Segger Microcontroller Systems
Datasheet:

Part Number:
Description:
PROGRAMMING TOOL FOR STM8
Manufacturer:
Segger Microcontroller Systems
Datasheet:

Part Number:
Description:
JTAG EMULATOR USB ETHERNET ARM
Manufacturer:
Segger Microcontroller Systems
Datasheet:

Part Number:
Description:
JTAG EMULATOR ARM7/ARM9 ETM
Manufacturer:
Segger Microcontroller Systems
Datasheet:

Part Number:
Description:
EMULATOR JTAG/SWD CORTEX M3
Manufacturer:
Segger Microcontroller Systems
Datasheet: