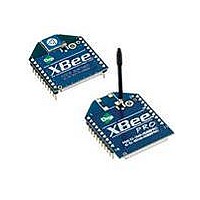
XBP09-DPSIT-156 Digi International, XBP09-DPSIT-156 Datasheet - Page 32

XBP09-DPSIT-156
Manufacturer Part Number
XBP09-DPSIT-156
Description
MODULE XBEE PRO W/RPSMA
Manufacturer
Digi International
Series
XBEE-PRO™r
Specifications of XBP09-DPSIT-156
Frequency
902MHz ~ 928MHz
Data Rate - Maximum
156kbps
Modulation Or Protocol
FHSS
Applications
ISM
Power - Output
17dBm (50mW)
Sensitivity
-100dBm
Voltage - Supply
3 V ~ 3.6 V
Current - Receiving
80mA
Current - Transmitting
210mA
Data Interface
PCB, Through Hole
Antenna Connector
RP-SMA
Operating Temperature
-40°C ~ 85°C
Package / Case
Module
Lead Free Status / RoHS Status
Lead free / RoHS Compliant
Memory Size
-
Lead Free Status / Rohs Status
Lead free / RoHS Compliant
Other names
602-1169
XBee‐PRO® 900 RF Modules
Starting a Sleeping Network
Adding a New Node to an Existing Network
By default, all new nodes operate in normal (non-sleep) mode. To start a sleeping network, follow
these steps:
1. Enable the preferred sleep coordinator option on one of the nodes and set its SM to a sleep
compatible mode (7 or 8) with its SP and ST set to a quick cycle time. The purpose of a quick cycle
time is to allow commands to be sent quickly through the network during commissioning.
2. Next, power on the new nodes within range of the sleep coordinator. The nodes will quickly
receive a sync message and synchronize themselves to the short cycle SP and ST.
3. Configure the new nodes in their desired sleep mode as cyclic sleeping nodes or sleep support
nodes.
4. Set the SP and ST values on the sleep coordinator to the desired values for the deployed
network.
5. Wait a cycle for the sleeping nodes to sync themselves to the new SP and ST values.
6. Disable the preferred sleep coordinator option bit on the sleep coordinator (unless a preferred
sleep coordinator is desired).
7. Deploy the nodes to their positions.
Alternatively, nodes can be configured with their sleep settings configured and written to flash
(using the WR command) prior to deployment. If this is the case, the commissioning button and
associate LED can be used to aid in deployment:
1. If a preferred sleep coordinator is going to be used in the network deploy it first. If there will be
no preferred sleep coordinator then select a node for deployment, power it on, and press the
commissioning button twice. This will cause the node to begin emitting sync messages.
Verify that the first node is emitting sync messages by observing its associate LED. A slow blink
indicates that the node is acting as a sleep coordinator.
2. Next, power on nodes in range of the sleep coordinator or other nodes which have synchronized
with the network. If the synchronized node is asleep it can be woken by pressing the
commissioning button once.
3. Wait a cycle for the new node to sync itself.
4. Verify that the node syncs with the network. The associate LED will blink when the module is
awake and synchronized.
5. Continue this process until all nodes have been deployed.
To add a new node to the network, the node must receive a sync message from a node in the
network. On power-up, an unsynchronized sleep compatible node will periodically send a
broadcast requesting a sync message and then sleep for its SP period. Any node in the network
which receives this message will respond with a sync. Because the network can be asleep for
extended periods of time, and as such cannot respond to requests for sync messages, there are
methods which can be used to sync a new node while the network is asleep.
1. Power the new node on within range of a sleep support node. Sleep support nodes are always
awake and will be able to respond to sync requests promptly.
2. A cyclic sleep node in the network which is asleep can be woken via the commissioning button.
Place the new node in range of the existing cyclic sleep node and wake the existing node by
holding the commissioning button for 2 seconds, or until the node wakes. The existing node stays
awake for 30 seconds and will respond to sync requests while it is awake.
If one of these methods are not used it is necessary to wait for the network to wake up before the
new node can be added. The new node should be placed in range of the network with a sleep/wake
cycle which is shorter than the wake period of the network. The new node will periodically send
sync requests until the network wakes up and it receives a sync message.
© 2009 Digi International, Inc.
32


