H7BX-A AC100-240 Omron, H7BX-A AC100-240 Datasheet - Page 9
H7BX-A AC100-240
Manufacturer Part Number
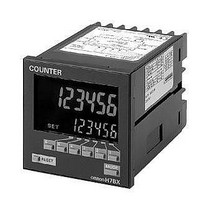
H7BX-A AC100-240
Description
1-stg 72x72 Multifunc Counter
Manufacturer
Omron
Datasheet
1.Y92A-72.pdf
(28 pages)
Specifications of H7BX-A AC100-240
Display Type
LCD Backlight
Lead Free Status / Rohs Status
Lead free / RoHS Compliant


■ Settings for Basic Operations
Note: This includes using a model with a 2-stage
Operating Procedures (Counter Function)
Note: All the pins are factory-set to OFF.
The default setting is for a 1-stage preset
counter. (For models with a 2-stage setting,
the default is for a 2-stage preset counter.)
To make changes, use the procedure shown
on the right. For details, refer to page 23.
Hold down the
for at least 1 s.
The mode will not change if the
pressed first.
1
2
3
4
5
6
7
8
After setting the DIP switch for basic operations, advanced functions (see note) can be added using the operation keys. For details,
refer to page 10.
Note: Advanced functions consist of dual count calculating mode, output 1 time, decimal point position, prescale value,
display color, and key protect level.
The ON/OFF status of the DIP switch pins
can be confirmed using the front display.
For details, refer to page 23.
setting as a 1-stage preset counter.
DIP switch settings enable/disable
Counting speed
Input mode
Output mode
One-shot output time (See note.)
Reset input signal width
NPN/PNP input mode
Caution
Using the H7BX as a Total and Preset Counter, Batch Counter, or Dual Counter
Item
Key and press the
Always turn OFF the power supply before changing the DIP switch settings.
Always turn ON pin 1 when performing settings with the DIP switch. Performing settings with the DIP switch is
disabled when pin 1 is OFF.
DIP switch setting changes will be updated when the power is turned ON. Perform the settings before performing
installation and supplying power.
Properly set the DIP switch to match the item being counted (or measured) and use the DIP switch monitor for
confirmation.
Use the keys on the front panel to perform all settings for input modes, output modes, and output times that cannot
be set with the DIP switch. For details on the setting methods, refer to page 10.
When performing these settings, always turn OFF pin 1(DIP switch setting) (disabled).
Settings for basic functions can be performed with just the DIP switch.
Up 1
Key is
NPN (no-voltage)
UP (increment)
Up 1
Disabled
Refer to the table on the right.
20 ms
30 Hz
0.5 s
OFF
Key
Configuration
selection
DOWN (decrement)
OFF
ON
Select the configuration using the
PNP (voltage)
Configuration selection mode
(1-stage preset
counter)
Enabled
0.05 s
5 kHz
1 ms
ON
1
Be sure to turn ON pin 1 when using the DIP switch.
2
(2-stage preset
counter)
3
4
5
(Total and
preset counter)
least 1 s (See note.)
6
Up
7
Key +
Key. (The configurations that can be selected depend on the model.)
Multifunction Counter
8
(Batch counter)
Pin 4
Up 1
OFF
OFF
ON
ON
Key for at
(Dual counter)
Power ON
Run mode
Pin 5
OFF
OFF
ON
ON
(Tachometer)
H7BX
Output mode
K-1
N
C
F
9
Related parts for H7BX-A AC100-240
Image
Part Number
Description
Manufacturer
Datasheet
Request
R

Part Number:
Description:
G6S-2GLow Signal Relay
Manufacturer:
Omron Corporation
Datasheet:
Part Number:
Description:
Compact, Low-cost, SSR Switching 5 to 20 A
Manufacturer:
Omron Corporation
Datasheet:
Part Number:
Description:
Manufacturer:
Omron Corporation
Datasheet:
Part Number:
Description:
Manufacturer:
Omron Corporation
Datasheet:
Part Number:
Description:
Manufacturer:
Omron Corporation
Datasheet:
Part Number:
Description:
Manufacturer:
Omron Corporation
Datasheet:
Part Number:
Description:
Manufacturer:
Omron Corporation
Datasheet:
Part Number:
Description:
Manufacturer:
Omron Corporation
Datasheet: