33000 Parallax Inc, 33000 Datasheet - Page 8
33000
Manufacturer Part Number
33000
Description
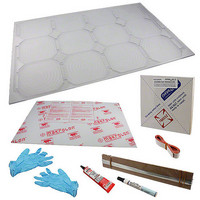
Power Management Modules & Development Tools 30W Solar Cell Kit
Manufacturer
Parallax Inc
Datasheet
1.33000.pdf
(20 pages)
Specifications of 33000
New! Us2012 Catalog Page
Solar Cells_Panels
Voltage - Output
*
Operating Temperature
*
Current Short Circuit (isc)
*
Package / Case
-
Lead Free Status / RoHS Status
Lead free / RoHS Compliant
Available stocks
Company
Part Number
Manufacturer
Quantity
Price
Company:

Part Number:
33000-0001
Manufacturer:
MOLEX
Quantity:
43 635
Company:
Part Number:
33000-0001
Manufacturer:
MOLEX
Quantity:
35 000
Company:
Part Number:
33000-0002
Manufacturer:
MOLEX
Quantity:
25 000
Company:
Part Number:
33000-0002
Manufacturer:
STARCONN
Quantity:
12 450
Company:
Part Number:
33000-0003
Manufacturer:
MOLEX
Quantity:
43 637
Part Number:
330000001
Manufacturer:
MOLEX
Quantity:
20 000
Part Number:
330000002
Manufacturer:
MOLEX
Quantity:
20 000


Do not try to pick up a cell by merely pinching one corner and lifting it like a potato chip.
One of the safest ways to pick up a cell is to gently slide it off the edge of a table into the palm of your
hand. Once the cell is in your palm, you can gently grasp it with your other hand by spanning across the
cell with your thumb and finger. Gently, ever so gently…
Gloves are provided in the kit, but using them is optional. They will prevent fingerprints on the cells, but
this is only a cosmetic issue that won’t significantly affect the panel’s power output. If you do choose to
use the gloves, your sense of touch is reduced and could result in mishandling and/or breakage of cells.
Step 7 — Preparing cells for Base Panel cavities 2,3,4,6,7,8,10,11, and 12 (refer to Figure 2)
The blocks of plywood serve two purposes. First, they prevented cell breakage during shipping and they
are now going to be used as solar cell “workbenches.” It’s critical that the platform on which you prepare
the cells is absolutely flat, firm, clean, and smooth. These “workbenches” fit the bill nicely.
The top of the cell is the “pretty” blue side with the small silver wires spread out horizontally across the
surface. The top side is “negative” and the bottom is “positive”—like a very, very flat flashlight battery.
You will notice during—and immediately after—the soldering process that the cell will “bow” or cup
upwards. This is normal. If the cell is incorrectly restrained by the tape, stress will build up and the cell
may break, especially when you try to remove the tape.
Copyright © Parallax Inc.
Soldering the tabbing wires to the cells is
the most delicate portion of the assembly
process. Move slowly and gently!
Carefully place the first cell face down on
the cell workbench. Using masking tape,
attach it as shown in Figure 14. Do not
burnish it to the cell too much, and do not
put tape anywhere else on the cell (like the
bad examples shown in Figure 15).
Only burnish the tape enough to hold the
cell in place. The tape is only used to
prevent the cell from sliding around during
the soldering process, and you want to be
able to remove it easily without risk of
breaking the cell
Incorrect tape holding methods. Incorrect taping will cause cells to break!
30 Watt Solar Panel Kit (#33000)
Figure 15
Proper tape location to hold the cell
for tabbing wire installation
Figure 14
v1.0 2/19/2010 Page 8 of 20
Related parts for 33000
Image
Part Number
Description
Manufacturer
Datasheet
Request
R


Part Number:
Description:
Microcontroller Modules & Accessories DISCONTINUED BY PARALLAX
Manufacturer:
Parallax Inc

Part Number:
Description:
BOOK UNDERSTANDING SIGNALS
Manufacturer:
Parallax Inc
Datasheet:


Part Number:
Description:
COMPETITION RING FOR SUMOBOT
Manufacturer:
Parallax Inc
Datasheet:


Part Number:
Description:
TEXT INFRARED REMOTE FOR BOE-BOT
Manufacturer:
Parallax Inc
Datasheet:
Part Number:
Description:
BOARD EXPERIMENT+LCD NX-1000
Manufacturer:
Parallax Inc
Datasheet:

Part Number:
Description:
CONTROLLER 16SERVO MOTOR CONTROL
Manufacturer:
Parallax Inc
Datasheet:

Part Number:
Description:
BASIC STAMP LOGIC ANALYZER
Manufacturer:
Parallax Inc
Datasheet:

Part Number:
Description:
IC MCU 2K FLASH 50MHZ SO-18
Manufacturer:
Parallax Inc
Datasheet: