HSC-ADC-EVALA-DC Analog Devices Inc, HSC-ADC-EVALA-DC Datasheet - Page 12
HSC-ADC-EVALA-DC
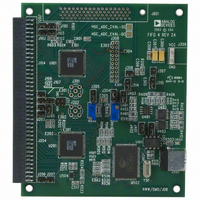
Manufacturer Part Number
HSC-ADC-EVALA-DC
Description
KIT EVAL FOR DUAL ADC/CONV
Manufacturer
Analog Devices Inc
Specifications of HSC-ADC-EVALA-DC
Lead Free Status / RoHS Status
Contains lead / RoHS non-compliant


AN-905
When you connect and move components, wires route on the
canvas automatically. If the diagram begins to look convoluted,
try reorganizing some components to force the wires to reroute.
To connect the end of an existing wire to a new node, do one of
the following:
•
•
Like physical wires, wires in VisualAnalog carry information
between components. Although it is transparent to the user in
most cases, a wire can transfer one of several different data types.
See the Data Types Overview section for more information.
ADJUSTING COMPONENT PARAMETERS
Some components have adjustable parameters. The steps that
follow show how to generate a simple waveform as input for an
ADC model and display FFT and time domain results.
1.
Click a node, drag the opposite end of the wire to another
node, and click again to connect.
Drag the selected end to another node.
In Tone Generator, set the Sample Frequency (MHz) to
105. Also, change the Samples text to 16384, by using the
drop-down arrow or entering the text manually. Update the
Use Composite Amplitude (dB) to −1 (because you are
evaluating ADC performance).
Figure 22. Sample Connections
Rev. 0 | Page 12 of 40
2.
In ADC Model, click the Settings… button and click Open
to browse for and select the AD6645_105.adc model file.
This file is located in the Models\ADC subdirectory in the
VisualAnalog path. When the model opens, the file name
appears in the Model File text box, along with information
about that model in the Properties grid (see Figure 24).
Click OK.
Figure 23. Tone Generator Settings
Related parts for HSC-ADC-EVALA-DC
Image
Part Number
Description
Manufacturer
Datasheet
Request
R

Part Number:
Description:
KIT EVAL ADC FIFO HI SPEED
Manufacturer:
Analog Devices Inc
Datasheet:

Part Number:
Description:
KIT EVAL ADC USB FIFO HI-SPEED
Manufacturer:
Analog Devices Inc
Datasheet:

Part Number:
Description:
BOARD FPGA OCTAL LVDS FOR ADC
Manufacturer:
Analog Devices Inc
Datasheet:
Part Number:
Description:
KIT EVAL FOR SINGLE CHAN HSC ADC
Manufacturer:
Analog Devices Inc

Part Number:
Description:
Data Conversion IC Development Tools Data Converter Evaluation Platform
Manufacturer:
Analog Devices
Datasheet:
Part Number:
Description:
KIT EVAL ADC USB FIFO HI-SPEED
Manufacturer:
Analog Devices Inc
Datasheet:

Part Number:
Description:
KIT EVAL ADC USB FIFO HI-SPEED
Manufacturer:
Analog Devices Inc
Datasheet:
Part Number:
Description:
KIT EVAL ADC FIFO DUAL-CH USB HS
Manufacturer:
Analog Devices Inc
Datasheet:
Part Number:
Description:
BOARD FPGA QUAD LVDS FOR ADC
Manufacturer:
Analog Devices Inc
Datasheet:
Part Number:
Description:
Adapter For AD922x Family
Manufacturer:
Analog Devices Inc
Datasheet:
Part Number:
Description:
Interposer Quad/octal ADCs
Manufacturer:
Analog Devices Inc
Datasheet:

Part Number:
Description:
±1.7g Dual-Axis IMEMS Accelerometer Evaluation Board
Manufacturer:
Analog Devices Inc
Datasheet:

Part Number:
Description:
IC MULTIPLIER ANALOG 8-SOIC T/R
Manufacturer:
Analog Devices Inc
Datasheet:
Part Number:
Description:
IC ANALOG MULTIPLIER 8-DIP
Manufacturer:
Analog Devices Inc
Datasheet: