CY8CKIT-020 Cypress Semiconductor Corp, CY8CKIT-020 Datasheet - Page 9
CY8CKIT-020
Manufacturer Part Number
CY8CKIT-020
Description
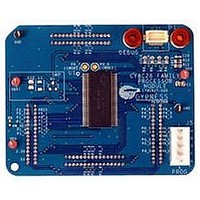
KIT PSOC CY8C28 FAMILY PROCESSOR
Manufacturer
Cypress Semiconductor Corp
Series
PSoC®r
Type
MCUr
Specifications of CY8CKIT-020
Contents
Board, Software and Documentation
Silicon Manufacturer
Cypress
Core Architecture
PSoC
Features
Programmable System-on-chip Design Methodology And Architecture
Kit Contents
PSoC CY8C28 Module, Doc, CD
Silicon Core Number
CY8C28
Silicon Family Name
PSoC
Rohs Compliant
Yes
Lead Free Status / RoHS Status
Lead free / RoHS Compliant
For Use With/related Products
CY8C28 Family
Lead Free Status / Rohs Status
Supplier Unconfirmed
Other names
428-3036


2.1
2.1.1
CY8CKIT-020 PSoC Development Kit Guide, Doc. # 001-56971 Rev. **
2.
Loading My First PSoC Project
The CY8CKIT-020 PSoC Development Kit supports projects across the CY8C28 family architec-
tures. This section walks you through the high level design process for opening, building, program-
ming, and running your first PSoC projects using this kit.
To begin with be sure you have the CY8CKIT-001 and the CY8CKIT-020 kit. Follow each of these
steps to make certain that your software and hardware environments are properly configured and
ready for these projects:
1. Install PSoC Designer using the steps listed in
2. Connect the MiniProg3 into your PC using the supplied USB cable. When you connect the
3. Configure the PSoC Development Board (jumper settings and switches) in its default configura-
4. Use the PSoC CY8C28 Family Processor Module for the PSoC 1 version of your first PSoC
5. For a PSoC 1 project, use the ISSP header on the PSoC CY8C28 Family Processor Module and
6. Power the PSoC Development Board using the 12V AC Power Adapter
My First PSoC 1 Project
This is a simple PSoC 1 project using a PWM peripheral inside PSoC, and software to control the
blinking rates of two different LED outputs. For this project, be sure you have the PSoC CY8C28
Family Processor Module inserted into the PSoC Development Board and the appropriate software
installed. This section walks you through the high level steps of opening, building, and programming
a project.
Loading My First PSoC 1 Project
1. Open PSoC Designer.
2. In the Start Page, navigate to File
3. Navigate to the project directory
4. Open the folder Ex1_LED_with_PWM.
5. Double click Ex1_LED_with_PWM.app.
6. The project opens in the Chip Editor view. All the project files are in the Workspace Explorer.
page
MiniProg3, Microsoft Windows
were installed as part of the PSoC Programmer installation process; however, if Windows opens
the driver installation dialog boxes, accept the defaults and allow Windows to automatically find
the appropriate driver.
tion, as described in
project
connect the MiniProg3 ISSP port.
C:\Cypress\CY8CKIT-001\CY8C28 Projects\
6.
(My First PSoC 1 Project on page
Default Switch and Jumper Settings on page
®
may indicate that it has found new hardware. All required drivers
Open Project/Workspace
9).
Installing PSoC 1 Development Software on
7.
9
Related parts for CY8CKIT-020
Image
Part Number
Description
Manufacturer
Datasheet
Request
R

Part Number:
Description:
KIT DEV FOR PSOC3/5
Manufacturer:
Cypress Semiconductor Corp
Datasheet:

Part Number:
Description:
PSoC1/3/5 Development Kit
Manufacturer:
Cypress Semiconductor Corp
Datasheet:

Part Number:
Description:
KIT DEV PSOC PROC MODULE CY8C38
Manufacturer:
Cypress Semiconductor Corp

Part Number:
Description:
KIT DEV PSOC PROC MODULE CY8C29
Manufacturer:
Cypress Semiconductor Corp

Part Number:
Description:
KIT DEV PSOC ANALOG VOLTMETER
Manufacturer:
Cypress Semiconductor Corp
Datasheet:

Part Number:
Description:
KIT DEV PSOC5 FIRST TOUCH
Manufacturer:
Cypress Semiconductor Corp
Datasheet:

Part Number:
Description:
KIT DEV PSOC3 FIRSTTOUCH STARTER
Manufacturer:
Cypress Semiconductor Corp
Datasheet:
Part Number:
Description:
KIT DEV PROC MODULE PSOC5
Manufacturer:
Cypress Semiconductor Corp
Datasheet:

Part Number:
Description:
KIT PSOC MINIPROG3 PROGRAM DEBUG
Manufacturer:
Cypress Semiconductor Corp
Datasheet:

Part Number:
Description:
DEV KIT PSOC 5 CY8C55
Manufacturer:
Cypress Semiconductor Corp
Datasheet:

Part Number:
Description:
KIT EVAL POWERLINE HIGH VOLT
Manufacturer:
Cypress Semiconductor Corp
Datasheet:

Part Number:
Description:
KIT PSOC FIRST TOUCH
Manufacturer:
Cypress Semiconductor Corp
Datasheet:

Part Number:
Description:
EVAL KIT WORLDTOUR2
Manufacturer:
Cypress Semiconductor Corp
Datasheet:

Part Number:
Description:
KIT UNIVERSAL CAPSENSE CTRLR
Manufacturer:
Cypress Semiconductor Corp
Datasheet: