11730D AGILENT TECHNOLOGIES, 11730D Datasheet - Page 132
11730D
Manufacturer Part Number
11730D
Description
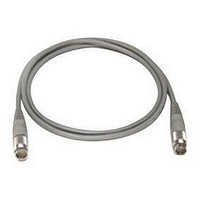
SENSOR CABLE, 50FT
Manufacturer
AGILENT TECHNOLOGIES
Datasheet
1.11730D.pdf
(234 pages)
Specifications of 11730D
Leaded Process Compatible
No
Peak Reflow Compatible (260 C)
No
Cable Length
50ft
Features
Reduces RFI Effect On Low Power Readings With Improved Shielding Design
Cable Assembly Type
Sensor
Cable Color
Gray
Rohs Compliant
No
For Use With
8480 & E-Series Power Sensors
Lead Free Status / RoHS Status
Contains lead / RoHS non-compliant


In Figure 5, an active device, such as an amplifier, is inserted into
a signal path presenting a unique problem. A single transfer switch
has the undesirable characteristic of shunting the output of the
amplifier to its input when the signal is bypassing the amplifier.
The advantage of using two transfer switches is that an additional
signal path is available, however two SPDT switches can also be
used. This additional path can utilize the same amplifier when the
original path is bypassed.
Figure 5. Bypassing an active device
Driving the switch
There are two positions for the Agilent 87222C/D/E transfer
switch. See Table A on page 123. Position A has RF Port 1
connected to RF Port 2 and RF Port 3 connected to RF Port 4.
Position B has RF Port 2 connected to RF Port 3 and RF Port 1
connected to RF Port 4. The switch can be driven with a standard
grounding drive control with or without a separate ground. Single
line or dual line TTL control are also available. The switch operates
in a break-before-make mode.
Caution 11713A switch driver users: Do not drive the 87222C/D/E
using the S9 or S0 outputs from either the banana-plug outputs or
the Viking connectors located on the rear panel of the 11713A.
J1
J2
Switch #1
Switch #1
Position A
Position A
Position B
Position B
Switch states
Position B
Position A
Position A
Position B
Switch #2
J1
J2
J2
J1
Signal paths
J3
J3
J3
J3
J2
J1
J1
J2
J4
J4
J4
J4
Switch #2
J3
J4
(I) Standard drive:
See Figure 6 on page 123 for drive connection diagrams.
• Connect Pin 1 to supply (+20 VDC to +32 VDC)
• Connect Pin 9 to ground (see note 1)
• Select position “A” by applying ground to Pin 3 (see note 3)
• Select position “B” by applying ground to pin 5 (see note 3)
(II) Single line TTL drive:
See Figure 6 on page 123 for drive connection diagrams.
See Figure 7 on page 123 for TTL voltage states.
• Connect Pin 1 to supply (+20 VDC to +32 VDC)
• Connect Pin 9 to ground (see notes 2, 4)
• Connect Pin 8 to TTL “High”
• Select position “A” by applying TTL “High” to pin 7 (see note 3)
• Select position “B” by applying TTL “Low” to pin 7 (see note 3)
(III) Dual line TTL drive:
See Figure 6 on page 123 for drive connection diagrams.
See Figure 7 on page 123 for TTL voltage states.
• Connect Pin 1 to supply (+20 VDC to +32 VDC)
• Connect Pin 9 to ground (see notes 2, 4)
• Select position “A” by applying TTL “High” to pin 7 and TTL
• Select Position “B” by applying TTL “Low” to pin 7 and TTL
Notes:
1. Pin 9 does not need to be grounded for the switch to operate in standard drive
2. For TTL drive, pin 9 must be grounded.
3. After the RF path is switched and latched, the drive current is interrupted by
4. In addition to the quiescent current supplying the electronic position-sensing
“Low” to pin 8 (see note 3)
“High” to pin 8 (see note 3)
mode. If pin 9 is not grounded, the position indicators will only function while
the appropriate drive has ground applied. Therefore, if a pulse drive is used and
continuous indicator operation is required, pin 9 must be grounded.
the electronic position-sensing circuitry. Pulsed control is not necessary, but if
implemented, the pulse width must be 15 ms minimum to ensure that the
switch is fully latched.
circuitry, the drive current flows out of pin 9 (during switching) when using TTL
drive.
High Performance Transfer Switch (continued)
www.agilent.com/find/mta
Switches
121
15
Related parts for 11730D
Image
Part Number
Description
Manufacturer
Datasheet
Request
R

Part Number:
Description:
Agilent Tachyon DX4+ (HPFC-5700) Dual-Channel 4-Gb Fibre Channel Controller With The Data Integrity Field (DIF) Feature
Manufacturer:
Agilent Technologies, Inc.
Part Number:
Description:
Manufacturer:
Agilent Technologies, Inc.
Datasheet:
Part Number:
Description:
Manufacturer:
Agilent Technologies, Inc.
Datasheet:
Part Number:
Description:
Manufacturer:
Agilent Technologies, Inc.
Datasheet:
Part Number:
Description:
Manufacturer:
Agilent Technologies, Inc.
Datasheet:
Part Number:
Description:
Manufacturer:
Agilent Technologies, Inc.
Datasheet:
Part Number:
Description:
Manufacturer:
Agilent Technologies, Inc.
Datasheet:
Part Number:
Description:
Manufacturer:
Agilent Technologies, Inc.
Datasheet:
Part Number:
Description:
Manufacturer:
Agilent Technologies, Inc.
Datasheet:
Part Number:
Description:
Manufacturer:
Agilent Technologies, Inc.
Datasheet:
Part Number:
Description:
Manufacturer:
Agilent Technologies, Inc.
Datasheet:
Part Number:
Description:
Manufacturer:
Agilent Technologies, Inc.
Datasheet:
Part Number:
Description:
1.0625 GBd Fibre Channel 10x10 mm QFP Transceiver Chip (Recommend HDMP-1636A for new designs)
Manufacturer:
Agilent Technologies, Inc.
Datasheet:
Part Number:
Description:
Manufacturer:
Agilent Technologies, Inc.
Datasheet:
Part Number:
Description:
1.0625-2.125 GBd Serdes Circuits: SSTL_2
Manufacturer:
Agilent Technologies, Inc.
Datasheet: