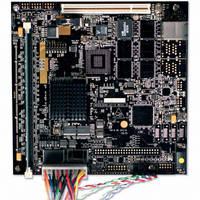
MPC8349E-MDS-PBE Freescale Semiconductor, MPC8349E-MDS-PBE Datasheet - Page 6

MPC8349E-MDS-PBE
Manufacturer Part Number
MPC8349E-MDS-PBE
Description
KIT MODULAR DEV SYSTEM MPC8349E
Manufacturer
Freescale Semiconductor
Datasheet
1.MPC8349EA-MDS-PB.pdf
(8 pages)
Specifications of MPC8349E-MDS-PBE
Lead Free Status / RoHS Status
Lead free / RoHS Compliant
Step 4: Assemble and connect the
1. Connect the AC/DC power supply
2. Plug the power cable into the wall
Step 5: Initial board power up.
Step 6: Connect the JTAG connectivity
The JTAG connectivity unit (included as
part of the CodeWarrior SW kit) lets
CodeWarrior SW work with the board.
6
Note! Move the power switch to OFF.
Assemble the AC/DC power supply kit:
Note! To prevent damage to the JTAG
1. Move the power switch to ON—
2. Check for completion of the reset
3. Shut off the power—move the power
1. Connect the JTAG connectivity unit to
2. Move the power switch to ON.
3. Check for completion of the reset
4. Continue as per the instructions in
• power cable with country-specific
• power supply unit and cable with
cable with jack to the board.
outlet.
LED13 displays green light.
sequence—indicated by a single
flash of LED1 (green) and LED2
(red). The location of LED1 and
LED2 is marked on the Step 7 image.
switch to OFF.
the JTAG/COP 14-pin connector.
sequence (see Step 5, part 2).
the CodeWarrior SW Quick Start (in
progress).
connectivity unit (part of the
CodeWarrior SW kit) connect the
unit only after initial board reset.
wall outlet plug
jack (for board connection)
power supply kit.
unit to the board.
MPC8349E MDS Processor Board HW Getting Started Guide
ON/OFF switch
ON/OFF switch
JTAG/COP 14-pin connector
AC/DC power supply
connector and cable


