A16-1NRN Omron, A16-1NRN Datasheet - Page 18
A16-1NRN
Manufacturer Part Number
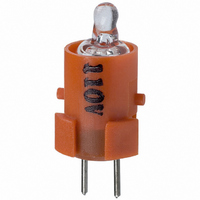
A16-1NRN
Description
NEON LAMP 110V RED FOR A16
Manufacturer
Omron
Type
Neon Lamp, 110 VoltsACr
Series
A16r
Datasheets
1.M2DA-7001.pdf
(265 pages)
2.A16-1NRN.pdf
(30 pages)
3.A16-2.pdf
(27 pages)
4.A165-CAA.pdf
(17 pages)
Specifications of A16-1NRN
Accessory Type
Neon Lamp Replacement
Supply Voltage
110V
Base Type
Bi-Pin
Colour
Red
Current Rating
1.5mA
Svhc
No SVHC (15-Dec-2010)
Illumination Colour
Red
Operating Lifetime
10000h
Voltage Rating Vac
110V
Average Bulb Life
1000
Color
Red
Illumination
Illuminated
Height
13 mm
Illumination Color
Red
Mounting Style
Snap In
Termination Style
Tabs
Lamp Base Type
Bi-Pin
Rohs Compliant
Yes
Lead Free Status / RoHS Status
Lead free / RoHS Compliant
For Use With/related Products
A16 Series
For Use With
Z1397 - SWTCH KNOB RND 3POS DPDT ILL REDZ1394 - SWTCH KNOB RND 2POS SPDT ILL REDZ1391 - SWTCH KNOB RND 2POS SPDT ILL REDZ1385 - SWITCH KNB RECT 3POS DPDT ILLZ1382 - SWITCH KNB RECT 2POS SPDT ILLZ1379 - SWITCH KNB RECT 2POS SPDT ILLZ1373 - SWITCH KNOB SQ 3-POS DPDT ILLZ1370 - SWITCH KNOB SQ 2-POS SPDT ILLZ1367 - SWITCH KNOB SQ 2-POS SPDT ILLZ1309 - SWITCH PB RND MOM DPDT ILLUM REDZ1305 - SWITCH PB RECT MOM DPDT ILLUMZ1301 - SWITCH PB SQ MOM DPDT ILLUM RED
Lead Free Status / Rohs Status
Lead free / RoHS Compliant
Other names
A161NRN
Z1342
Z1342


Technical Information
Do not apply contact protective circuits as shown below.
Switching a DC inductive load is usually more difficult than switching
a resistive load. By using an appropriate contact protective circuit,
however, switching a DC inductive load will be as easy as switching
a resistive load.
Switching
•
•
•
•
•
•
Mechanical Conditions
Operating Force and Operating Method
•
16
Incorrect
Incorrect
Incorrect
Power
supply
Power
supply
Do not use the Switch for loads that exceed the rated switching
capacity or other contact ratings. Doing so may result in contact
weld, contact separation failures, or insulation failures.
Furthermore, the Switch may be broken or damaged.
Do not touch the charged switch terminals while power is
supplied, otherwise an electric shock may be received.
The life of the Switch varies greatly with switching conditions.
Before using the Switch, be sure to test the Switch under actual
conditions. Make sure that the number of switching operations is
within the permissible range.
If a deteriorated Switch is used continuously, insulation failures,
contact weld, contact failures, switch damage, or switch burnout
may result.
Do not apply excessive or incorrect voltages to the Switch or
incorrectly wire the terminals. Otherwise, the Switch may not
function properly and have an adverse effect on external
circuitry. Furthermore, the Switch itself may become damaged or
burnt.
Do not use the Switch in locations where flammable or explosive
gases are present. Otherwise switching arcs or heat radiation
may cause a fire or explosion.
Do not drop or disassemble the Switch, otherwise it may not be
capable of full performance. Furthermore, it may be broken or
burnt.
Fingertip operation is an important feature of Pushbutton
Switches. In terms of Switch operation, Pushbutton Switches
differ greatly from detection switches such as Microswitches.
Operating the Switch using a hard object (e.g., metal), or with a
large or sudden force, may deform or damage the Switch,
resulting in faulty or rough operation, or shortening of the Switch
life. The strength varies with the size and construction of the
Switch. Use the appropriate Switch for the application after
confirming the operating method and operating force with this
catalog.
Load
Load
This circuit effectively suppresses arcs
when the contacts are OFF. The capacitor
will be charged, however, when the
contacts are OFF. Consequently, when the
contacts are ON again, short-circuited
current from the capacitance may cause
contact weld.
This circuit effectively suppresses arcs
when the contacts are OFF. When the
contacts are ON again, however, charge
current will flow to the capacitor, which may
result in contact weld.
•
Mounting
•
•
•
Snap-in Mounting
The pushbutton surface is composed of resin. Therefore, do not
attempt to operate the pushbutton using a sharp object, such as
a screwdriver or a pair of tweezers. Doing so may damage or
deform the pushbutton surface and result in faulty operation.
Switches can be broadly divided into two categories according to
mounting method: panel-mounting models and PCB-mounting
models. Use the appropriate model for the mounting method
required. Basically, panel-mounting Switches can withstand a
greater operating force than PCB-mounting Switches. If,
however, the panel thickness or the panel-cutout dimensions are
not suitable for the Switch, it may not be able to withstand the
normal operating force. With continuous mounting in particular,
select a panel of a thickness that is easily sufficient to withstand
the total operating force.
Panel-mounting Switches can be divided into two categories
according to the mounting method: snap-in mounting models
and screw-mounting models. Snap-in mounting Switches are
held in place with the elasticity of resin or a metal leaf spring. Do
not attempt to modify the spring after mounting. Doing so may
result in faulty operation or damage the mounting structure.
Mount screw-mounting models using the screws and nuts
provided (or individually specified). Tighten the screws to the
specified torque. Mounting with different screws or nuts, or
tightening beyond the specified torque may result in distortion of
the inside of the case or damage to the screw section.
Subjecting the Switch to severe vibrations or shock may result in
faulty operation or damage. Also, many of the Switches are
Incorrect
Tweezers
Do not attempt to
modify the spring
after mounting.
Incorrect
Technical Information
Screw Mounting
Hammer
Do not use
sharp objects.
Do not apply
excessive or
sudden force.
Screwdriver
Use the
screws and
nuts provided
(or specified).
Related parts for A16-1NRN
Image
Part Number
Description
Manufacturer
Datasheet
Request
R

Part Number:
Description:
SWITCH PB SQUARE MOM SPDT GREEN
Manufacturer:
Omron
Datasheet:

Part Number:
Description:
SWITCH PB SQUARE MOM SPDT WHITE
Manufacturer:
Omron
Datasheet:
Part Number:
Description:
SWITCH PB SQUARE MOM SPDT YELLOW
Manufacturer:
Omron
Datasheet:
Part Number:
Description:
SWITCH PB RECTANG MOM SPDT BLUE
Manufacturer:
Omron
Datasheet:
Part Number:
Description:
SWITCH PB RECTANG MOM SPDT YEL
Manufacturer:
Omron
Datasheet:
Part Number:
Description:
SWITCH PB SQUARE MOM SPDT BLUE
Manufacturer:
Omron
Datasheet:
Part Number:
Description:
SWITCH PB SQUARE MOM SPDT RED
Manufacturer:
Omron
Datasheet:
Part Number:
Description:
SWITCH PB RECTANG MOM SPDT GREEN
Manufacturer:
Omron
Datasheet:
Part Number:
Description:
SWITCH PB RECTANG MOM SPDT RED
Manufacturer:
Omron
Datasheet:

Part Number:
Description:
SWITCH PB RECTANG MOM SPDT WHITE
Manufacturer:
Omron
Datasheet:
Part Number:
Description:
SWITCH PB ROUND MOM SPDT BLUE
Manufacturer:
Omron
Datasheet:
Part Number:
Description:
SWITCH PB ROUND MOM SPDT GREEN
Manufacturer:
Omron
Datasheet:
Part Number:
Description:
SWITCH PB ROUND MOM SPDT RED
Manufacturer:
Omron
Datasheet:
Part Number:
Description:
SWITCH PB ROUND MOM SPDT WHITE
Manufacturer:
Omron
Datasheet:
Part Number:
Description:
SWITCH PB ROUND MOM SPDT YELLOW
Manufacturer:
Omron
Datasheet: