9946 3M, 9946 Datasheet - Page 5
9946
Manufacturer Part Number
9946
Description
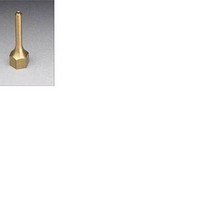
Soldering Tools .072 HOT MELT TIP SCOTCH WELD 3PC BAG
Manufacturer
3M
Type
Brass Extension Tipr
Datasheet
1.9946.pdf
(26 pages)
Specifications of 9946
Tip Size
0.072 mm
Product
Soldering Tips
Lead Free Status / Rohs Status
Lead free / RoHS Compliant
Other names
021200-22040
Available stocks
Company
Part Number
Manufacturer
Quantity
Price
Company:

Part Number:
994684-3
Manufacturer:
TE/AMP
Quantity:
30 000


Setup and Installation
1. Remove the 3M™
2. Connect Air and Electrical
Grounding Instructions
The 3M Scotch-Weld Hot Melt Applicator PG II LT
must be grounded. If it should malfunction or break
down, grounding provides a path of least resistance
for electric current to help reduce the risk of
electrical shock. This applicator is equipped with a
cord having an equipment-grounding conductor and
grouding plug. This plug must be used with
appropriate outles that are properly installed and
grounded in accordance with all local codes and
ordinances.
The 3M Scotch-Weld Hot Melt Applicator PG II LT
is designed for use on a nominal 120-volt circuit and
has a grounding plug as shown in illustration above.
Make sure the applicator is connected to an outlet
having the same configuration as the plug. No
adaptor should be used.
3
Scotch-Weld™ Hot Melt
Applicator PG II LT from its
shipper and inspect for obvious
damage.
Service
Select a work station where 120 VAC grounded
receptacle and compressed air service are
available.
Do not modify the plug provided with the 3M
Scotch-Weld Hot Melt Applicator PG II LT.
Improper grounding connection of the plug may
cause electrical shock. Check with a qualified
electrician or service person to determine whether
the plug is properly grounded.
Electrical outlet should be as close to air supply
as possible. Filtered air regulated to 80 psi
maximum is vital to optimum operation.
Do not connect 3M Scotch-Weld Hot Melt
Applicator PG II LT to air supply with air
pressure greater than 80 psi. Damage to the
applicator may result.
Refer to step 3 on page 4 for air filter and
regulator installation procedure.
Connect air hose using two 1/2’’ open-end
wrenches. Remove the steel swivel portion of the
connector and insert the steel swivel into 1/8’’
female pipe thread air source. Insert and tighten
the brass fitting into the swivel and snug up all
fittings.
!
!
Important
Danger
© 3M 2006