MPC8313EVRAFFB Freescale Semiconductor, MPC8313EVRAFFB Datasheet - Page 92
MPC8313EVRAFFB
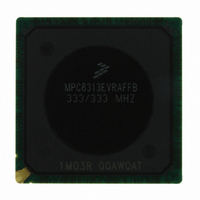
Manufacturer Part Number
MPC8313EVRAFFB
Description
IC MPU POWERQUICC II PRO 516PBGA
Manufacturer
Freescale Semiconductor
Datasheet
1.MPC8313CZQAFFB.pdf
(100 pages)
Specifications of MPC8313EVRAFFB
Processor Type
MPC83xx PowerQUICC II Pro 32-Bit
Speed
333MHz
Voltage
0.95 V ~ 1.05 V
Mounting Type
Surface Mount
Package / Case
516-PBGA
Processor Series
MPC8xxx
Core
e300
Data Bus Width
32 bit
Development Tools By Supplier
MPC8313E-RDB
Maximum Clock Frequency
400 MHz
Operating Supply Voltage
- 0.3 V to + 1.26 V
Maximum Operating Temperature
+ 105 C
Mounting Style
SMD/SMT
Data Ram Size
16 KB
I/o Voltage
2.5 V
Interface Type
I2C, SPI, UART
Minimum Operating Temperature
- 40 C
Program Memory Type
EEPROM/Flash
For Use With
MPC8313E-RDB - BOARD PROCESSOR
Lead Free Status / RoHS Status
Lead free / RoHS Compliant
Features
-
Lead Free Status / Rohs Status
Lead free / RoHS Compliant
Available stocks
Company
Part Number
Manufacturer
Quantity
Price
Company:

Part Number:
MPC8313EVRAFFB
Manufacturer:
FREESCAL
Quantity:
150
Company:
Part Number:
MPC8313EVRAFFB
Manufacturer:
Freescale Semiconductor
Quantity:
10 000


System Design Information
22.8
Pull-Up Resistor Requirements
The MPC8313E requires high resistance pull-up resistors (10 kΩ is recommended) on open drain type pins
2
including I
C, Ethernet management MDIO, and IPIC (integrated programmable interrupt controller).
Correct operation of the JTAG interface requires configuration of a group of system control pins as
demonstrated in
Figure
61. Care must be taken to ensure that these pins are maintained at a valid deasserted
state under normal operating conditions because most have asynchronous behavior and spurious assertion,
which give unpredictable results.
Refer to the PCI 2.2 Specification, for all pull-ups required for PCI.
22.9
JTAG Configuration Signals
Boundary scan testing is enabled through the JTAG interface signals. The TRST signal is optional in
IEEE 1149.1, but is provided on any Freescale devices that are built on Power Architecture technology.
The device requires TRST to be asserted during reset conditions to ensure the JTAG boundary logic does
not interfere with normal chip operation. While it is possible to force the TAP controller to the reset state
using only the TCK and TMS signals, systems generally assert TRST during power-on reset. Because the
JTAG interface is also used for accessing the common on-chip processor (COP) function, simply tying
TRST to PORESET is not practical.
The COP function of these processors allows a remote computer system (typically, a PC with dedicated
hardware and debugging software) to access and control the internal operations of the processor. The COP
interface connects primarily through the JTAG port of the processor, with some additional status
monitoring signals. The COP port requires the ability to independently assert TRST without causing
PORESET. If the target system has independent reset sources, such as voltage monitors, watchdog timers,
power supply failures, or push-button switches, then the COP reset signals must be merged into these
signals with logic.
The arrangement shown in
Figure 61
allows the COP to independently assert HRESET or TRST, while
ensuring that the target can drive HRESET as well. If the JTAG interface and COP header are not used,
TRST should be tied to PORESET so that it is asserted when the system reset signal (PORESET) is
asserted.
The COP header shown in
Figure 61
adds many benefits—breakpoints, watchpoints, register and memory
examination/modification, and other standard debugger features are possible through this interface—and
can be as inexpensive as an unpopulated footprint for a header to be added when needed.
The COP interface has a standard header for connection to the target system, based on the 0.025"
square-post, 0.100" centered header assembly (often called a Berg header).
There is no standardized way to number the COP header shown in
Figure
61; consequently, many different
pin numbers have been observed from emulator vendors. Some are numbered top-to-bottom then
left-to-right, while others use left-to-right then top-to-bottom, while still others number the pins counter
clockwise from pin 1 (as with an IC). Regardless of the numbering, the signal placement recommended in
Figure 61
is common to all known emulators.
™
MPC8313E PowerQUICC
II Pro Processor Hardware Specifications, Rev. 3
92
Freescale Semiconductor
Related parts for MPC8313EVRAFFB
Image
Part Number
Description
Manufacturer
Datasheet
Request
R

Part Number:
Description:
Mpc8313e Powerquicc Ii Pro Processor
Manufacturer:
Freescale Semiconductor, Inc
Datasheet:

Part Number:
Description:
BOARD PROCESSOR
Manufacturer:
Freescale Semiconductor
Datasheet:

Part Number:
Description:
BOARD CPU 8313E VER 2.1
Manufacturer:
Freescale Semiconductor
Datasheet:

Part Number:
Description:
BOARD CPU 8313E VER 2.2
Manufacturer:
Freescale Semiconductor
Datasheet:
Part Number:
Description:
Microprocessors - MPU 8313 REV2.2 PB ENC EXT
Manufacturer:
Freescale Semiconductor
Datasheet:
Part Number:
Description:
Microprocessors - MPU 8313 REV2.2 PB W/ENC
Manufacturer:
Freescale Semiconductor
Datasheet:
Part Number:
Description:
Manufacturer:
Freescale Semiconductor, Inc
Datasheet:
Part Number:
Description:
Manufacturer:
Freescale Semiconductor, Inc
Datasheet:
Part Number:
Description:
Manufacturer:
Freescale Semiconductor, Inc
Datasheet:
Part Number:
Description:
Manufacturer:
Freescale Semiconductor, Inc
Datasheet:
Part Number:
Description:
Manufacturer:
Freescale Semiconductor, Inc
Datasheet:
Part Number:
Description:
Manufacturer:
Freescale Semiconductor, Inc
Datasheet:
Part Number:
Description:
Manufacturer:
Freescale Semiconductor, Inc
Datasheet:
Part Number:
Description:
Manufacturer:
Freescale Semiconductor, Inc
Datasheet:
Part Number:
Description:
Manufacturer:
Freescale Semiconductor, Inc
Datasheet: