P0349 Terasic Technologies Inc, P0349 Datasheet
P0349
Specifications of P0349


Related parts for P0349


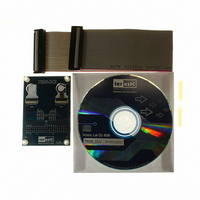
P0349 Summary of contents
Page 1
Terasic TRDB_DC2 Digital Camera Package 1.3Mega Pixel Digital Camera Development Kit Frame grabber with VGA display reference design For Altera DE2/DE1 and Terasic T-Rex C1 Boards TRDB_DC2 Preliminary Version TRDB_DC2 Document Version 1.2 OCT. 17, 2006 by Terasic © 2006 ...
Page 2
Terasic TRDB_DC2 Page Index CHAPTER 1 ABOUT THE KIT ...................................................................................................................................... 1 1 ........................................................................................................................................................ 1 IT ONTENTS 1 ......................................................................................................................................... 2 SSEMBLE THE AMERA 1 ........................................................................................................................................................ 4 ETTING ELP CHAPTER 2 TRDB_DC2 ............................................................................................................................................... 5 2-1 F ...
Page 3
Chapter 1 The TRDB_DC2 Kit provides everything you need to develop a 1.3Mega Pixel Digital Camera on the Altera DE2/DE1 and Terasic TREX C1 boards (TR1). The kit contains hardware design (in Verilog) and software to load the picture taken ...
Page 4
Assemble the Camera 1-2 Please follow the four steps below to assemble your camera: 1. For Altera DE2/DE1 board users, assemble the CMOS sensor lens into the st 1 Sensor Connector (Sensor1-U1) on the DC2 board, as shown in Figure ...
Page 5
Figure 1.4 Connect the other end of IDE cable to the DE2/DE1 board’s expansion port (outermost port). Figure 1.5 Connect the other end of the IDE cable to the TREX C1’s expansion port (outermost). 3 About the Kit ...
Page 6
Getting Help 1-3 Here are some places to get help if you encounter any problem: Email to support@terasic.com Taiwan & China: +886-3-550-8800 Korea : +82-2-512-7661 Japan: +81-428-77-7000 English Support Line: +1-408-512-1336 4 About the Kit ...
Page 7
Chapter 2 This chapter will illustrate the technical details users need to know to modify the reference design for their own purpose. The DC2 kit is designed using the same strict design and layout practices used in high-end consumer products. ...
Page 8
Schematic of the Board 2-2 Figure 2.1. Schematic of the TRDB_DC2 6 TRDB_DC2 ...
Page 9
Pin Description of the 40-pin Interface of TRDB_DC2 2-3 The TRDB_DC2 has a 40-pin connector on the back of the board. The pin description of the 40-pin connector follows: Pin Numbers ...
Page 10
Chapter 3 Digital Camera Design This chapter illustrates how to exercise the digital camera reference design provided with the kit. Users can follow the instructions in this chapter to build a 1.3Mega Pixel camera using their DE2/DE1/TREX- mins. ...
Page 11
Configuring the Camera (DE2 Board Users) 3-2 Locate the project directory from the CD-ROM included and follow the steps below: Quartus II Project Directory: DE2_CCD FPGA Bitstream Used: DE2_CCD.sof or DE2_CCD.pof 1. Ensure the connection is made correctly as shown ...
Page 12
Digital Camera Design Demonstration Figure 3.2. The Connection Setup for DE2 users 10 ...
Page 13
Configuring the Camera 3-3 (DE1 Board / Altera Cyclone II Starter Kit Users) Locate the project directory from the CD-ROM included and follow the steps below VGA Monitor is used for displaying image. Quartus II Project Directory: DE1_CCD ...
Page 14
Component KEY[0] KEY[1] KEY[2] KEY[3] SW[9:0] LEDG[8:0] HEX[3:0] Figure 3.3. The Connection Setup for DE1 users (DC2 module is connected to 12 Digital Camera Design Demonstration Function Description Reset circuit Set the new exposure time (load the binary value defined ...
Page 15
Configuring the Camera (TREX C1 Board Users) 3-4 Locate the project directory from the CD-ROM included and follow the steps below: Quartus II Project Directory: TR1_CCD FPGA Bitstream Used: TR1_CCD.sof or TR1_CCD.pof 1. Ensure the connection is made correctly as ...
Page 16
Digital Camera Design Demonstration Figure 3.4. The Connection Setup for TR1 users 14 ...
Page 17
Load the Image Captured to your PC 3-5 The TRDB_DC2 package also provides users a software tool for uploading the image taken to your PC and save the data as a bitmap file. Follow the steps below to exercise this ...
Page 18
Execute the Control Panel application software. 6. Switch to SDRAM page; load the SDRAM content to a file starting from address 2800H and length is 96000H. Please save the result to a file filename_GB.DAT. You can change the filename ...
Page 19
You can see the image captured shown in your windows. 14. Click on the “Save Bitmap” button to save this bitmap file in your computer. Block Diagram of the Reference Design 3-6 The complete reference design is also located ...
Page 20
Chapter 4 Date JAN 20, 2006 JAN 25, 2006 MAR 29, 2006 OCT. 17, 2006 Always Visit TRDB_DC2 Webpage for New Applications 4-2 We will be continuing providing interesting examples and labs on our TRDB_DC2 webpage. Please visit Chapter 4 ...