SDM-USB-QS-S_ Linx Technologies Inc, SDM-USB-QS-S_ Datasheet - Page 5
SDM-USB-QS-S_
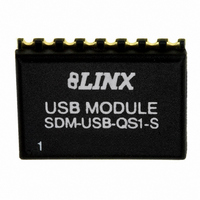
Manufacturer Part Number
SDM-USB-QS-S_
Description
MODULE USB LOW SPEED
Manufacturer
Linx Technologies Inc
Series
QSr
Datasheet
1.SDM-USB-QS-S_.pdf
(7 pages)
Specifications of SDM-USB-QS-S_
Applications
USB, Peripherals
Interface
Parallel/Serial
Voltage - Supply
4.35 V ~ 5.25 V
Package / Case
16-SMD Module
Mounting Type
Surface Mount
Lead Free Status / RoHS Status
Lead free / RoHS Compliant
Other names
SDM-USB-QS-S
SDM-USB-QS-S
SDM-USB-QS1-S
SDM-USB-QS-S
SDM-USB-QS1-S


POWER SUPPLY GUIDELINES
Figure 8: USB Bus-Powered Schematic
CHANGING THE DEVICE DESCRIPTORS
Page 8
The USB module can be powered in two ways: from the USB bus or from an
external source. If necessary, a voltage regulator can be used to supply a clean
5V as the external source, or the V
of the USB connector. Using the bus to power the module is an advantage
because the module then uses power from the host rather than from the
peripheral. This is especially helpful if the peripheral is battery-powered. Figure
8 shows the schematic for a bus-powered device.
The USB specification has strict allowances for using power from the bus. A
device is allowed to use 100mA before enumeration, 500mA during normal
operation, and 500mA in suspend mode. A descriptor stored in the EEPROM will
tell the host how much current the device will pull from the bus so that the host
can allocate the appropriate power. The modules come programmed for 100mA,
but if the final product will draw more than this, then the device descriptors will
need to be changed as described below.
The QS can be customized to display your product’s name, manufacturer name,
and to use different Product Identifiers (PID) and Vendor Identifiers (VID). This
allows an end user to see the final product’s name in their Windows Device
Manager and when the hardware is first loaded. The PID and VID are set by the
USB Implementers Forum and should not be changed unless the final product
has gone through the certification process and received its own unique IDs.
The Manufacturer, Description, and Serial Number strings can all be modified
using the QS EEPROM Programmer software, which can be downloaded from
the Linx web site. This easy-to-use software will reprogram the module via the
USB bus and can be done as a part of the final testing procedure.
Once the module is reprogrammed, some modifications to the driver files may be
necessary. If a VID and PID other than the default Linx numbers are used, these
numbers will need to be added to the files. This requires modifying several lines
in the .inf files and is described in detail in the QS Series Programmer’s Guide.
Modifying the name displayed by the Windows Device Manager requires
changing only one line, also described in the Programmer’s Guide.
Note: when these drivers are installed on a system with Windows XP, an error message
may be displayed stating that these drivers are not certified and could potentially crash the
system. As long as no other changes are made to the .inf files, this should not be a
concern.
GND
USB Type B
Connector
GND
DAT -
DAT+
GND
5V
4
3
2
1
GND
GND
1
2
3
4
5
6
8
7
CC
USBDP
USBDM
GND
VCC
SUSP_IND
RX_IND
TX_IND
485_TX
pin can be connected to the bus power pin
SDM-USB-QS-S
DATA_OUT
DATA_IN
DCD
DSR
DTR
RTS
CTS
RI
16
15
14
13
12
11
10
9
TYPICAL APPLICATIONS
Figure 9: RS-232 To USB Converter
Figure 10: Wireless Modem Using ES Series RF Modules
VCC
GND
USB Type B
Connector
SUSP_IND
RX DATA
There are many potential uses for the QS Series modules, three of which will be
described here. Figure 9 shows the QS and a MAX213 RS-232 level converter
IC from Maxim. This creates a USB-to-RS-232 converter that supports all of the
standard handshaking lines. Similarly, RS-485 or RS-422 level converter chips
could be used for designs requiring those standards.
TX DATA
The QS Series modules can be used with Linx RF modules to create a wireless
link between two PCs. Figure 10 shows a design using the ES Series RF
modules. An option not shown in the schematic below is that one of the output
lines of the QS module (RTS or DTR) could be connected to the PDN lines of the
RF modules, enabling the host to turn the RF modules on and off.
DAT+
DAT -
GND
0.1uF
DTR
DCD
DSR
RTS
CTS
VCC
0.1uF
0.1uF
5V
6.3V
16V
RI
220
+
+
+
12
14
15
16
20
21
26
22
19
24
25
7
6
8
5
GND
C1+
C1-
C2+
C2-
T1
T2
T3
T4
R1
R2
R3
R4
R5
SHDN
EN
IN
IN
IN
IN
TX Side
OUT
OUT
OUT
OUT
OUT
1
2
3
4
5
6
8
VCC
7
MAX213
VCC
GND
VCC
USBDP
USBDM
GND
VCC
SUSP_IND
RX_IND
TX_IND
485_TX
1
2
3
4
5
11
10
SDM-USB-QS-S
PDN
LVL ADJ
GND
DATA
T1
T2
T3
T4
TXM-XXX-ES
R1
R2
R3
R4
R5
V+
OUT
OUT
OUT
OUT
V-
IN
IN
IN
IN
IN
LOW V DET
DATA_OUT
13
17
2
3
1
28
9
4
27
23
18
/CLK SEL
+
+
0.1uF
0.1uF
6.3V
GND
/CLK
16V
TX DATA2
DTR2
RTS2
ANT
CTS2
DCD2
DSR2
RX DATA2
RI2
DSR
RTS
CTS
DTR
RI
10
9
8
7
6
16
15
14
12
11
10
9
GND
USB Type B
Connector
GND
VCC
DAT+
DAT -
GND
5V
GND
USB Type B
Connector
SUSP_IND
4
3
2
1
GND
GND
220
GND
DAT+
DAT -
VCC
5V
220
220
1
2
3
4
5
6
7
8
4
3
2
USBDP
USBDM
GND
VCC
SUSP_IND
RX_IND
TX_IND
485_TX
GND
RX Side
SDM-USB-QS-S
RX DATA2
TX DATA2
VCC
1
2
3
4
5
6
7
8
GND
DCD2
DSR2
RTS2
CTS2
DTR2
USBDP
USBDM
GND
VCC
SUSP_IND
RX_IND
TX_IND
485_TX
RI2
1
8
DATA_OUT
SDM-USB-QS-S
DATA_IN
NC
NC
RXM-XXX-ES
DCD
DSR
DTR
RTS
CTS
RI
1
6
2
7
3
8
4
9
5
DATA_OUT
AUDIO
DATA
AREF
DATA_IN
RSSI
DB9M
PDN
16
15
14
13
12
11
10
NC
NC
NC
9
DCD
DSR
RTS
CTS
DTR
RI
DCD
DSR
RX DATA
TX DATA
RTS
CTS
DTR
RI
16
15
14
13
12
11
10
9
Page 9
16
15
14
13
12
11
10
9
Related parts for SDM-USB-QS-S_
Image
Part Number
Description
Manufacturer
Datasheet
Request
R

Part Number:
Description:
RF Modules & Development Tools USB Module
Manufacturer:
Linx Technologies Inc
Datasheet:

Part Number:
Description:
HOLDER BATTERY 20MM COIN CR2032
Manufacturer:
Linx Technologies Inc
Datasheet:

Part Number:
Description:
CONN RPSMA BL CRJA-CPV 8.5" COAX
Manufacturer:
Linx Technologies Inc

Part Number:
Description:
CABLE RG174 RPSMA M/F 8.5"
Manufacturer:
Linx Technologies Inc

Part Number:
Description:
CABLE RG174 SMA M/F 8.5"
Manufacturer:
Linx Technologies Inc

Part Number:
Description:
CABLE RPSMA/SMA 8.5"
Manufacturer:
Linx Technologies Inc

Part Number:
Description:
CABLE MALE-NMALE 8' RG-58 RPSMA
Manufacturer:
Linx Technologies Inc

Part Number:
Description:
CABLE RPSMA/SMA 8.5"
Manufacturer:
Linx Technologies Inc

Part Number:
Description:
CABLE MALE-NMALE 8' RG-58 SMA
Manufacturer:
Linx Technologies Inc

Part Number:
Description:
CONN RP-SMA FML BLKHD REAR RG174
Manufacturer:
Linx Technologies Inc

Part Number:
Description:
IC TRANSCODER MT BI-DIR 20-SSOP
Manufacturer:
Linx Technologies Inc
Datasheet:

Part Number:
Description:
IC ENCODER LOW SECURITY 8DIP
Manufacturer:
Linx Technologies Inc
Datasheet:

Part Number:
Description:
IC DECODER MS SERIES 20-SSOP
Manufacturer:
Linx Technologies Inc
Datasheet:
Part Number:
Description:
IC ENCODER MS SERIES 20-SSOP
Manufacturer:
Linx Technologies Inc
Datasheet:

Part Number:
Description:
IC DECODER LOW SECURITY 8DIP
Manufacturer:
Linx Technologies Inc
Datasheet: