Y92P-48GB Omron, Y92P-48GB Datasheet - Page 18
Y92P-48GB
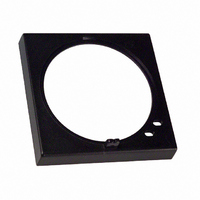
Manufacturer Part Number
Y92P-48GB
Description
PNL CVR BLACK
Manufacturer
Omron
Series
H3CR-Gr
Type
Protective Coversr
Specifications of Y92P-48GB
Accessory Type
Cover, Panel
Color
Black
Lead Free Status / RoHS Status
Lead free / RoHS Compliant
For Use With/related Products
H3CR-G Series
Lead Free Status / Rohs Status
Lead free / RoHS Compliant
Other names
Y92P48GB
Z929
Z929


PL Socket
1. Secure the Socket to the panel surface with screws and insert the
2. Connect the Timer to the Socket and press the tip of each hook
Panel Mounting
When the Y92F-30 Flush Mounting Adapter is used, insert the Timer
into the square hole from the front side of the panel and put on the
Flush Mounting Adapter from the rear side of the Timer. Press the
Flush Mounting Adapter so that the space between the Flush
Mounting Adapter and the panel is reduced as much as possible,
and secure the Flush Mounting Adapter with screws.
When using the US08, be sure to use 10.5-dia. max. multi-conductor
cable or 3-dia. max. insulated stranded wire for wiring.
When the Y92F-40, Y92F-70 or Y92F-71 Flush Mounting Adapter is
used, just insert the Timer into the square panel hole. If the panel
coating is too thick and the hooks do not click, spread open the
hooks appropriately to the left and right after inserting the Timer to
the hole.
18
F-shaped hook into the sockets.
by hand.
Spread open the hooks to the left and right.
Spread open the hooks to the left and right.
Solid-state Timer
Panel
Y92F-30
Panel
Screw
The illustration is an ex
ample with the Y92F-70.
H3BA-N
■ Dismounting
Surface Mounting with P2CF
Panel Mounting
Loosen the screws of the Flush Mounting Adapter, spread open the
hooks, and remove the Mounting Adapter.
When the Y92F-40, Y92F-70, Y92F-71 Mounting Adapter is used,
press the hook inwards with the thumb and index finger of both
hands, and press the Timer towards the front side.
Related parts for Y92P-48GB
Image
Part Number
Description
Manufacturer
Datasheet
Request
R

Part Number:
Description:
Mounting Hardware Front Panels - Rplc Black (N1.5)
Manufacturer:
Omron
Datasheet:
Part Number:
Description:
Mounting Hardware Front Panels - Rplc White (5Y9.2 / 0.5)
Manufacturer:
Omron
Datasheet:
Part Number:
Description:
Mounting Hardware Front Panels - Rplc Light gray (5Y7/1)
Manufacturer:
Omron
Datasheet:

Part Number:
Description:
PNL CVR LITE GRAY
Manufacturer:
Omron
Datasheet:
Part Number:
Description:
PNL CVR MED GRAY
Manufacturer:
Omron
Datasheet:

Part Number:
Description:
G6S-2GLow Signal Relay
Manufacturer:
Omron Corporation
Datasheet:
Part Number:
Description:
Compact, Low-cost, SSR Switching 5 to 20 A
Manufacturer:
Omron Corporation
Datasheet:
Part Number:
Description:
Manufacturer:
Omron Corporation
Datasheet:
Part Number:
Description:
Manufacturer:
Omron Corporation
Datasheet:
Part Number:
Description:
Manufacturer:
Omron Corporation
Datasheet:
Part Number:
Description:
Manufacturer:
Omron Corporation
Datasheet: