TOOTHPIC RF Solutions, TOOTHPIC Datasheet - Page 55
TOOTHPIC
Manufacturer Part Number
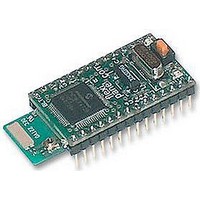
TOOTHPIC
Description
MODULE, BLUETOOTH, DATA ACQUISITION
Manufacturer
RF Solutions
Datasheet
1.TOOTHPIC.pdf
(126 pages)
Specifications of TOOTHPIC
Svhc
No SVHC (15-Dec-2010)


Guide to ToothPIC Slave Development
HyperTerminal Setup
The easiest way to experiment with ToothPIC Slave is to connect it to a terminal emulator such as
HyperTerminal, which is bundled with the Windows operating systems. Notes on how to do this are given in
the section ToothPIC Slave Firmware Solution.
Note: When sending ASCII commands to ToothPIC, if you make a typing error, avoid pressing delete, or
pressing enter repeatedly until an error message is generated. This is because the delete and carriage return
characters are legitimate binary characters. Instead, keep tapping a completely illegal character (e.g. ‘z’) until
the error message 0302F1 is generated. Then you can start typing a new command.
BASIC Stamp Host Setup
ToothPIC can be connected directly to BASIC Stamp using any data pins. To send data at 9600 baud to
ToothPIC, use the following BASIC command (substitute RxDpin, RTSpin with the actual pins used):
To receive data at 9600 baud from ToothPIC, use the following BASIC command (substitute TxDpin, CTSpin
with the actual pins used):
The BASIC Stamp doesn’t buffer data so you will need to call SERIN regularly to avoid the ToothPIC Slave’s
message queue from overflowing. You can use the INT1 is DATA configuration command to set INT1 as an
output which is high whenever messages are in the queue waiting to be processed, and low otherwise.
PIC Host Microcontroller Setup
Another UART-equipped PIC can be connected directly to the ToothPIC Slave.
connections (i.e. connect RxD to TxD, CTS to RTS, etc). The sample code provided for the ToothPIC Slave
firmware solution shows how to write interrupt-driven, buffered serial I/O and you can copy from it to develop
your application code.
External memory
External memory may be used as described in the Memory Management section of the ToothPIC services
reference. This memory may then be allocated to the FlexiPanel Server or accessed using the Get Data and
Set Data commands. Use the Config Slave (I2C Memory Setup) command to set up the SDA and SCL pins.
Adding a FlexiPanel User Interface
FlexiPanel User Interfaces can be written to ToothPIC Slave at any time using FlexiPanel Designer as shown
in the Quick Tour section of the ToothPIC Slave Firmware Solution. The RAM space is limited to 0x800 bytes
less the number of bytes required for the message queue (22 bytes per message). The Flash ROM space is
limited to 0xE000 bytes.
Beware that control ID value may change if you insert a dialog or a control earlier in FlexiPanel Designer’s
control list. You may therefore wish to define constants in your host controller code to simplify changes to ID
values. It is also good practice to complete a user interface design as much as possible before coding. This
is not for the sake of easier coding; it is because the result is more intuitive to the user.
Page 55
SEROUT RxDpin\RTSpin, 240, [Command]
SERIN TxDpin\CTSpin, 240, [Response buffer]
9-Apr-06
Toothpick 3.0.00007
DS380-8
© FlexiPanel Ltd
Patents apply and/or pending
Simply cross over the
www.FlexiPanel.com
Related parts for TOOTHPIC
Image
Part Number
Description
Manufacturer
Datasheet
Request
R

Part Number:
Description:
RF Switch SPDT 0MHz to 2GHz 27dB 8-Pin SOIC T/R
Manufacturer:
M/A-Com Technology Solutions
Datasheet:
Part Number:
Description:
RF Switch SPST 500MHz to 2GHz 40dB 8-Pin SOIC T/R
Manufacturer:
M/A-Com Technology Solutions
Datasheet:

Part Number:
Description:
RF Switch SPDT 100MHz to 4GHz 14dB 6-Pin SOT-6
Manufacturer:
Skyworks Solutions Inc
Datasheet:
Part Number:
Description:
RF Switch SPST 500MHz to 2.5GHz 10dB 6-Pin SOT-6
Manufacturer:
Skyworks Solutions Inc

Part Number:
Description:
IC ENCODER TRANSMITTER RF 8DIP
Manufacturer:
RF Solutions
Datasheet:

Part Number:
Description:
IC DECODER RECEIVER RF 18DIP
Manufacturer:
RF Solutions
Datasheet:

Part Number:
Description:
IC ENCODER 3 DGTL I/O SOT23-6
Manufacturer:
RF Solutions
Datasheet:

Part Number:
Description:
IC ENCODER 3 DGTL I/O 8-PDIP
Manufacturer:
RF Solutions
Datasheet:

Part Number:
Description:
IC DECODER 3 DGTL I/O 8-PDIP
Manufacturer:
RF Solutions
Datasheet:

Part Number:
Description:
IC DECODER 3 DGTL I/O 8-SOIC
Manufacturer:
RF Solutions
Datasheet:

Part Number:
Description:
118 SERIES AM REMOTE CONTROL SYSTEMS.
Manufacturer:
RF Solutions Ltd.