DM303006 Microchip Technology, DM303006 Datasheet - Page 4
DM303006
Manufacturer Part Number
DM303006
Description
KIT EVALUATION KEELOQ
Manufacturer
Microchip Technology
Series
KEELOQ®r
Type
KeeLoq®r
Specifications of DM303006
Silicon Manufacturer
Microchip
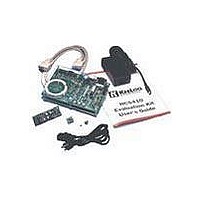
Kit Contents
Main Board, 2 Transmitters, Cables And Power Supply
Tool / Board Applications
General Purpose MCU, MPU, DSP, DSC
For Use With
KeeLoq
Lead Free Status / RoHS Status
Request inventory verification / Request inventory verification
For Use With/related Products
Keeloq Encoders & Decoders
Lead Free Status / RoHS Status
Lead free / RoHS Compliant, Request inventory verification / Request inventory verification


2.0
The software provided on the disk is based on the Win-
dows operating system. The K
software can be installed either in the default
C:\HCS_EVAL directory or in another directory of
choice.
1.
2.
3.
FIGURE 2-1:
DS41155A-page 2
M
Insert the K
ROM into the CD drive (in the following we will
refer to it as drive D).
If you are using Windows
gram Manager File > Run command, type
D:\tools\HCS_EVAL\SETUP.
If you are using Windows 95, 98 or Windows
NT
and type D:\tools\HCS_EVAL\SETUP.
The Setup screen will appear requesting to con-
firm the installation.
Click OK to continue, or Cancel to abort the
installation.
The Setup program will then display the “Select
Destination” dialog box.
Click OK after selecting where the software is to
be installed or click Cancel to abort the installa-
tion.
®
INSTALLATION
4.0, click on the Start button, select Run
EE
SERIAL PORT SELECTION DIALOG BOX
L
OQ
Installing K
Secure Data Products CD-
EELOQ
®
3.1, from the Pro-
Evaluation Kit II
EE
L
OQ
®
Evaluation Kit II
4.
5.
6.
7.
2.1
The K
cate with the programmer board. The active serial port
defaults to COM1 but can be changed in the
Port” dialog
played by selecting “Com Port” from the “Options”
menu.
The “Make Backups?” dialog box will appear.
Click Yes to backup files being replaced.
Click No to overwrite files without backup.
Click Cancel to abort the installation.
If Yes was selected in the previous step the “The
Select Backup Directory” dialog box appears.
Click OK after selecting a directory where
backups will be stored.
Click Cancel to abort the installation.
After the files have been installed the “Install
Icons” dialog box appears
Click Yes to add the software Icons.
Click No to skip adding the Icons.
Click Cancel to abort installation.
After the software has been successfully
installed, a “Setup Complete” message will
appear.
EE
L
Serial Port Selection
OQ
K
software uses a serial port to communi-
EE
box (Figure 2-1). The dialog box is dis-
L
OQ
2001 Microchip Technology Inc.
®
EVALUATION KIT
II USER’S GUIDE
“Com
Related parts for DM303006
Image
Part Number
Description
Manufacturer
Datasheet
Request
R

Part Number:
Description:
Manufacturer:
Microchip Technology Inc.
Datasheet:
Part Number:
Description:
Manufacturer:
Microchip Technology Inc.
Datasheet:
Part Number:
Description:
Manufacturer:
Microchip Technology Inc.
Datasheet:
Part Number:
Description:
Manufacturer:
Microchip Technology Inc.
Datasheet:
Part Number:
Description:
Manufacturer:
Microchip Technology Inc.
Datasheet:
Part Number:
Description:
Manufacturer:
Microchip Technology Inc.
Datasheet:
Part Number:
Description:
Manufacturer:
Microchip Technology Inc.
Datasheet:
Part Number:
Description:
Manufacturer:
Microchip Technology Inc.
Datasheet: