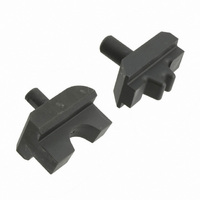
45439 Tyco Electronics, 45439 Datasheet - Page 5

45439
Manufacturer Part Number
45439
Description
TOOL DIE SOLIS 69099 2/0AWG
Manufacturer
Tyco Electronics
Type
Terminals and Splicesr
Specifications of 45439
Lead Free Status / RoHS Status
Not applicable / Not applicable
4. MAINTENANCE AND INSPECTION PROCEDURES
Tyco Electronics recommends that a maintenance
and inspection program be performed periodically to
ensure dependable and uniform terminations. Dies
should be inspected at least once a month.
Frequency of inspection may be adjusted to suit your
requirements through experience. Frequency of
inspection is dependent upon:
Since there is a possibility of die damage in shipment,
new dies should be inspected in accordance with the
following instructions when received in your plant.
4.1. Cleaning
Do not allow deposits of dirt, grease, and foreign
matter to accumulate in the die closure surfaces and
on the bottoming surfaces of the dies. These deposits
may prevent the dies from bottoming fully and may
also cause excessive wear in the die closure
surfaces, thereby affecting the quality of the crimp.
The dies should be wiped clean frequently with a
clean cloth.
4.2. Visual Inspection
Visually inspect the die closure surfaces for broken,
pitted, or chipped areas. Although dies may gage
within possible limits, worn or damaged die closure
surfaces are objectionable and can affect the quality
of the crimp. Examples of possible damaged die
closure surfaces are shown in Figure 8.
4.3. Die Closure Inspection
Every die set is inspected for proper die closure
before packaging. An inspection should be performed
periodically to check the die closure for excessive
wear. The die closure inspection is accomplished
using the GO NO–GO plug gage. Tyco Electronics
neither manufactures nor sells plug gages. A
suggested plug gage design and the GO NO–GO
dimensions of the plug gage members are listed in
Figure 9. The following procedure is recommended
for inspecting the die closure.
Dies for the 69097 Tool
Rev B
SOLISTRAND Crimping Dies
1. Clean oil and dirt from the die closure surfaces
and plug gage members.
2. Assemble the dies so that they are bottomed
but not under pressure. See Figure 10, Detail “A”.
S The care, amount of use, and handling of the
S The type and size of the products crimped.
S The degree of operator skill.
S The presence of abnormal amount of dust and
S Your own established standards.
dies.
dirt.
Tyco Electronics Corporation
Dies for the 69099 Tool
Chipped
Area
1. Clean oil and dirt from the die closure surfaces
and plug gage members.
2. Assemble and adjust the dies to meet the “gage
dimension” indicated in Figure 10, Detail “A”.
3. With the crimping dies assembled as described
in steps 1 and 2, check the wire barrel crimp die
closure using the proper plug gage. Hold gage in
straight alignment with the die closure and carefully
try to inset them without forcing the GO member
as shown in Figure 10, Detail “A”. The GO member
must pass completely through the die closure as
shown in Figure 10, Detail “B”.
4. Try to insert the NO–GO member. The NO–GO
member may enter partially, but must not pass
completely through the die closure. See Figure 10,
Detail “B”.
5. If the dies meet the GO NO–GO gage
conditions, the dies may be considered
dimensionally correct. If you find that the dies no
not conform with the GO NO–GO gage conditions,
contact your local Tyco Electronics Field
Representative.
Figure 8
Pitted Area
408-1697
Flattened
Area
5 of 8


