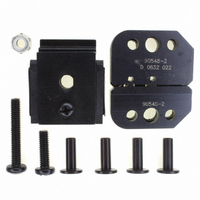
90548-2 Tyco Electronics, 90548-2 Datasheet - Page 3

90548-2
Manufacturer Part Number
90548-2
Description
TOOL DIESET 18-24AWG UNI-MATE
Manufacturer
Tyco Electronics
Series
MATE-N-LOK II®r
Type
Crimp Tool Assemblyr
Specifications of 90548-2
Connector Type
Crimp Terminals
Crimp Handle
A9996-ND
Crimp Or Cable Size
18-24 AWG
Crimp Tool
Hand Crimper III
Product
Crimping, Stripping & Cutting Tools & Drills
Description/function
Hand crimp tool assembly
For Use With
SDE Dies
Lead Free Status / RoHS Status
Not applicable / Not applicable
Lead Free Status / RoHS Status
na, Not applicable / Not applicable
Other names
A9944
5. CRIMPING PROCEDURE
Rev E
Adjustment
Screw for
Contact
Support
3. Place a contact with wire into the proper nest and
close the tool handles until the ratchet reaches the
sixt# click, or until the contact support touches the
contact.
4. Slightly loosen the nut that holds the locator
assembly onto the tool frame.
5. Move the contact support as required to eliminate
the bending of the contact.
6. Tighten the nut and close the handles until the
ratchet releases.
7. Remove and inspect the contact.
8. Make another sample crimp. If the contact is
straight, tighten the contact support screw. If the
contact is still being bent during crimping, repeat the
adjustment procedure.
NOTE
NOTE
i
i
The ratchet has detents that create audible clicks
as the tool handles are closed.
This tool is provided with a crimp adjustment
feature. Initially, the crimp height should be verified
as specified in Figure 4. Refer to Section 6, Crimp
Height Inspection, and Section 7, RATCHET
Adjustment, to verify crimp height before using the
tool to crimp desired contacts and wire sizes.
Contact
Support
Locator
Back of Tool
(Wire Side)
Figure 3
Wire
Refer to the table in Figure 1 and select wire of the
specified size and insulation diameter. Strip the wire to
the length indicated in Figure 1, taking care not to nick
or cut wire strands. Select an applicable contact and
identify the appropriate crimp section according to the
wire size markings on the tool. Refer to Figure 3 and
proceed as follows:
CAUTION
1. Hold the tool so that the back (wire side) is facing
you. Squeeze tool handles together and allow them
to open fully.
2. Holding the contact by the mating end, insert the
contact - insulation barrel first - through the front of
the tool and into the appropriate crimp section.
3. Position the contact so that the mating end of the
contact is on the locator side of the tool, and so that
the open "U" of the wire and insulation barrels face
the top of the tool. Place the contact up into the nest
so that the movable locator drops into the slot in the
contact. Refer to Figure 3. Butt the front end of the
wire barrel against the movable locator.
4. Hold the contact in position and squeeze the tool
handles together until ratchet engages sufficiently to
hold the contact in position. Do NOT deform
insulation barrel or wire barrel.
!
Contact
(Typ)
Locator in
Wire Stop Slot
Make sure that both sides of the insulation barrel
are started evenly into the crimping section. Do not
attempt to crimp an improperly positioned contact.
Wire Inserted
to Stop
Strip
Length
408-9885
3 of 6


