64001-3900 Molex Inc, 64001-3900 Datasheet - Page 5
64001-3900
Manufacturer Part Number
64001-3900
Description
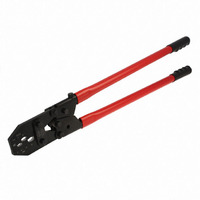
TOOL HAND CRIMP FOR TERMINALS
Manufacturer
Molex Inc
Series
Insulkrimp®, Nylakrimp®, Perma-Seal™, Versakrimp™r
Type
Crimp Tool Assemblyr
Datasheets
1.64016-0201.pdf
(1 pages)
2.19284-0034.pdf
(27 pages)
3.64001-3900.pdf
(9 pages)
4.64001-3900.pdf
(4 pages)
Specifications of 64001-3900
Features
Side Entry, Ratchet
Tool Type
Hand Crimper
Fits Cable/wire
8-2 AWG
Product
Crimping, Stripping & Cutting Tools & Drills
Description/function
Hand crimp tool assembly
Lead Free Status / RoHS Status
Lead free / RoHS Compliant
For Use With/related Products
Splices and Terminals, 2-8 AWG
For Use With
WM19139 - CONN RING TERM 2AWG 5/16" CRIMPWM19138 - CONN RING TERM 2AWG 3/8" CRIMPWM19137 - CONN RING TERM 2AWG 1/4" CRIMPWM19136 - CONN RING TERM 2AWG 1/2" CRIMPWM19135 - CONN RING TERM 4AWG 1/2" CRIMPWM19134 - CONN RING TERM 4AWG 1/4" CRIMPWM19133 - CONN RING TERM 4AWG #10 CRIMPWM19132 - CONN RING TERM 4AWG 5/16" CRIMPWM19131 - CONN RING TERM 4AWG 3/8" CRIMPWM19130 - CONN RING TERM 4AWG 1/4" CRIMPWM19129 - CONN RING TERM 6AWG 1/4" CRIMPWM19128 - CONN RING TERM 6AWG #10 CRIMPWM19127 - CONN RING TERM 6AWG 1/2" CRIMPWM19126 - CONN RING TERM 6AWG 5/16" CRIMPWM19125 - CONN RING TERM 6AWG 3/8" CRIMPWM19124 - CONN RING TERM 6AWG 1/4" CRIMPWM19123 - CONN RING TERM 8AWG #10 CRIMPWM19122 - CONN RING TERM 8AWG 5/16" CRIMPWM19121 - CONN RING TERM 8AWG 3/8" CRIMPWM19120 - CONN RING TERM 8AWG 1/4" CRIMPWM19119 - CONN RING TERM 8AWG #10 CRIMPWM18727 - CONN SPLICE SEALABLE 8AWG
Lead Free Status / Rohs Status
Lead free / RoHS Compliant
Other names
064001-3900
064001-3900-E
0640013900
0640013900-E
64001-3900-E
640013900
640013900-E
WM19140
064001-3900-E
0640013900
0640013900-E
64001-3900-E
640013900
640013900-E
WM19140


MCT-8200 Hand Crimp Tool
Doc. No: ATS-640013900
Revision: K
5. When crimping butt splices, insert the wire into the butt
6. When crimping parallel splices, Insert the 1
Maintenance
It is recommended that each operator of the tool be made aware of, and responsible for, the following
maintenance steps:
1. Remove dust, moisture and other contaminants with a clean brush, or soft, lint-free cloth.
2. Do not use any abrasive materials that could damage the tool.
3. Make certain all pins; pivot points and bearing surfaces are protected with a thin coat of high quality machine
4. When tool is not in use, keep the handles closed to prevent objects from becoming lodged in the crimping
splice. Position the splice and the wire in proper nest
with conductor crimp on the conductor barrel of the
splice. The splice should be approximately centered
inside the tooling nests. See Figure 3. Cycle the tool.
one end of splice then insert the 2
opposite end of the parallel splice. This procedure will
crimp both wires at the same time. Make sure the wires
are fully seated into the parallel splice. Position the
splice and the wires in proper nest with conductor crimp
on the conductor barrel of the splice. The splice should
be approximately centered inside the tooling nests. See Figure 4. Cycle the tool.
Note: Whenever crimping without the locator, make sure the seam of the terminal is oriented up or down in
the tool if using unbrazed product, as this will provide higher pull force values.
oil. Do not oil excessively. This hand tool was engineered for durability, but like any fine piece of equipment,
it needs cleaning and lubrication for a maximum service life of trouble-free crimping. A light oil, such as 30
weight automotive oil used at the oil points shown in Figure 6, every 5,000 crimps or 3 months will
significantly enhance the tool life and ensure a stable calibration.
dies, and store the tool in a clean, dry area.
Release Date: 09-26-03
Revision Date: 05-06-08
nd
wire into the
st
wire into
Figure 5
UNCONTROLLED COPY
LIGHT OIL (EVERY 3 MONTHS
LUBRICATION POINTS
PARALLEL
OR 5,000 CRIMPS)
2
SPLICE
ND
(BOTH SIDES)
WIRE
Figure 4
PUNCH/ANVIL
CONDUCTOR
PUNCH/ANVIL
1
CONDUCTOR
ST
VISUALLY
WIRE
CENTER
SPLICE
Page 5 of 9