DEMO9S12NE64E Freescale Semiconductor, DEMO9S12NE64E Datasheet - Page 12
DEMO9S12NE64E
Manufacturer Part Number
DEMO9S12NE64E
Description
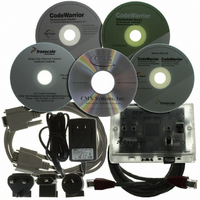
DEMO BOARD FOR 9S12NE64
Manufacturer
Freescale Semiconductor
Type
MCUr
Datasheet
1.DEMO9S12NE64E.pdf
(21 pages)
Specifications of DEMO9S12NE64E
Contents
*
Processor To Be Evaluated
MC9S12NE64
Maximum Operating Temperature
+ 50 C
Minimum Operating Temperature
- 10 C
Operating Supply Voltage
6 V to 12 V
Silicon Manufacturer
Freescale
Core Architecture
S12
Core Sub-architecture
S12
Silicon Core Number
MC9S12
Silicon Family Name
S12NE
Rohs Compliant
Yes
For Use With/related Products
MC9S12NE64
Lead Free Status / RoHS Status
Lead free / RoHS Compliant


2.1 Introduction
CAUTION: ESD
Protection
2.2 Configuring Board Components
2.3 I/0 Connector J50
Freescale Semiconductor
User’s Manual — DEMO9S12NE64 User’s Manual
Section 2. Support Information
Switch, SW3
Component
This section explains DEMO9S12NE64 preparation, how to set switches and
how to make system connections. It also consists of connector pin
assignments, connector signal descriptions, and other information that may be
useful in your development activities.
Freescale development tools contain static-sensitive components. These
boards are subject to damage from electrostatic discharge (ESD). To prevent
such damage, you must use static-safe work surfaces and grounding straps, as
defined in ANSI/EOS/ESD S6.1 and ANSI/EOS/ESD S4.1. All handling of these
boards must be in accordance with ANSI/EAI 625.
Connector J50 is an I/O expansion connector that can be used to interface the
DEMO9S12NE64 to other boards. Figure 2-1 and Table 2-2 give the pin
assignments and signal descriptions for connector J50.
1
Position
SW3
Table 2-1 Configuration Components
DEMO9S12NE64 User’s Manual, Rev. 0.8
0
SW3: Controls the value of I/O pin PG<4>. In the 1 position
(labeled in silk on the case) PG<4> is pulled high to 3.3 VDC
through a 10K ohm resistor. In the 0 position, PG<4> is tied
directly to GND.
This switch is used by the serial monitor to put the monitor into
Load or Run mode. To put the monitor into Load mode, set SW3 to
the 0 position. To put the monitor into Run mode, set SW3 to the 1
position.
Effect
Support Information
15
Related parts for DEMO9S12NE64E
Image
Part Number
Description
Manufacturer
Datasheet
Request
R

Part Number:
Description:
Manufacturer:
Freescale Semiconductor, Inc
Datasheet:
Part Number:
Description:
Manufacturer:
Freescale Semiconductor, Inc
Datasheet:
Part Number:
Description:
Manufacturer:
Freescale Semiconductor, Inc
Datasheet:
Part Number:
Description:
Manufacturer:
Freescale Semiconductor, Inc
Datasheet:
Part Number:
Description:
Manufacturer:
Freescale Semiconductor, Inc
Datasheet:
Part Number:
Description:
Manufacturer:
Freescale Semiconductor, Inc
Datasheet:
Part Number:
Description:
Manufacturer:
Freescale Semiconductor, Inc
Datasheet:
Part Number:
Description:
Manufacturer:
Freescale Semiconductor, Inc
Datasheet:
Part Number:
Description:
Manufacturer:
Freescale Semiconductor, Inc
Datasheet:
Part Number:
Description:
Manufacturer:
Freescale Semiconductor, Inc
Datasheet:
Part Number:
Description:
Manufacturer:
Freescale Semiconductor, Inc
Datasheet:
Part Number:
Description:
Manufacturer:
Freescale Semiconductor, Inc
Datasheet:
Part Number:
Description:
Manufacturer:
Freescale Semiconductor, Inc
Datasheet:
Part Number:
Description:
Manufacturer:
Freescale Semiconductor, Inc
Datasheet:
Part Number:
Description:
Manufacturer:
Freescale Semiconductor, Inc
Datasheet: