MCP1631RD-MCC2 Microchip Technology, MCP1631RD-MCC2 Datasheet - Page 43
MCP1631RD-MCC2
Manufacturer Part Number
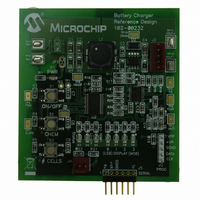
MCP1631RD-MCC2
Description
REFERENCE DESIGN MCP1631HV
Manufacturer
Microchip Technology
Datasheets
1.MCP1631VHVT-330EST.pdf
(34 pages)
2.MCP1631HV-330EST.pdf
(54 pages)
3.MCP1631RD-MCC2.pdf
(20 pages)
4.MCP1631RD-MCC2.pdf
(328 pages)
Specifications of MCP1631RD-MCC2
Main Purpose
Power Management, Battery Charger
Embedded
Yes, MCU, 8-Bit
Utilized Ic / Part
MCP1631HV, PIC16F883
Primary Attributes
1 ~ 2 Cell- Li-Ion, 1 ~ 5 Cell- NiCd/NiMH, 1 ~ 2 1W LEDs
Secondary Attributes
Status LEDs
Silicon Manufacturer
Microchip
Application Sub Type
Battery Charger
Kit Application Type
Power Management - Battery
Silicon Core Number
MCP1631HV, PIC16F883
Kit Contents
Board
Lead Free Status / RoHS Status
Lead free / RoHS Compliant
Lead Free Status / RoHS Status
Lead free / RoHS Compliant


C.5
© 2009 Microchip Technology Inc.
MPLAB
®
AND PICKIT™ 2 DEBUGGING EXERCISE
1. Startup MPLAB (not supplied, available at: http://www.microchip.com).
2. From the toolbar, select “File | Open Workspace”.
3. Browse to the evaluation board source code path.
4. Select the existing workspace file named
5. Connect the PICkit 2 programmer to header J3 on the battery charger board.
6. Set the bench power supply voltage control to minimum voltage output.
7. Turn on the power supply and set the output voltage to 8V. Turn off the power
8. Connect the bench power supply to the battery charger board. Connect +V(8V)
9. Turn on the power supply.
10. From the toolbar, select “Debugger | Connect”. The debugger should find the
11. From the toolbar, select “File | Import”.
12. Browse to the source code path.
13. Select the existing project file named
14. From the toolbar, select “Debugger | Program”. The debugger will program the
15. From the toolbar, select “Debugger | Reset | Processor Reset”. This must always
16. From the toolbar, select “File | Open”.
17. In the “Files of type” text box, select “List Files (*.lst)”.
18. Click on “MCP1631HVBuckBoostBatteryChargerReferenceDesign.lst”.
19. Click on “Open”. This opens the mikroC
20. Scroll to the end of the listing file and locate the code label “L_main_1:”. Write
21. In the “Program Memory” window, scroll down until you reach the same address
22. From the toolbar, select “Debugger | Run”. The debugger will stop at the
23. From the toolbar, select “Debugger | Run”. The debugger will continue.
When debugging the battery charger board, be careful when setting breakpoints. If the
breakpoint occurs while the Voltage Reference PWM is HIGH, the V
to about 2.5V. The MCP1631HV will then attempt to supply the current for the given
V
signal which is in turn limited by the V
REF
“MCP1631HVBuckBoostBatteryChargerReferenceDesign.mcw”
Align Pin 1 of the header with the Pin 1 mark on the programmer.
supply.
to J1-1 and –V (Ground) to J1-2.
PIC16F883 processor.
“MCP1631HVBuckBoostBatteryChargerReferenceDesign.hex”.
PIC16F883 with the imported hex file.
be done after programming.
Code addresses are at the end.
down the function address.
as the “L_main_1:” function address. Right click on the line and set a breakpoint.
breakpoint. Disable the breakpoint.
, which will be high (about 2.5V / 1.1 = 2.27A). The current is limited by the V
REF
voltage divider resistor pair R24 and R34.
™
listing file for the project. Variable and
or create a new one.
REF
Software
DS51791A-page 39
voltage will rise
REF
Related parts for MCP1631RD-MCC2
Image
Part Number
Description
Manufacturer
Datasheet
Request
R

Part Number:
Description:
REFERENCE DESIGN FOR MCP1631HV
Manufacturer:
Microchip Technology
Datasheet:

Part Number:
Description:
REF DES BATT CHARG OR LED DRIVER
Manufacturer:
Microchip Technology
Datasheet:

Part Number:
Description:
Manufacturer:
Microchip Technology Inc.
Datasheet:
Part Number:
Description:
Manufacturer:
Microchip Technology Inc.
Datasheet:
Part Number:
Description:
Manufacturer:
Microchip Technology Inc.
Datasheet:
Part Number:
Description:
Manufacturer:
Microchip Technology Inc.
Datasheet:
Part Number:
Description:
Manufacturer:
Microchip Technology Inc.
Datasheet:
Part Number:
Description:
Manufacturer:
Microchip Technology Inc.
Datasheet:
Part Number:
Description:
Manufacturer:
Microchip Technology Inc.
Datasheet:
Part Number:
Description:
Manufacturer:
Microchip Technology Inc.
Datasheet: