NTN8655A MOTOROLA TWO WAY, NTN8655A Datasheet
NTN8655A


Related parts for NTN8655A


NTN8655A Summary of contents
Page 1
Multi-Service Wearable i1000 0 Motorola ® Digital Portable Getting Started June 17, 1998 68P81088C88-O TM GETTING STARTED ...
Page 2
CONTENTS YOUR i1000 PORTABLE . . . . . . . . . . . . . . . . . . . . . . . . . . . . 1 About Your Portable’s Features . . . ...
Page 3
Call Waiting . . . . . . . . . . . . . . . . . . . . . . . . . . . . . . . . . . . . . . ...
Page 4
PROGRAMMING MENU OPTIONS . . . . . . . . . . . . . . . . . 49 ERROR MESSAGES . . . . . . . . . . . . . . . . . ...
Page 5
Patent Information This product is protected under one or more of the following patents: 4817157, 4896361, 4857928, 5041793, 5060294, 5066923, 5134718, 5140156, 5239963, 5257411, 5287387, 5265219, 5289504, 5316168, 5317247, 5338396, 5389927, 5406588, 5424921, 5457376, 5460906, 5551063, 5557079, 5596487, 5615412, 5638403, ...
Page 6
YOUR 1000 PORTABLE i ongratulations on purchasing your Motorola iDEN i1000 C multi-service digital portable. Superior features and state-of- the-art technology help to keep you in constant touch with all of your business and personal contacts. The sleek, compact design ...
Page 7
FEATURES OF YOUR 1. Antenna 2. On/Off Key 3. LED 4. Speaker Key 5. Volume Control Buttons 6. Push-To-Talk (PTT) Button 7. Option Keys 8. Flip Cover (Closed) 9. Menu Key 7. Option Key 10. Mode Key 11. Speaker Remove ...
Page 8
Antenna 2. On/Off Key 3. LED 4. Speaker Key 5. Volume Control Buttons 6. Push-To-Talk (PTT) Button 7. Option Keys 8. Cover 9. Menu Key 10. Mode Key 11. Speaker 12. Earpiece 13. Alphanumeric Display 14. Send/End Key 15. ...
Page 9
BATTERY Charging the Battery To get the maximum use from the battery, charge it for at least three hours before you use it for the first time. Attach the charger connector to the i1000 then connect the adapter to an ...
Page 10
DISPLAY ICONS After you turn on the portable and use various features, icons appear on the screen to inform you of existing conditions. Some of the following icons may appear along the top of the display. Signal Strength Indicator Shows ...
Page 11
TURNING ON YOUR PORTABLE Press the On/Off button display. (For a description of the icons, see page 5.) Then the message “Please Wait” displays while the portable connects to your carrier’s network. The LED indicator located on top of the ...
Page 12
SPEAKERPHONE The i1000 provides a speakerphone feature similar to a speakerphone you may use on your office or home phone. Because the i1000 is wireless, you will have the convenience of a hands free speakerphone anytime, anyplace to bring people ...
Page 13
Selecting All Incoming Calls and Messages 1. Press 2. Press under “All”. After you set the vibration alert for all incoming calls and messages, the display returns to the previous mode. Look for (the Vibrate All icon) at the top ...
Page 14
The first selection is Vibe. To view the Vibe/Ring vibration alert choices, press MENU keypad. The vibration selection that you make affects only the current mode. In this example, vibration is set only for Phone mode. You must set each ...
Page 15
TURNING OFF GROUP AND PRIVATE MODES Your portable has a special feature, Phone Only mode, that allows you to turn off the Private and Group services. You can make and receive phone calls and receive Message Mail. Placing the portable ...
Page 16
To return to normal Phone mode: 1. Press 2. Press under “Off”. 3. Press under “Exit”. The display returns to Phone Ready. Group and Private mode services are now available. i1000 TUV ...
Page 17
SETTING THE TIME AND DATE FORMAT If your carrier provides this option, you can set your portable to display the current time and date. Unless the portable is turned off, it continues to display the current time during a loss ...
Page 18
To set the time and date format: 1. Press 2. Press under “Ok”. The Time/Date screen displays. The default (preset) time and date format that is displayed depends on your service provider. You can accept the default format or select ...
Page 19
Select “Exit”. The Ready screen for each mode (Phone, Group, and Private) now displays the time and date formats that you selected. STORING NUMBERS IN THE PHONE AND PRIVATE LISTS You can set a Phone and a Private ID ...
Page 20
Entering Names and Numbers 1. Press The “26=Phone/Prvt List” message appears on your display. 2. Press under “Ok”. . The next screen displays the remaining number of phone numbers and private IDs that you can store. 3. Enter the name ...
Page 21
Table 5: Entering a Name enter the name “Tim”: 1. Enter “T” by pressing 2. Move to the next letter by pressing ...
Page 22
At the next screen, enter the Private ID number associated with the name that you entered. To skip the Private ID number entry, press under “Skip”. For more information about using the speed-dial feature, see “Speed Dial Method” on ...
Page 23
CHANGING THE DISPLAY LANGUAGE You can customize your portable to display one of four languages: English, French, Spanish, or Portuguese. To change the displayed language: 1. Press screen. 2. Press under “Ok”. 3. Press to scroll through the language options. ...
Page 24
MODES AND MENUS Modes and menus are the navigational tools of your portable. Modes Modes are portable operation states for placing and receiving calls. Your portable has three modes: • Phone—for cellular phone calls and special phone features • Private—for ...
Page 25
Phone Mode and Menus - Cover Open ...
Page 26
If you set the Silent Group programming menu to silence incoming alerts and voices, the “Group Ready” screen displays as “Group-Silent”. To reset it: 1. Press 2. Press under “Ok”. i1000 TUV DEF ...
Page 27
N : OTES i1000 22 GETTING STARTED ...
Page 28
PHONE MODE In Phone mode, you can make and receive phone calls, forward calls, use call waiting, put calls on hold, and use three-way calling. AT FIRST GLANCE The first menu option choices that appear on the Phone Ready screen ...
Page 29
MAKING A PHONE CALL To make a phone call sure that the cover is open. You cannot make a phone call when the cover is closed you are not in Phone mode, press until “Phone Mode ...
Page 30
To hang up, press Name Method 4. Press until you see the “Name” menu option on MENU your display. 5. Press under “Name”. 6. Press the key with the first letter of the name associated with the Phone number. ...
Page 31
RECEIVING A PHONE CALL When you receive a call:. • The portable rings and/or vibrates. • If you subscribe to caller ID, the caller’s ID displays. • If the caller is stored in your Phone List and the name matches ...
Page 32
To end a call: Cover Closed ¥ Press under ÒEndÓ. This action terminates the connection. PROGRAMMING YOUR OWN PHONE NUMBER Programming your phone number means entering it into your portable. You can enter it now, or wait for your first ...
Page 33
To set a ring style: 1. Press to access the Programming Menu item for ring style selection. The display shows your current ring style. 2. Press under “Ok”. 3. Press to scroll through the available Ring Styles listen ...
Page 34
Unconditional Call Forwarding Unconditional call forwarding forwards all incoming calls to the designated number. Your portable will not ring when you activate unconditional call forwarding. 1. Within Phone mode, press until you see “Forwd” on the last line of the ...
Page 35
Within Phone mode, press until you see “Forwd” on MENU the last line of your display. 2. Press under “Forwd”. 3. Press once again until you MENU see “Busy” and “NoAns” on the last line of your display. To ...
Page 36
CALL WAITING Using the Call Waiting feature, you can answer an incoming call when you are on another call. Call Waiting is on unless you turn it off for a particular call. 1. You will hear a tone to alert ...
Page 37
CALLING If your portable has 3-way calling, you can combine two ongoing phone calls into one conversation. This option is available only when you initiate the second call. You cannot place either call on hold during a 3-way call. ...
Page 38
Setting the Active Line 1. Be sure that your portable displays “Phone Ready”. 2. Press until you see “Line 2” one of the following: • Press under “Line2” to activate Line 2 when Line 1 is the active ...
Page 39
N : OTES i1000 34 GETTING STARTED ...
Page 40
PRIVATE MODE A Private call is a one-to-one conversation between two individuals. Each portable is identifi name or a number that contains up to five digits. AT FIRST GLANCE The first menu option choices that appear on the ...
Page 41
GROUP/PRIVATE SPEAKER You can hear calls through either the earpiece or the speaker in Private mode. Pressing the Speaker button portable turns the Group/Private Speaker on or off. If you set the Speaker button on, you will hear incoming calls ...
Page 42
Press and hold the PTT button, wait for the chirp, then speak into the microphone. Name Method 1. Press until you see “Prvt Ready” on your display. Mode 2. Press until you see the “Name” menu option on MENU ...
Page 43
CALL ALERT™ You can access Call Alert from Group and Private modes. Using Call Alert, you can privately page an individual by sending an audible tone. Sending a Call Alert 1. Be sure that the cover is open. 2. Press ...
Page 44
Receiving a Call Alert with Stacking With Call Alert Stacking, you can either clear a Call Alert or save it to the queue for later recall. • To clear a Call Alert, press under “Clear”. • To place the Call ...
Page 45
N : OTES i1000 40 GETTING STARTED ...
Page 46
GROUP MODE A Group call is an instant communication that allows you to talk to all individuals in a talkgroup at the same time. A talkgroup is a pre- defined set of individuals who share a common communication need. Talkgroups ...
Page 47
GROUP/PRIVATE SPEAKER You can hear calls through either the earpiece or the speaker in Group mode. Pressing turns the Group/Private Speaker on or off. If you set the Group/Private Speaker button on, you will hear incoming calls through the speaker. ...
Page 48
Press under “Ok” talk, press the PTT button and wait for the chirp. RECEIVING A GROUP CALL No action is necessary to receive a Group call as long as your portable is not busy in an active ...
Page 49
N : OTES i1000 44 GETTING STARTED ...
Page 50
VOICE MAIL Your portable provides full support for Voice Mail. You can go to Voice Mail from any mode by pressing When you receive new voice mail messages in your voice mailbox, the icon appears on your display and you ...
Page 51
N : OTES i1000 46 GETTING STARTED ...
Page 52
MESSAGE MAIL Your portable provides full support for Message Mail. You can access this function from any mode by pressing Message Mail can be either a numeric page or a text message 140 characters. Your portable can ...
Page 53
Press under “Mail”. 2. Press under “Mesg”. Your Message mailbox opens and briefly displays the number of New and Saved messages currently in your Message mailbox. Then, the most recent message opens. 3. Use to scroll through the first ...
Page 54
PROGRAMMING MENU OPTIONS You can customize the settings on your portable using the Programming Menu. You may access the Programming Menu from any mode (Phone, Group, or Private). 1. Press until you see “Prgm” on the display. MENU 2. Press ...
Page 55
Table 7: Programming Menu Options Keypad Menu Option Number 4 Manual Lock 5 Auto Lock 6 Auto Answer 9 Vibrate Alert The following options require you to press two keypad numbers. For example, to enter keypad number 10, press 1 ...
Page 56
Table 7: Programming Menu Options Keypad Menu Option Number 20 Phone List Edit 21 Prvt ID List Edit 22 Talkgrp List Program 23 Area List Program 26 Phone/Prvt List 30 Ringer Volume 31 Set Ring Style 32 Mail Volume 33 ...
Page 57
Table 7: Programming Menu Options Keypad Menu Option Number 35 Speaker Volume 36 Spkr Vol Set Tone 38 Silent Group 40 Change Passcode 70 Language 71 Time/Date 80 Phone Only Contact your service provider before performing the shaded programming menu ...
Page 58
Change Service Key 50 NAM 51 Net ID i1000 Changes or resets the fraud prevention service key. Selects alternate Numeric Assignment Module (NAM). See local service provider for information. Edits the pre-programmed Network number list and select roaming options. ...
Page 59
N : OTES i1000 54 GETTING STARTED ...
Page 60
ERROR MESSAGES You may receive error messages under certain conditions. Before contacting your service provider, note the message, numeric code, and the conditions under which it appeared. The following table lists and describes the error messages. Table 8: Error Messages ...
Page 61
Table 8: Error Messages Error Messages Self Check Error Self Check Fail i1000 56 Message Description A fault was detected with your portable. If this error recurs, note the error code and contact your service provider. An operational fault was ...
Page 62
ACCESSORIES SAVE THESE ACCESSORY SAFETY INSTRUCTIONS • Before using the battery, read all the instructions and cautionary markings on (1) battery, (2) battery charger, and (3) portable using battery. • For your protection, store the battering it’s case when not ...
Page 63
Use of a non-recommended attachment to the Desktop Battery Charger may result in a risk of fire, electric shock, or injury to persons. • Make sure the Desktop Battery Charger cord ...
Page 64
BATTERIES MOTOROLA BATTERIES Kit Number Description/Chemistry NTN8618A Ultra-slim Lite NTN8615A Slim Lithium Ion NTN8614A Standard Lithium Ion NTN8617A Extended Lithium Ion * Charging times based on a fully-charged battery • recommended to charge the batteries within the temperature ...
Page 65
TRAVEL CHARGER The NTN6197A Travel Charger allows a battery to be charged from an AC outlet. On one end of the travel charger, an accessory connector attaches to the bottom of the portable unit. At the other (AC outlet) end ...
Page 66
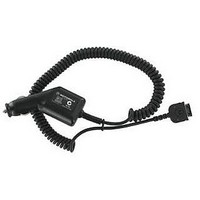
... VEHICULAR BATTERY CHARGER The NTN8655A Vehicular Battery Charger (VBC) enables in- vehicle communications by providing power to the portable unit as well as charging the portable’s Lithium Ion battery. The VBC is a power supply that allows the portable’s internal charger to charge the battery. The power light (green LED) will light when the VBC is receiving power ...
Page 67
Removing the Vehicular Battery Charger 1. Unplug the Vehicular Battery Charger’s cigarette lighter adapter from the vehicle’s cigarette lighter receptacle. 2. Press the latches on the accessory connector. 3. Pull the accessory connector from the bottom of the portable. Vehicular ...
Page 68
DESKTOP CHARGER The NTN8653A Desktop Rapid Charger will charge Motorola authorized batteries listed on page 59 for the i1000. To charge a battery, refer to Figure 3 and follow the procedure below: Front Pocket LED Indicators Pin Connector Figure 3: ...
Page 69
Desktop Battery Charger Troubleshooting If the battery is not charging and there is: A flashing yellow indicator — • battery is in the rear pocket, the rear pocket’s LED will continue to flash yellow until the battery in ...
Page 70
AUDIO ADAPTER The NTN8654A Audio Adapter allows you to connect an earpiece microphone to your portable for privacy and hands-free operation. The Audio Adapter that fits onto the bottom of the portable, provides a standard 2.5mm jack connection for an ...
Page 71
N : OTES i1000 66 GETTING STARTED ...
Page 72
SAFETY AND GENERAL INFORMATION IMPORTANT! Read this information before using your portable. RADIO OPERATION Your portable’s radio component contains a transmitter and a receiver. When it is ON, it receives, and also transmits, radio frequency (RF) energy. The radio operates ...
Page 73
Speak directly into the mouthpiece and position the antenna up and over your shoulder. When using the radio as a traditional two-way radio while making group or private calls with the Group/Private Speaker ON (no speaker icon visible in the ...
Page 74
Interference to Other Electronic Devices RF energy may affect improperly or inadequately shielded electronic operating and entertainment systems in motor vehicles. Check with the manufacturer or representative to determine if these systems are adequately shielded from external RF energy. ...
Page 75
Children Do not allow children to play with your radio not a toy. Children could hurt themselves or ! others (by poking themselves or others in the eye with the antenna, for example). Children also could damage ...
Page 76
Potentially Explosive Atmospheres Turn your radio OFF and do not replace the battery when in any area with a potentially ! ! explosive atmosphere rare, but your radio or its accessories could generate sparks which might trigger ...
Page 77
For Vehicles Equipped with an Air Bag An air bag inflates with great force. DO NOT place objects, including communication ! ! equipment, in the area over the air bag or in the air bag deployment area. If the ...
Page 78
OWNER’S INFORMATION Mobile Equipment Identifier (IMEI) _____________________________ _____________________________ _____________________________ Dealer Telephone Number Customer Service Number i1000 73 Own Phone Number Own Private Number Date Purchased ______________ _______________________ _______________________ GETTING STARTED ...
Page 79
PRIVATE NUMBER DIRECTORY Private Number TALKGROUP DIRECTORY Talkgroup Number i1000 74 Name Name GETTING STARTED ...
Page 80
GETTING STARTED ...