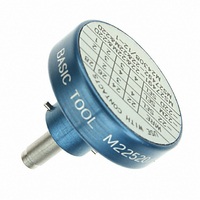
601966-4 Tyco Electronics, 601966-4 Datasheet - Page 15

601966-4
Manufacturer Part Number
601966-4
Description
Connector Accessories Loose Piece Tool Positioner
Manufacturer
Tyco Electronics
Type
Positionerr
Specifications of 601966-4
Accessory Type
Positioner
Product
Tool Component
Lead Free Status / RoHS Status
Not applicable / Not applicable
For Use With/related Products
A9977
For Use With
206071-4 - CONN SOCKET 22-28AWG CRIMP AU204351-5 - CONN SOCKET 22-28AWG CRIMP AU204351-4 - CONN SOCKET 22-28AWG CRIMP AUA34487 - CONN SOCKET 26-28AWG 50GOLDA34527 - CONN SOCKET 22-28AWG CRIMP GOLDA34486 - CONN SOCKET 22-28AWG 50GOLD
Lead Free Status / Rohs Status
Lead free / RoHS Compliant
Other names
A34489
4. CRIMPING PROCEDURE
Rev E
CAUTION
3. Place the back of the turret head over the
retainer ring on the back of the tool. Make sure that
the turret head is seated, then tighten the two
socket head cap screws of the turret head.
4. Rotate the turret until the positioner marked with
the desired contact size is aligned with the index
mark.
5. Press the turret until it is in the locked position.
6. Determine the selector setting according to the
contact size and wire size listed in Figure 3. Pull
the selector knob and turn to the proper setting.
NOTE
1. Strip the wire according to the wire size listed in
Figure 3.
2. Squeeze the tool handles together, then allow
the handles to FULLY open.
3. Insert the mating end of the contact into the
indenter from the FRONT of the tool until the
contact bottoms. Refer to Figure 6.
4. Insert the wire into the contact wire barrel. While
holding the wire in place, squeeze the tool handles
until the ratchet releases. Allow the handles to
open.
5. Remove the crimped contact from the tool.
Inspect the contact according to the applicable
application specification (114--series).
!
i
The tool handles must be fully opened when
changing the positioner selector setting;
otherwise, damage to the tool will occur.
These tools have a ratchet which ensures proper
crimping of the contacts. Once engaged, the
ratchet will NOT release until the tool handles are
FULLY closed.
Figure 6
Indenter
Nameplate
(Ref)
Front of Tool
Mating End
of Contact
5. MAINTENANCE AND INSPECTION
5.1. Daily Maintenance
Each operator should be aware of, and responsible
for, the following steps of daily maintenance, to
ensure continuous quality and reliability of each tool.
5.2. Gaging the Die Opening (Indenters)
This inspection requires the use of a plug gage
conforming to the dimensions provided in Figure 7.
For plug gages used for periodic general inspection,
see Figure 8. To gage the die opening, proceed as
follows:
If the die opening conforms to the gage inspection,
the tool may be considered dimensionally correct and
should be lubricated with a THIN coat of any good
SAE 20 motor oil. If the die opening does NOT
conform to the gage inspection, the tool must be
returned for further evaluation and repair.
For additional information regarding the use of a plug
gage, refer to 408--7424.
5.3. Crimp Height Inspection
This inspection requires the use of a micrometer, or
equivalent, as shown in Figure 10. It is recommended
using the micrometer (Dial Micrometer 27--9) which
may be purchased from:
CAUTION
NOTE
1. Remove dust, moisture, and other contaminants
with a clean brush, or soft, lint--free cloth. DO NOT
use objects that could damage the tool.
2. When the tool is not in use, keep the handles
closed, and store the tool in a clean, dry area.
1. Remove traces of oil or dirt from the die opening
and plug gage.
2. Fully close tool handles; then hold in this
position. DO NOT force beyond initial contact.
3. Insert GO element into the die opening; but do
not force it. The GO element must pass through
the length of the die opening. See Figure 9.
4. In the same manner, try to insert the NO--GO
element into the die opening. The NO--GO element
may enter partially, but must not pass completely
through the length of the die opening. See
Figure 9.
i
!
Be careful NOT to crimp the gage element.
Allowances for tool stresses and relaxation of
contact material were calculated into the crimp
height measurements for military specified
contacts only.
B.C. Ames Company
Lexington Street
Waltham, MA 02154
408- 7516
15 of 17


