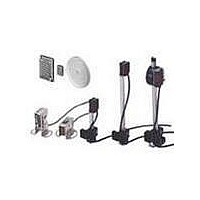
E39-S54 Omron, E39-S54 Datasheet - Page 44

E39-S54
Manufacturer Part Number
E39-S54
Description
Photoelectric Sensors - Industrial Slit Kit
Manufacturer
Omron
Datasheet
1.E39-S53.pdf
(48 pages)
Specifications of E39-S54
Lead Free Status / RoHS Status
Lead free / RoHS Compliant
E3S-A/B
Position of Arrow Indicating Optical Axis
Adjustor Cap
In order to prevent the sensitivity or OFF-delay time that has been
set from changing accidentally enclosed, cover the adjustors with
the adjustor cap (enclosed).
Mutual Interference Filter (E39-E6/-E8)
A set of 4 filters are sold together for two through-beam models (for 2
each of emitters and receivers).
For mounting, refer to the figure of the slit for the E3S-A Photoelec-
tric Sensor.
The arrow printed on the cover indicates the direction of polariza-
tion. By attaching the filters opposite to each other in polarization to
the emitters and the receivers (refer to the figure) in rows, mutual
interference can be prevented (in any case, the filter attached to an
emitter and to the corresponding receiver must be the same in direc-
tion of polarization or the photoelectric sensor will not function).
44
E3S-A (vertical)
E3S-A (horizontal)
E3S-B (vertical)
E3S-B (horizontal)
Model
Receiver
Adjustor cap
Top
Bottom
Adjustor
Press the adjustor cap until
this face touches the name
plate on the sensor.
Be aware of the direction of
polarization.
Position of lens in use
Emitter
Mounting Bracket
The direction of the optical axis coincides with the mounting direc-
tion of the E3S when the mounting screw is inserted into the lock
hole of the mounting bracket. Unlike conventional photoelectric
sensors, if the sensing object (or the retroreflector in the case of a
through-beam sensor) is in the mounting direction of the photoelec-
tric sensor, the object is detected with the incident light without the
time-consuming adjustment of the optical axis (but if the mounting
surface is not flat, the adjustment of the optical axis may still be re-
quired).
Note: The maximum tightening torque applied to the screw is
Note: The maximum tightening torque applied to the screw is
Insert this protruding portion
to the optical axis lock hole.
Optical axis
Optical axis
Base of mounting
bracket
5.5 kgf S cm (0.53 N S m).
5.5 kgf S cm (0.53 N S m).
E3S-A
E3S-B
Mounting direction
Mounting
direction
Optical axis lock hole
(M3)
Align the upper side of the photoelectric sen-
sor with that of the mounting bracket so that
the photoelectric sensor will be parallel to the
base of the mounting bracket.
Align the rear side of the photoelectric
sensor with that of the mounting brack-
et so that the photoelectric sensor will
be vertical to the base of the mounting
bracket.
Bracket can move
in this direction
Mounting screw (M3)
Optical axis lock hole (M3)
Bracket can move
in this direction
Base of mounting
bracket
E3S-A/B


