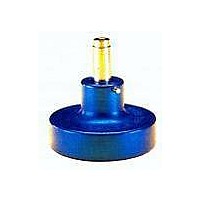
Z80-058 Harwin Inc, Z80-058 Datasheet - Page 3

Z80-058
Manufacturer Part Number
Z80-058
Description
Crimping, Stripping, Cutting Tools & Drills DATAMATE CRIMP POSITIONER
Manufacturer
Harwin Inc
Type
Crimp Toolr
Datasheet
1.Z80-058.pdf
(3 pages)
Specifications of Z80-058
Product
Crimping, Stripping & Cutting Tools & Drills
Lead Free Status / RoHS Status
Lead free / RoHS Compliant
3.
4.
5.
6.
M80-XXX piece parts are assembled using the Assembly Tool Z80-280. See Instruction Sheet IS-25
for details on assembly.
K36XX piece parts are assembled using the Assembly Tool ZK3610-00. See Instruction Sheet IS-22
for details on assembly.
There is virtually no maintenance required for the M22520/2-01 tool. However, it is good
practice to keep the indenter tips free of residual colour band deposits and other debris. A small
wire brush may be used for this purpose.
We strongly recommend that you:
1.
2.
3.
This is a precision crimp tool and should be handled as such.
IS-01
Issue: 3
Position the crimp socket fully into the positioner, with the crimp barrel uppermost.
Load the terminated end of the cable into the crimp barrel of the socket. Ensure the wire is
fully home, with all strands in place (see Figure C).
Squeeze the handles of the crimp tool fully together, until the ratchet releases. The handle
will return to the open position. Remove the crimped socket and wire. Using the sight hole
on the side wall of the socket, ensure that adequate insertion of strands into the crimp
socket has been achieved.
Crimp joints should be checked for:
DO NOT immerse tools in any cleaning solution.
DO NOT spray oil into tool to lubricate.
DO NOT attempt to disassemble tool or make repairs.
a) Correct combination of cable, tool setting and crimp termination.
b) Correctness of form and location of crimp.
c) Freedom of fracture, rough edges and flash.
d) Adequate insertion of all conductor strands in the crimp barrel.
e) Absence of damage to the conductor or the insulation.
Date: 03.10.07
C/Note: 9874
ASSEMBLY PROCEDURE
CARE OF TOOL
Figure C
Page 3 of 3


