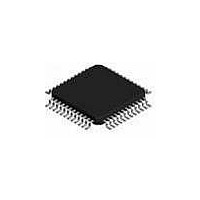
ispPAC-POWR1014A-01TN48I Lattice, ispPAC-POWR1014A-01TN48I Datasheet - Page 48

ispPAC-POWR1014A-01TN48I
Manufacturer Part Number
ispPAC-POWR1014A-01TN48I
Description
Supervisory Circuits ispPAC-POWR1014 w/ A DC I
Manufacturer
Lattice
Type
Power Supply Sequencer and Monitorr
Series
ispPAC®r
Datasheet
1.ISPPAC-POWR1014A-01TN48I.pdf
(52 pages)
Specifications of ispPAC-POWR1014A-01TN48I
Internal Hysteresis
Yes
Minimum Operating Temperature
- 40 C
Operating Temperature Range
- 40 C to + 85 C
Output Type
Open Collector / Drain
Number Of Voltages Monitored
10
Monitored Voltage
Adj V
Undervoltage Threshold
Adj
Overvoltage Threshold
Adj
Manual Reset
No
Watchdog
No
Power-up Reset Delay (typ)
500 ms
Supply Voltage (max)
3.96 V
Supply Voltage (min)
2.8 V
Supply Current (typ)
20 mA
Mounting Style
SMD/SMT
Maximum Operating Temperature
+ 85 C
Package / Case
TQFP-48
Applications
General Purpose
Voltage - Input
-0.3 V ~ 5.9 V
Voltage - Supply
2.8 V ~ 3.96 V
Current - Supply
20mA
Operating Temperature
-40°C ~ 85°C
Mounting Type
*
Lead Free Status / RoHS Status
Lead free / RoHS Compliant
Available stocks
Company
Part Number
Manufacturer
Quantity
Price
Company:
Part Number:
ISPPAC-POWR1014A-01TN48I
Manufacturer:
Lattice
Quantity:
176
Company:
Part Number:
ISPPAC-POWR1014A-01TN48I
Manufacturer:
LATTICE
Quantity:
494
Company:
Part Number:
ISPPAC-POWR1014A-01TN48I
Manufacturer:
Lattice Semiconductor Corporation
Quantity:
10 000
Part Number:
ISPPAC-POWR1014A-01TN48I
Manufacturer:
LATTICE
Quantity:
20 000
Lattice Semiconductor
Package Diagrams
48-Pin TQFP (Dimensions in Millimeters)
NOTES:
1.
2.
4.
5. THE TOP OF PACKAGE MAY BE SMALLER THAN THE BOTTOM
6.
7.
8.
3.
DIMENSIONING AND TOLERANCING PER ANSI Y14.5 - 1982.
ALL DIMENSIONS ARE IN MILLIMETERS.
DATUMS A, B AND D TO BE DETERMINED AT DATUM PLANE H.
DIMENSIONS D1 AND E1 DO NOT INCLUDE MOLD PROTRUSION.
ALLOWABLE MOLD PROTRUSION IS 0.254 MM ON D1 AND E1
DIMENSIONS.
OF THE PACKAGE BY 0.15 MM.
SECTION B-B:
THESE DIMENSIONS APPLY TO THE FLAT SECTION OF THE
LEAD BETWEEN 0.10 AND 0.25 MM FROM THE LEAD TIP.
A1 IS DEFINED AS THE DISTANCE FROM THE SEATING PLANE
TO THE LOWEST POINT ON THE PACKAGE BODY.
EXACT SHAPE OF EACH CORNER IS OPTIONAL.
c
0.08
SECTION B - B
3.
e
8.
M C
A
4X
PIN 1 INDICATOR
1
A -B D
b
b
b
1
N
D
D
c
1
SEE DETAIL "A"
3.
BASE METAL
LEAD FINISH
B 3.
C
0.20
SEATING PLANE
E
C A-B D
2-48
0.08 C
A
ispPAC-POWR1014/A Data Sheet
0.20
A2
A1
H
E1
SYMBOL
0.20 MIN.
A-B
1.00 REF.
A
A1
A2
D
D1
E
E1
L
N
e
b
b1
c
c1
DETAIL "A"
H
D
0.05
1.35
0.45
0.17
0.17
0.09
0.09
MIN.
-
D1
9.00 BSC
7.00 BSC
9.00 BSC
7.00 BSC
0.50 BSC
NOM.
1.40
0.60
48
0.15
0.13
0.20
-
-
0.22
GAUGE PLANE
0-7∞
L
MAX.
1.60
0.15
1.45
0.75
0.27
0.23
0.20
0.16
0.25


