ATAVRRZ200 Atmel, ATAVRRZ200 Datasheet - Page 21
ATAVRRZ200
Manufacturer Part Number
ATAVRRZ200
Description
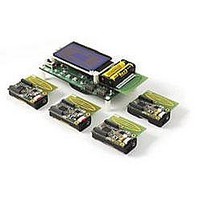
KIT DEMO AT86RF230
Manufacturer
Atmel
Series
AVR®r
Type
802.15.4/Zigbeer
Datasheet
1.ATAVRRZ200.pdf
(25 pages)
Specifications of ATAVRRZ200
Contents
5 Radio Controller Boards, Display Board, ATAVRISP mkII Programming Dongle, and Software
Wireless Frequency
2.45 GHz
For Use With/related Products
AT86RF230
Lead Free Status / RoHS Status
Lead free / RoHS Compliant


6.2.3
Demonstration Kit User Guide
How to re-program
the RCB MAC
address
5. Go back to the Program tab, in the Flash section, browse to the location of the
6. Alternatively, fuse settings can be altered using JTAG ICE mkII. In this case,
The 64-bit IEEE MAC address associated with the RCB is stored in the internal
EEPROM of the ATmega1281 that is on the RCB at address 0 (LSB). If the MAC
address has been inadvertently erased, the following steps can be followed to repro-
gram it into the EEPROM. This procedure should not be attempted if the RCB has a
valid MAC address. The following steps can only be performed with the JTAGICE mkII
while AVRStudio is running in Debug mode. This operation cannot be performed with
the AVRISP mkII included in your Demonstration kit.
The following steps reprogram the MAC address and MUST be completed from start to
finish once the program memory has been loaded (step 4), otherwise the RCB’s MAC
address will be overwritten with all FFs.
1. Open AVR Studio.
2. Connect the JTAGICE mkII to the RCB programming header located on the Dis-
3. From the File Menu, select Open File and open the file rz200_v1_0.hex from the
4. In the Save AVR Studio Project File dialog box, select Save to create a project
5. In the Select Device and Debug Platform dialog box, select JTAGICE mkII as the
6. Enter drop menu Debug -> JTAGICE mkII Options
7. Select Debug tag
8. In the General area, select the ‘Preserve EEPROM contents when reprogram-
9. If the EEPROM Memory window is not already open: from the View tab, open
10. Starting at location 0 (the upper most left corner of the window), enter the 16
Note:
11. From the Project tab, select Close Project. You will be prompted to close and
Caution: In the following step, you must select No. Selecting Yes will cause the MAC
address you just entered to be to permanently saved into the demokitfirmware.hex file.
This will make the file unuseable for other RCBs.
12. You will then be prompted to save the changes to demokitfirmware.hex. Select
input HEX file and select the filename: rz200_v1_0.hex. Press Program and ver-
ify that the process terminates successfully.
the Serial program downloading (SPI) enabled; [SPIEN=0] fuse must be
checked.
play Board.
CDROM.
file.
debug platform, ATmega1281 as the device, and then select Finish to start the
AVR Studio disassembler and load the program memory.
ming device’ box and hit OK.
the active HEX file’s EEPROM contents by selecting EEPROM from the Memory
Window drop down list. The EEPROM memory window should contain all FF’s.
byte MAC address printed on the back of the RCB PCB in reverse order.
end the debug session, select OK.
No.
The MAC address MUST be written in reverse order in 2 byte pairs, i.e., if the
MAC address is 00-04-25-FF-FF-17-01-52, the sequence written into the
EEPROM must be entered as 52-01-17-FF-FF-25-04-00 from location 0. The
MAC address will automatically be saved to the EEPROM with each keystroke.
5183A–ZIGB–12/07/06
6-3
Related parts for ATAVRRZ200
Image
Part Number
Description
Manufacturer
Datasheet
Request
R

Part Number:
Description:
DEV KIT FOR AVR/AVR32
Manufacturer:
Atmel
Datasheet:

Part Number:
Description:
INTERVAL AND WIPE/WASH WIPER CONTROL IC WITH DELAY
Manufacturer:
ATMEL Corporation
Datasheet:
Part Number:
Description:
Low-Voltage Voice-Switched IC for Hands-Free Operation
Manufacturer:
ATMEL Corporation
Datasheet:
Part Number:
Description:
MONOLITHIC INTEGRATED FEATUREPHONE CIRCUIT
Manufacturer:
ATMEL Corporation
Datasheet:
Part Number:
Description:
AM-FM Receiver IC U4255BM-M
Manufacturer:
ATMEL Corporation
Datasheet:
Part Number:
Description:
Monolithic Integrated Feature Phone Circuit
Manufacturer:
ATMEL Corporation
Datasheet:
Part Number:
Description:
Multistandard Video-IF and Quasi Parallel Sound Processing
Manufacturer:
ATMEL Corporation
Datasheet:
Part Number:
Description:
High-performance EE PLD
Manufacturer:
ATMEL Corporation
Datasheet:
Part Number:
Description:
8-bit Flash Microcontroller
Manufacturer:
ATMEL Corporation
Datasheet:
Part Number:
Description:
2-Wire Serial EEPROM
Manufacturer:
ATMEL Corporation
Datasheet: