E3X-NA41 Omron, E3X-NA41 Datasheet - Page 18
E3X-NA41
Manufacturer Part Number
E3X-NA41
Description
PNP GEN PURPOSE FO AMP
Manufacturer
Omron
Series
E3X-NAr
Type
Standard Fiber Optic Sensorr
Specifications of E3X-NA41
Output Type
PNP
Amplifier Type
Standard
Voltage - Supply
12 V ~ 24 V
Current - Supply
35mA
Mounting Type
DIN Rail
Sensor Output
PNP LO/DO
Length/height, External
31.5mm
Sensor Input
Fiber Optic
External Width
10mm
Supply Voltage Max
24V
External Depth
64.3mm
Switch Terminals
Wire Leaded
Supply Voltage Min
12V
Rohs Compliant
Yes
Fiber Optic Sensor Type
Standard Fiber Optic Sensor
Lead Free Status / RoHS Status
Lead free / RoHS Compliant
Lead Free Status / RoHS Status
Lead free / RoHS Compliant, Lead free / RoHS Compliant
Other names
E3XNA41
Available stocks
Company
Part Number
Manufacturer
Quantity
Price
Company:

Part Number:
E3X-NA41
Manufacturer:
AVAGO
Quantity:
11 130


18
E3X-SD/-NA
Operating Procedure
E3X-SD@
A 7-segment display showing excess gain is provided in
addition to the orange operation indicator.
Use these when adjusting the light axis and setting the
sensitivity at setup.
The sensitivity can be set with the UP and DOWN Keys similar
to using an adjuster knob. The sensitivity can also be easily
set by using the following three teaching functions.
The sensitivity can be set to the maximum. This is the optimal
setting for resistance against the effects of dust.
Two points (one with the workpiece and the other without) are
detected, and the operating level is set to the midpoint.
Changes within a time are detected, and the operating level is
set to the midpoint between the maximum and the minimum
values of the changes. This setting is optimal for when the
workpieces cannot be stopped.
Set the TEACH/RUN selector
switch to TEACH.
Press the UP Key for 3 s min.
Set the TEACH/RUN selector
switch to RUN (start of mea-
surement).
Set the TEACH/RUN selector
switch to TEACH.
Press the UP Key with the
workpiece present.
Press the UP Key with the
workpiece not present.
Set the TEACH/RUN selector
switch to RUN (start of mea-
surement).
Set the TEACH/RUN selector
switch to TEACH.
Press the UP Key.
1
Display/indicator status (for L/ON)
2
2-1. Maximum Sensitivity Setting
2-2. Teaching with/without a Workpiece
Operation description
2-3. Automatic Teaching
Operation description
Operation description
Displays
Sensitivity Setting
Operation indicator
Excess gain display
Switch/Key
TEACH
TEACH
Switch/Key
TEACH
TEACH
Switch/Key
TEACH
UP
UP
UP
UP
RUN
RUN
RUN
RUN
RUN
Excess gain
(10 times)
999%
100%
0%
Display
Display
Display
incident light or
interrupted light
interrupted light
Stable incident
90% to 110%
Description
110% min.
90% max.
Unstable
Unstable
Stable
light
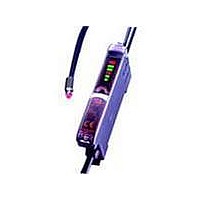
E3X-NA@
A bar display (with four green and one red) showing excess
gain is provided in addition to the orange operation indicator.
Use these when adjusting the light axis and setting the
sensitivity at setup.
Hold down the UP Key during
detection. Let the workpiece
pass while the key is held down.
Set the TEACH/RUN selector
switch to RUN (start of mea-
surement).
1
Display/indicator status (for L/ON)
Operation description
Displays
Operation indicator
Excess gain level display
Switch/Key
TEACH
UP
RUN
110% to 120%
90% to 110%
Excess gain
80% to 90%
120% min.
80% max.
Approx.
Approx.
Approx.
Approx.
Approx.
level
Display
interrupted light
interrupted light
incident light or
Stable incident
Description
Unstable
Unstable
Stable
light
Related parts for E3X-NA41
Image
Part Number
Description
Manufacturer
Datasheet
Request
R

Part Number:
Description:
SENSOR PHOTOAMP FIBER 2M CBL
Manufacturer:
Omron
Datasheet:

Part Number:
Description:
CONN READY NPN GEN PURPOSE FO
Manufacturer:
Omron
Datasheet:
Part Number:
Description:
CONN READY PNP GEN PURPOSE FO
Manufacturer:
Omron
Datasheet:
Part Number:
Description:
PNP GREEN LED GEN PURPOSE FOA
Manufacturer:
Omron
Datasheet:
Part Number:
Description:
AMANUAL FA NPN RED M8 CONN
Manufacturer:
Omron
Datasheet:

Part Number:
Description:
NPN GEN PURPOSE FO AMP
Manufacturer:
Omron
Datasheet:

Part Number:
Description:
AUTOTUNE NPN
Manufacturer:
Omron
Datasheet:
Part Number:
Description:
AUTOTUNE NPN TMR REMOTE TCH
Manufacturer:
Omron
Datasheet:
Part Number:
Description:
AUTOTUNE PNP TMR REMOTE TCH
Manufacturer:
Omron
Datasheet:

Part Number:
Description:
PREWIRED DIGITAL NPN FO AMP
Manufacturer:
Omron
Datasheet:

Part Number:
Description:
G6S-2GLow Signal Relay
Manufacturer:
Omron Corporation
Datasheet:
Part Number:
Description:
Compact, Low-cost, SSR Switching 5 to 20 A
Manufacturer:
Omron Corporation
Datasheet:
Part Number:
Description:
Manufacturer:
Omron Corporation
Datasheet: