EE-1003 Omron, EE-1003 Datasheet - Page 9
EE-1003
Manufacturer Part Number
EE-1003
Description
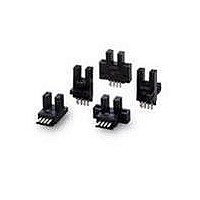
Sensor Hardware & Accessories 3 Pin Connector w/3.3 Wire Harness
Manufacturer
Omron
Series
EE Seriesr
Specifications of EE-1003
Product
Connector
Connector Mounting
Cable
Gender
Female
Connector Type
Circular
Terminal Type
Wire Leaded
Contact Material
Phosphor Bronze
Cable Length
1m
No. Of Contacts
3
Contact Termination
Solder
Accessory Type
Connector
Cable Assembly Type
Sensor
Rohs Compliant
Yes
Lead Free Status / RoHS Status
Lead free / RoHS Compliant
For Use With
EE-SPZ301
For Use With/related Products
Omron Photosensors
Lead Free Status / RoHS Status
Lead free / RoHS Compliant, Lead free / RoHS Compliant
Available stocks
Company
Part Number
Manufacturer
Quantity
Price
Company:

Part Number:
EE-1003
Manufacturer:
Panasonic
Quantity:
4 328


If the metal mounting base is subjected to inductive electrical
noise, the photomicrosensor can be activated accidentally. If
noise is a problem, take the following precautions:
1. Connect the negative terminal to the mounting base so that
2. Connect the negative terminal to the mounting base with a
3. Insert a plastic insulating plate with a thickness of approxi-
Wire, as shown by the following illustration, to connect a small
inductive load (a relay for example) to the photomicrosensor. A
diode must be connected parallel to the relay to absorb the
reverse voltage.
The possible sensing distance differs for each EE-SPZ301/401
model when used with the E32-DC200. The differences are,
however, within 6 to 10 mm using white paper with a reflection
factor of 90%.
J TIGHTENING THE FIBER UNIT
Tighten the Fiber Unit at a torque less than 8kg-cm. Use the
correct spanner to tighten the Fiber Unit.
J INSERTING THE FIBER UNIT
Do not pull or push the Fiber Unit with excessive force. Bend the
fiber in as large a radius as possible and 25 mm min. Do not
bend the portions between the both ends and 40 mm from the
ends of the fiber.
9
there will be no difference in electric potential between the
photomicrosensor and mounting base.
0.47-µF capacitor.
mately 10 mm between the photomicrosensor and mounting
base.
Main body
OUT
No
40 mm min.
40 mm min.
Relay
Fiber unit
5 to 24 VDC
0 V
Install the fiber with a holder or clip.
Install the Fiber Unit with nylon cable holders or cable ties as
shown below so that no excessive force is directly applied to any
section of the cable.
J INSTALLATION
When installing three or four transmissive-type
photomicrosensors in parallel, do not mount all the emitters on
one side and the receivers on the other side. Mount each pair of
emitter and receiver so that it emits light in the opposite direction
from the next pair.
Two reflective photomicrosensors mounted in parallel could
malfunction if they are used to sense an object moving at slow
speed.
The operating temperature of the amplifier unit must not exceed
55°C.
The connection force between the fiber and the
photomicrosensor will decrease when the ambient temperature is
high. If high ambient temperature can be expected, install the
fiber with a holder or clip, so the fiber will not pull off.
J POWER SUPPLY
When using a standard switching regulator, ground the FG and G
terminal to ensure that the photomicrosensor will be in a stable
operating condition.
J CHEMICAL RESISTANCE
Do not use the photomicrosensor in an atmosphere containing
organic solvents, such as paint thinner vapor.
OUT
Fiber unit
Nylon cable holder
OUT
Switching
regulator
G
FG
Related parts for EE-1003
Image
Part Number
Description
Manufacturer
Datasheet
Request
R

Part Number:
Description:
SENSOR OPTO 5MM LIGHT-ON TRANS
Manufacturer:
Omron
Datasheet:

Part Number:
Description:
Photoelectric Sensors - Industrial NPN To PNP Converter
Manufacturer:
Omron
Datasheet:

Part Number:
Description:
OPTO SENSOR SLOT TYPE NPN DK-ON
Manufacturer:
Omron
Datasheet:

Part Number:
Description:
OPTO SENSOR SLOT TYPE 1MM SMT
Manufacturer:
Omron
Datasheet:

Part Number:
Description:
OPTO SENSOR SLOT TYPE 3MM SMT
Manufacturer:
Omron
Datasheet:

Part Number:
Description:
OPTO SENSOR SLOT TYPE 2MM SMT
Manufacturer:
Omron
Datasheet:

Part Number:
Description:
OPTO SENSOR DUAL SLOT 2MM SMT
Manufacturer:
Omron
Datasheet:

Part Number:
Description:
OPTO SENSOR SLOT TYPE 2MM
Manufacturer:
Omron
Datasheet:

Part Number:
Description:
OPTO SENSOR SLOT TYPE 3MM
Manufacturer:
Omron
Datasheet:

Part Number:
Description:
OPTO SENSOR SLOT TYPE 2MM
Manufacturer:
Omron
Datasheet:


Part Number:
Description:
PHOTO MICROSENSOR
Manufacturer:
Omron
Datasheet:

Part Number:
Description:
PHOTO MICROSENSOR :
Manufacturer:
Omron
Datasheet:

Part Number:
Description:
PHOTO MICROSENSOR
Manufacturer:
Omron
Datasheet:

Part Number:
Description:
PHOTO MICROSENSOR
Manufacturer:
Omron
Datasheet: