204 Panavise, 204 Datasheet - Page 5
Specifications of 204
Tool Type
Jaw Pads
Product
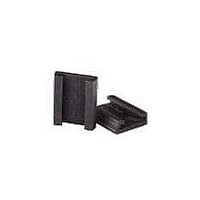
Vise Jaw Pads
Color
Black
For Use With/related Products
Vise Model 201 and 203
Lead Free Status / Rohs Status
Lead free / RoHS Compliant
Other names
Q2515154A
Available stocks
Company
Part Number
Manufacturer
Quantity
Price
Company:

Part Number:
204-0016-000
Manufacturer:
EDAC
Quantity:
3 000
Part Number:
204-10SDRD/S530-A3
Manufacturer:
EVERLIGHT/亿光
Quantity:
20 000
Part Number:
204-10SUBC/C470/S400-X9-L
Manufacturer:
EVERLICHT
Quantity:
20 000
Company:
Part Number:
204-10SUGC/S400-A4-L
Manufacturer:
EVERLIGHT
Quantity:
49 380
Company:
Part Number:
204-10SURC/S400-A8-L
Manufacturer:
EVERLIGHT
Quantity:
39 690
Company:
Part Number:
204-10SURD/S530-A3-L
Manufacturer:
EVERLIGHT
Quantity:
46 380
Company:
Part Number:
204-10SURT/S530-A3
Manufacturer:
EVL
Quantity:
8 000
Part Number:
204-15/T1C3-4QSA
Manufacturer:
EVERLIGHT/亿光
Quantity:
20 000


Accessories
Unique vise accessories (pages 22-23) help keep you
organized! Here the Wire Manager, Model 358,
keeps the leads under control, and when combined
with the Solder Station, Model 371, makes a neat,
efficient work station.
Base Mounts
Because you work in different environments, PanaVise
Base Mounts help you work more efficiently. Base Mounts
(pages 14-15) include mounting screws and fit the PV Jr.
Model 201, 300 and 305 Bases.
Tilt, Turn & Rotate
PanaVise’s patented “split-ball” allows the vise head
to move smoothly through 3-planes: Tilts 90˚, Turns &
Rotates 360˚ to position the vise head exactly where
you want it.
Interchangeability
All 300 series Vise Heads (pages 10-12) fit all 300
series Vise Bases (page 13). Work on a circuit board
in the morning and a model train in the afternoon! If
you already own a PanaVise, you can easily expand its
capabilities by adding another Vise Head.
One Knob; 3-planes
A single knob controls the Vise Head. Loosen the knob
and the Vise Head moves smoothly into position; tighten
it and the Vise Head locks into place.
NEXT > > >