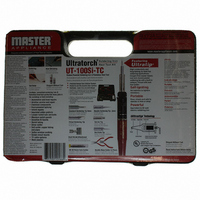
UT-100SI-TC Master Appliance Co, UT-100SI-TC Datasheet - Page 5

UT-100SI-TC
Manufacturer Part Number
UT-100SI-TC
Description
KIT ULTRCH BUTANE SLDR HEAT TOOL
Manufacturer
Master Appliance Co
Series
Ultratorch®r
Type
Butane Torch, Flamelessr
Specifications of UT-100SI-TC
Temperature Range
1202°F (650°C)
Features
Includes: Heat Gun, Case, 5 Nozzles, Pliers, 60/40 Solder, Wire Cutter, Sponge
Brand/series
UT Series
Length
10.3 in.
Length, Overall
11.25 in.
Power, Rating
20 to 80 W
Weight
5.5 Oz.
Kit Contents
Soldering Tips, A Hot Air Tip, Heat Shrink Reflector, Hot Knife, Wire Cutter, Needle Nose Pliers
Lead Free Status / RoHS Status
Not applicable / Not applicable
Voltage
-
Power - Rated
-
Lead Free Status / RoHS Status
Not applicable / Not applicable
Other names
MA1025
UT-100SI-TC
UT-100SI-TC
Ignition Instructions
1. Set gas control lever to 3 and move On/Off lever to “ON”. In cold conditions, move gas lever
2. Push ignition button all the way down slowly, holding in down position for 3 seconds after it
3. When catalyst inside of exhaust opening glows red, slowly release button.
4. If unit did not ignite, repeat.
5. To turn off, move On/Off lever to “OFF” position until it clicks.
All models come with the soldering tip pre-installed. To change tips, unscrew knurled nut,
drop out tip and drop in replacement tip.
As a heat tool, heated gas flows from the end of the
heat tip. Use the heated gas to heat, dry or shrink as
necessary. Tip temperatures can be varied by adjust-
ing the gas control lever.
As a soldering iron, heat conducts into tip. Touch tip to
work surface and apply solder. Use proper tip for type
of work being performed. Make sure hot air exhaust
points away from work surface.
The ejector is where the
air/fuel mixture takes place.
Occasionally it may be
necessary to replace due
to clogging.
Unscrew the knurled nut and
remove the tip and tip hous-
ing. Disconnect ignition wire
by gently pulling lead wire
down and away from ignition
Use as a Soldering Iron or Heat Tool
To Replace Ejector
higher, in warm, lower.
clicks. You may hear a whistling sound.
Temperature can be changed by adjusting gas control lever.
tube. Insert spanner wrench
into small hole in the ejec-
tor. While holding spanner
wrench stationary, loosen
locking hex nut above
ejector by using open end
wrench and turning counter
clockwise. Use spanner
wrench to remove ejector.
Replace ejector and tighten.
Mount burner by turning
clockwise onto ejector until
light tension is felt. Align insu-
lation tube in a straight line
with ignition wire. Tighten hex
nut with open end wrench
while holding ejector in place
with spanner wrench. Insert
lead wire into insulation tube.
Push ignition button to con-
firm sparking. Replace tip
and tip housing.


