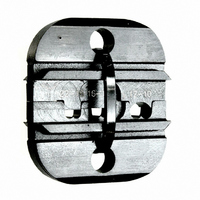
58509-1 Tyco Electronics, 58509-1 Datasheet - Page 3

58509-1
Manufacturer Part Number
58509-1
Description
DIE SET 22-10AWG BUDGET
Manufacturer
Tyco Electronics
Series
Pro-Crimper™ III, Budgetr
Datasheet
1.58508-1.pdf
(5 pages)
Specifications of 58509-1
Connector Type
Terminals and Splices
Crimp Handle
A9996-ND
Crimp Or Cable Size
10-22 AWG
Lead Free Status / RoHS Status
Not applicable / Not applicable
Other names
A31883
Rev
Detail A
Edge of Wire Even
with Edge of Terminal
Wire Barrel and Edge
of Wire Anvil
PRO-CRIMPER III Hand Crimping Tool Assembly 58508-1
4. Hold the terminal or butt splice in position and
squeeze the tool handles together until ratchet
engages sufficiently to hold the terminal or butt
splice in position. Do NOT deform the wire barrel.
5. Insert stripped wire into the wire barrel of the
terminal or butt splice as follows:
Wire Crimper
B
a. For terminals, make sure that the end of the
wire is even with the edge of the wire barrel and
wire crimper, as shown in Figure 4, Detail A.
b. For butt splices, make sure that the end of
the wire butts against the internal wire stop of
the splice, as shown in Figure 4, Detail B.
Figure 3
Back of Tool
(Wire Side)
NOTE:
Strip Length
Wire
Not to Scale
Tyco Electronics Corporation
Figure 4
5. CRIMP INSPECTION
Inspect crimped terminals and butt splices by
comparing to the ones shown in Figure 5. Use only
the terminals and butt splices that meet the conditions
shown in the “ACCEPT” column. “REJECT” terminals
and butt splices can be avoided by carefully following
the above procedures and by performing regular tool
maintenance, as provided in Section 8,
MAINTENANCE AND INSPECTION.
6. CRIMP HEIGHT INSPECTION
Crimp height inspection is performed through the use
of a micrometer with a modified anvil, commonly
referred to as a crimp–height comparator. Tyco
Electronics does not manufacture or market
crimp–height comparators. Detailed information on
obtaining and using crimp–height comparators can be
found in instruction sheet 408–7424.
6. Holding the wire in place, squeeze tool handles
together until ratchet releases. Allow tool handles
to open and remove crimped terminal or butt
splice.
NOTE
7. Inspect the crimped terminal or butt splice as
described in Section 5. Check the terminal or butt
splice crimp height as described in Section 6. If
necessary, adjust the crimp height as described in
Section 7, RATCHET ADJUSTMENT.
Detail B
Edge of Wire Butts
Against Internal Wire
Stop of Butt Splice
i
Wire Crimper
The crimped terminal or butt splice may stick in
the crimping area; however, it can be easily
removed by pushing upward on the mating end of
the terminal or butt splice.
Strip Length
408-4372
3
of 5


