91512-1 Tyco Electronics, 91512-1 Datasheet - Page 4
91512-1
Manufacturer Part Number
91512-1
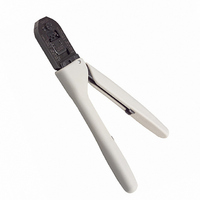
Description
CRIMP TOOL MATE-N-LOK 18-24AWG
Manufacturer
Tyco Electronics
Series
Certi-Crimp™ II, Commercial MATE-N-LOK®r
Type
Crimpersr
Specifications of 91512-1
Tool Type
Hand Crimper
Features
Side Entry, Ratchet
Wire Size (awg)
28-22
Crimp Tool
Hand
Product
Crimping, Stripping & Cutting Tools & Drills
Fits Cable/wire
24-20 AWG
Lead Free Status / RoHS Status
Not applicable / Not applicable
For Use With/related Products
Rectangular Contacts, 18-24 AWG
For Use With
61473-1 - CONN SOCKET 18-24AWG TIN CRIMP170148-1 - CONN SOCKET M-N-L 18-24AWG TINA25554 - CONN PIN 18-24AWG TIN CRIMPA25555 - CONN SOCKET 18-24AWG TIN CRIMPA25558 - CONN PIN 18-24AWG GOLD CRIMPA25559 - CONN SOCKET 18-24AWG GOLD CRIMPA1433 - CONN SOCKET 18-24AWG GOLD CRIMPA1432 - CONN PIN 18-24AWG GOLD CRIMPA1423 - CONN SOCKET 18-24AWG TIN CRIMPA1422 - CONN PIN 18-24AWG TIN CRIMP
Lead Free Status / Rohs Status
Lead free / RoHS Compliant
Other names
A9974


4.5. CERTI-CRIMP Ratchet Inspection
The CERTI–CRIMP ratchet feature on these hand tools
should be checked to ensure that the ratchet does not
release prematurely, allowing the crimping dies to open
before they have fully bottomed. Obtain a 0.025–mm
[.001–in.] shim that is suitable for checking the clearance
between the bottoming surfaces of the crimping dies.
Proceed as follows:
CERTI-CRIMP II Straight Action Hand Tools
50.04
[1.970]
4
of 4
1. Select the maximum size wire and strip it
according to dimensions listed in the drawing shipped
with the tool.
2. Select contact and crimp section corresponding to
the selected wire size (refer to the drawing shipped
with the tool).
3. Position the contact and wire in the crimping dies,
as described in the CRIMPING PROCEDURE
section.
4. Hold the wire in place and squeeze the handles
until the CERTI–CRIMP ratchet releases. Hold the
handles in this position, maintaining just enough
tension to keep the dies closed.
5. Check the clearance between the bottoming
surfaces of the wire crimper and the wire anvil. See
Figure 1. If the clearance is 0.025 mm [.001 in.] or
less (on at least two of the bottoming surfaces), the
ratchet is satisfactory. If clearance exceeds 0.025 mm
[.001 in.], the ratchet is out of adjustment and must be
repaired. See Section 5.
29.46 [1.160]
ITEM
1
19.81 [.780]
41.91 [1.650]
12.19 [.480]
76.71 [3.020]
PART NUMBER
21045-3
1
D
Closed to Last Ratchet Point Before Release
Tyco Electronics Corporation
REPLACEABLE PARTS
296.93 [11.690]
Figure 4
5. REPLACEMENT AND REPAIR
Replacement parts are listed in Figure 4. Parts other
than those listed in Figure 4 should be replaced by Tyco
Electronics to ensure quality and reliability of the tool.
Order replacement parts through your Tyco Electronics
Representative, or call 1–800–526–5142, or refer to the
appropriate website:
Tools may also be returned for evaluation and repair. For
tool repair service, contact a Tyco Electronics
Representative at: 1–800–526–5136, or reference the
appropriate website above.
6. REVISION SUMMARY
RING, Retaining
DESCRIPTION
NOTE
220.22 [8.670]
S toolrepair@tycoelectronics.com
S asia.tool@tycoelectronics.com
S jp_tool@tycoelectronics.com
S uktoolingservicecentre@tycoelectronics.com
S Updated document to corporate requirements
S Added NOTE to Figure 1
S Added new artwork and dimensions to Figure 4
The insulation crimper does not bottom on the
insulation anvil.
15.75 [.620]
QTY PER TOOL
4
27.43 [1.080]
408-8547
70.36
[2.770]
Rev
D
E