E-9J 3M, E-9J Datasheet
E-9J
Manufacturer Part Number
E-9J
Description
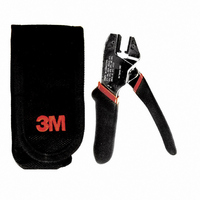
SCOTCHLOK LIGHTWEIGHT CRIMP TOOL
Manufacturer
3M
Series
Scotchlok™r
Specifications of E-9J
Tool Type
Hand Crimper
Features
Side Entry
For Use With/related Products
Splices
For Use With
UY2-25/PACK - SCOTCHLOK BUTT 19-26AWG 25PCSUY2-PK50 - SCOTCHLOK BUTT 19-26AWG 50PCSUY2-JAR500 - SCOTCHLOK BUTT CONN 19-26AWGUY2(BULK) - SCOTCHLOK BUTT CONN 19-26AWGUY(CART) - SCOTCHLOK BUTT 22-26AWG CARTUY(BULK) - SCOTCHLOK BUTT CONN 22-26AWGUR2-25/PACK - SCOTCHLOK BUTT 19-26AWG 25PCSUR2-PK50 - SCOTCHLOK BUTT 19-26AWG 50PCSUR2-JAR500 - SCOTCHLOK BUTT CONN 19-26AWGUR(CART) - SCOTCHLOK BUTT 19-26AWG CARTUR(BULK) - SCOTCHLOK BUTT CONN 19-26AWGUPC(CART) - SCOTCHLOK CLEARING CAP 22-26AWGUP3(CART) - SCOTCHLOK BUTT CONN DRY 19-26AWGUP3-BULK - SCOTCHLOK BUTT CONN DRY 19-26AWGUP2(CART) - SCOTCHLOK BUTT CONN DRY 22-26AWGUCC-JAR500 - SCOTCHLOK CLEARING CAP 22-26AWGUCC(CART) - SCOTCHLOK CLEAR-CAP 22-26 CARTUB2A-25/PACK - SCOTCHLOK BRIDGE 19-26AWG 25PCSUY2100 - SCOTCHLOK BUTT CONN DRY 19-26AWGUY2000 - SCOTCHLOK BUTT CONN 19-26AWGUR2000 - SCOTCHLOK BUTT CONN 19-26AWGUPC1000 - SCOTCHLOK CLEARING CAP 22-26AWGUPB1000 - SCOTCHLOK TAP CONN DRY 22-26AWGUP3000 - SCOTCHLOK BUTT CONN DRY 19-26AWGUP2000 - SCOTCHLOK BUTT CONN DRY 22-26AWGUCC1000 - SCOTCHLOK CLEARING CAP 22-26AWGUB2A1100 - SCOTCHLOK TAP/BRIDGE 19-26AWGUB2A1000 - SCOTCHLOK TAP/BRIDGE 19-26AWGU2A1000 - SCOTCHLOK TRIM-OUT 19-26AWGUR2(BX) - SCOTCHLOK BUTT CONN 19-26AWGUAL27828 - SCOTCHLOK BUTT 19-24AWG CARTUG20082 - SCOTCHLOK TAP/BRIDGE 19-26AWG CUUAL27827 - SCOTCHLOK LOW VOLT GREY (LOOSE)UY14911 - SCOTCHLOK BUTT CONN 22-26AWGUR20074 - SCOTCHLOK BUTT CONN 19-26AWG
Lead Free Status / RoHS Status
Lead free / RoHS Compliant
Other names
0-00-51115-19004-9
00051115190049
5111519004
51115190049
80-6113-1406-5
80611314065
E9J
00051115190049
5111519004
51115190049
80-6113-1406-5
80611314065
E9J


Scotchlok
Instructions
The 3M
designed to terminate a wide range of 3M Scotchlok connectors. The lightweight
tool incorporates a 10:1 mechanical advantage to reduce operator fatigue and
is fitted with textured plastic grips for improved handling. It is supplied with a
protective fabric carrying pouch.
1.0
2.0
2.1
2.2
2.3
3.0
3.1
3.2
3.3
™
The E9-J tool is suitable for the termination of the following Scotchlok connectors:
211, UAL, UB2A, UB2A-D, UCC, UG, UP2, UP3, UPB, UPC, UR, UR2, UR2-D, UY, UY2,
UY2-D, and UYF
Instructions for use with Scotchlok connectors UAL, UCC, UP2, UP3, UPC, UR,
UR2, UR2-D, UY, UY2, UY2-D, and UYF
Insert the trimmed wire ends into the connector. Do not strip the wires.
Make sure all wires are inserted past the metal element to the back wall of
the connector.
Place the connector between the jaws of the E-9J tool, cap side down.
Make sure the wires remain fully inserted to the back wall of the
connector. Rest the connector against the step in the back wall of the
crimping jaws and squeeze the handles of the E-9J tool.
Complete termination of the connector is achieved by full closure of the
tool handles until the connector cap remains flush with the rim of the
connector body when the tool is released.
Instructions for use with Scotchlok connectors UB2A, UB2A-D, UG, and UPB
Insert the run wire into the open side of the connector and the tap wire into
the wire port on the closed side of the connector. Do not strip the wire.
Make sure the tap wire is inserted past the metal element to the back wall
of the connector.
Place the connector between the jaws of the E-9J tool, cap side down.
Make sure the run wire remains inside the connector body, and the tap
wire remains inserted to the back wall of the connector. Rest the connector
against the step in the back wall of the crimping jaws and squeeze the
handles of the E-9J tool.
Complete termination of the connector is achieved by full closure of the
tool handles until the connector cap remains flush with the rim of the
connector body when the tool is released.
Scotchlok
™
Crimping Tool E-9J is a hand operated crimping tool
™
Crimping Tool Model E-9J
E-9J Summary of contents
Page 1
... Make sure all wires are inserted past the metal element to the back wall of the connector. 2.2 Place the connector between the jaws of the E-9J tool, cap side down. Make sure the wires remain fully inserted to the back wall of the connector. Rest the connector against the step in the back wall of the crimping jaws and squeeze the handles of the E-9J tool ...
Page 2
... Place the connector between the jaws of the 3M Scotchlok Crimping Tool E-9J. Ensure the wires remain located within the body of the 211connector. Rest the connector against the step in the back wall of the crimping jaws and squeeze the handles of the E-9J tool. ...