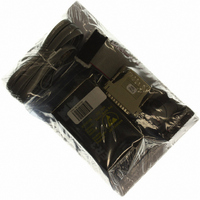
ER3-1M TechTools, ER3-1M Datasheet - Page 8

ER3-1M
Manufacturer Part Number
ER3-1M
Description
EMULATOR EPROM ECONOROM III 1MEG
Manufacturer
TechTools
Series
EconoROM™ IIIr
Type
Memoryr
Datasheet
1.ER3-256.pdf
(24 pages)
Specifications of ER3-1M
Contents
ER3 EconoROM III Emulator, Cables (Daisy-chain, LPT and Target) and more
For Use With/related Products
EPROMs
For Use With
CBL08-25 - 25 FT DOWNLOAD CABLE UPGRADEC32D-6 - 6" TARGET CABLE IDC TO 32PIN DIPC28D-6 - 6" TARGET CABLE IDC TO 28PIN DIPPS-RT1 - EXTERNAL PWR SUPPLY
Other names
ER31M
Connect RESET
The RESET line must be connected to guarantee proper target operation. The reset signal is automatically
asserted during each emulator access. This prevents the target from “running stupid” while we change its
code space. The reset signal is released at the completion of the transfer, allowing the target to restart with
the new code image. We also use the reset line to prevent the target from attempting to execute code before
the emulator recognizes that the target has sufficient voltage to run.
EconoROM III provides two reset outputs. RESET is an open emitter, ACTIVE HIGH output. /RESET is
an open collector ACTIVE LOW output. Both signals are pulled to the in-active state via very weak
resisters. Connect the appropriate output to your target’s RESET circuitry.
EconoROM III’s reset signal should be connected to the target’s reset circuitry at the most “upstream” point
available. This is usually an RC combination that senses the target’s power up or a manual reset switch.
Sometimes this circuitry is connected directly to the CPU reset input. In other targets, it will be connected
to the input to a reset chip, power management chip, a watchdog timer chip or a Schmitt trigger gate.
DO NOT CONNECT EconoROM III’s RESET
OUTPUT ACROSS A TOTEM-POLE OR BIPOLAR
GATE, OR DIRECTLY TO GROUND OR 5VOLTS.
THIS MAY RESULT IN DAMAGE TO
EconoROM III OR THE TARGET.
If your target has a reset button, determining where to connect the reset line is easy. Use a DVM, SCOPE
or logic probe to measure the voltage of both sides of the switch. They should be different (one HIGH and
one GROUND). Push and hold the button and take the two measurements again. Both should now be the
same (HIGH or GROUND). Notice that one side of the switch remained the same, the other side changed
states. Connect the reset lead to the side that CHANGED STATES. The level at this point indicates which
POLARITY (RESET or /RESET) we should use. Ground indicates active LOW; use /RESET. HIGH
indicates active high; use RESET.
The next easiest connection point is an RC reset network. If you find a resister and capacitor in series
between power and ground with the common point connected to the CPU or a monitor chip marked
something like reset or clear, you probably found it. Connect the reset line at the RC juncture. If the
resister is connect to ground and the capacitor is connected to power, use the RESET signal. If the resister
is connected to power and the capacitor is connected to ground, use the /RESET signal. In some targets, the
resistor or the capacitor may be missing but these instructions would still apply if you imagine the missing
component is internal to the processor or monitor chip. If you are not sure, ask ‘sparkie’ (a technical term
for the hardware engineer that designed the board).
Call our technical support if you are unsure about which output to use or where to connect to your target.
EconoROM III User’s Manual
4
Copyright © 2000, TechTools


