MCP3901EV-MCU16 Microchip Technology, MCP3901EV-MCU16 Datasheet - Page 15
MCP3901EV-MCU16
Manufacturer Part Number
MCP3901EV-MCU16
Description
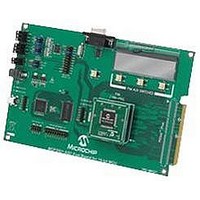
BOARD EVAL FOR 2CH ADC MCP3901
Manufacturer
Microchip Technology
Datasheets
1.MCP3901A0-ISS.pdf
(60 pages)
2.MCP3901A0-ISS.pdf
(30 pages)
3.MCP3901EV-MCU16.pdf
(38 pages)
4.MCP3901EV-MCU16.pdf
(38 pages)
Specifications of MCP3901EV-MCU16
Number Of Adc's
2
Number Of Bits
24
Data Interface
SPI™
Inputs Per Adc
1 Differential
Input Range
±1 V
Voltage Supply Source
Analog and Digital
Operating Temperature
-40°C ~ 85°C
Utilized Ic / Part
MCP3901
Silicon Manufacturer
Microchip
Application Sub Type
ADC
Kit Application Type
Data Converter
Silicon Core Number
MCP3901, PIC24F, PIC24H, DsPIC33, PIC18F86J55
Kit Contents
Board
Lead Free Status / RoHS Status
Lead free / RoHS Compliant


2.1
2010 Microchip Technology Inc.
DSPIC33 FIRMWARE DESCRIPTION
2.1.1
After reset, the global variables ConfigHValue, ConfigLValue, GainValue, and
StatusComValue are written to 0x00. These variables will be written with values
received from the PC, to set up the MCP3901 as required. Next, the Initialization()
function is called to set up the dsPIC33. First, interrupt nesting is configured in order to
disable the user interrupts by putting the MCU priority at 7 (maximum). External interrupt
3 is enabled on the positive edge. The INT3 interrupt is enabled but the priority is set to 6.
Since it is lower than 7, it will not be active until the MCU priority is decreased to less than
6. The MCU uses the FRC (7.37 MHz) with PLL. The clock on the MCU will be 80 MHz,
the maximum frequency for dsPIC33, at which the computing power is 40 MIPS.
Timer2 is placed on the Output Compare 1 pin (OC1), and is used to generate the
master clock (MCLK) for the MCP3901. In addition, some initial values are set up for
the MCP3901 clock frequency. Timer5 is configured (but not active), and the interrupt
is disabled. The user can enable it for different applications. The SPI peripheral is
configured, but the interrupt is disabled. The SPI interrupt will be enabled in code to
establish the communication between MCU and MCP3901. The UART is used to send
and receive data from the PC at a speed of 115200 baud. Timer8 and Timer9 are
configured to create a 32-bit timer that runs at maximum speed. It is used to measure
the time needed to fill the data buffer, so it measures the sampling speed of the
MCP3901.
After the execution of the Initialization() function, the MCP3901 is configured
with values given by a set of functions especially developed for the MCP3901
configuration. In this case, this step is not necessary because the MCP3901 will update
its configuration using data from the PC GUI. These functions are helpful for users to
develop applications that do not involve a PC to configure the MCP3901.
For example, AddressLoop(NONE) is used to select the loop on specific registers
groups and types. DRHIZ(ON) will allow the data ready pulse to be present at the
output of the MCP3901 even if there is no pull-up resistor. SetGain(1,1) configures
the gain of both channels at 1. A list of all configuration functions are found in the
firmware file, main.c, starting at line 345.
It is important to have interrupts disabled during this configuration. Only after the
MCP3901 is configured using the functions described, can the interrupts be enabled.
In this case, it is done by decreasing the CPU priority to 3.
Reset and Initialization
Chapter 2. Firmware
MCP3901 ADC EVALUATION BOARD
FOR 16-BIT MCUs USER’S GUIDE
DS51845B-page 15
Related parts for MCP3901EV-MCU16
Image
Part Number
Description
Manufacturer
Datasheet
Request
R

Part Number:
Description:
Manufacturer:
Microchip Technology Inc.
Datasheet:
Part Number:
Description:
Manufacturer:
Microchip Technology Inc.
Datasheet:
Part Number:
Description:
Manufacturer:
Microchip Technology Inc.
Datasheet:
Part Number:
Description:
Manufacturer:
Microchip Technology Inc.
Datasheet:
Part Number:
Description:
Manufacturer:
Microchip Technology Inc.
Datasheet:
Part Number:
Description:
Manufacturer:
Microchip Technology Inc.
Datasheet:
Part Number:
Description:
Manufacturer:
Microchip Technology Inc.
Datasheet:
Part Number:
Description:
Manufacturer:
Microchip Technology Inc.
Datasheet: